Note: credit card fee is not the same as pre-auth increase. Pre-auth increase is a buffer (or a floating amount) that is added to the pre-authorization on the card via the payment gateway settings when the payment type is "pre-authorization", whereas, credit card fee is a fixed amount that can be added to the credit card transaction regardless of the payment type. You may or may not capture the pre-auth increase amount, but ideally you would always capture the credit card fee.
Use case: your webstore allows users to pay for the orders using their credit card, however you incur extra processing charges from the payment gateway or the merchant. In this scenario you have the option of passing on that extra processing charge to the end user.
Pre-requisite for configuration:
- An x3 invoicing element - for housing/storing the credit card fee on the order on Sage
- Field name and screen name for the invoicing element - for mapping the value from the webstore
- Tax code for credit card fee - to specify if the fee will be taxable or non-table
Conditions:
- Credit card fee option is only available on the following payment gateways at the moment;
- EXACT
- PAYPAL
- PAYPAL PAYFLOW PRO
- DPS PXPOST
- BRAINTREE
- Sage Payment Solution (Paya Sage 300)
- First Atlantic
- Pay360
- Stripe
- Versa Pay
- Credit card fee can only be configured as a % amount, and not a $ amount
- Order surcharge module (Admin>System>Modules>Orders Surcharge) cannot be used in conjunction with credit card fee because both options use the same surcharge line on the order for posting the value to x3
Configuration Part 1: webstore configuration
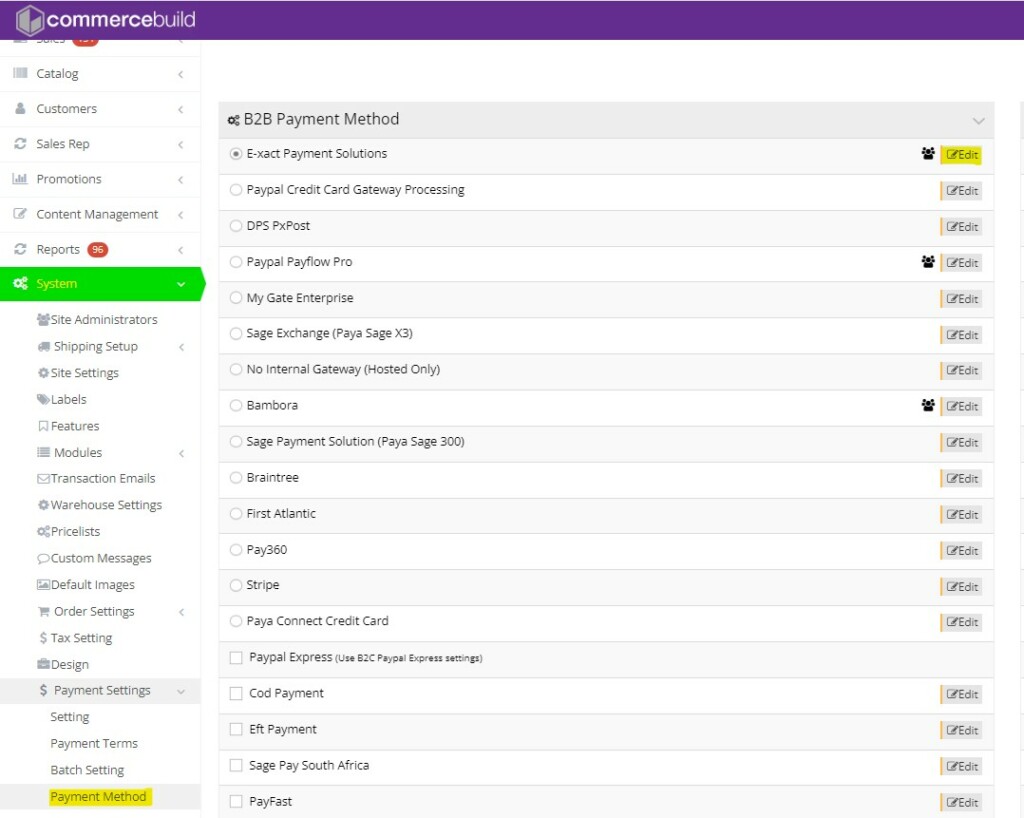
- Navigate to Admin>System>Payment Settings>Payment Method - on the webstore admin panel
- Click on edit next to the payment gateway that is being used on the webstore, edit the terminal (edit each terminal if multiple terminal are being used)
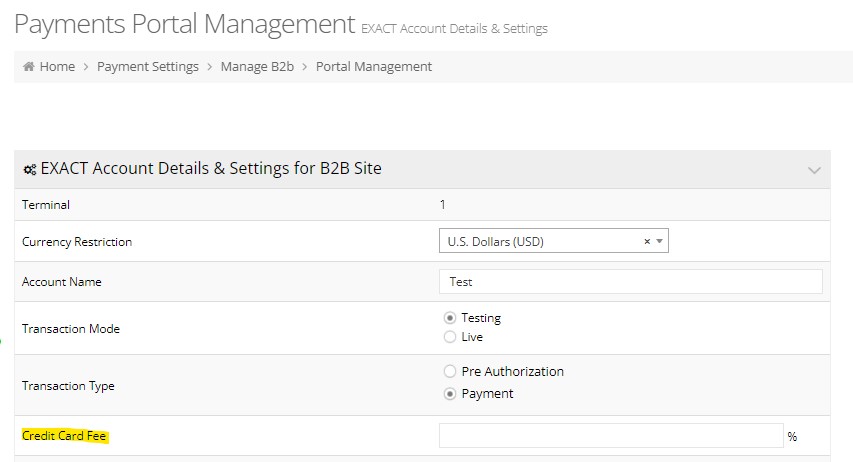
- Add a value in the field for Credit Card Fee, and click on apply

- Navigate to Admin>System>Payment Settings>Settings>X3 Credit Card Fee Type - select X3 Credit Card Fee on Invoicing Elements
- Select the appropriate invoice element and tax code under X3 Invoicing Elements, apply and save changes

- Navigate to Admin>System>Labels>Payment Page Labels - enable Credit Card Fee and enter a text value for the label (this the label that the users will see in front of the fee in the 5th step in check out)
Configuration Part 2: Symphony client configuration on the server
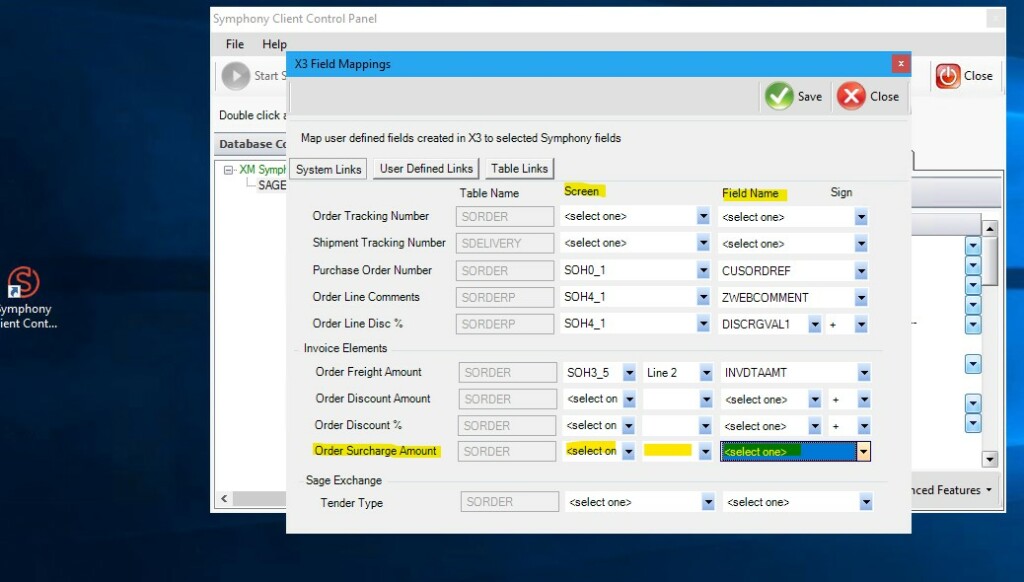
- Navigate to Sage X3 Defaults tab on Symphony client and click on Map Symphony Fields to X3 Screens
- Configure Order Surcharge Amount by selecting the screen (line if applicable) and field name for the invoicing element that will be used for housing/storing the credit card fee on the order, and click on Save to apply changes

-
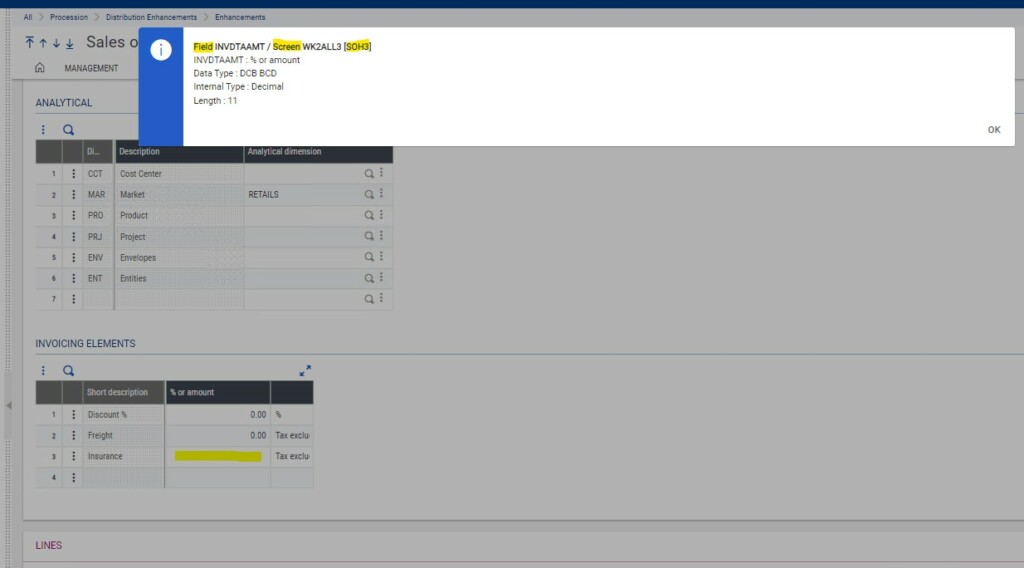
- Note: there are a few different ways to find out the screen, line and field name for mapping, and one of the easiest ways is to open and order in x3>navigate to invoicing elements>click in the field next to short description for the invoicing element that is going to be used - press Esc and F6 together on your keyboard (on windows machine)

- Post an order with credit card payment on the webstore and test your results in Sage

