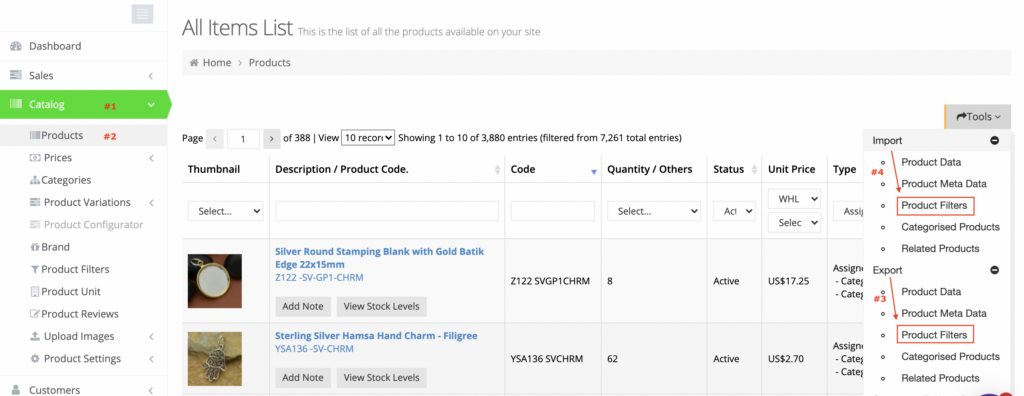
Once you have set up filters in your web store, you are now ready to begin assigning filters to products. To start, navigate to Catalog > Products.
Edit Product
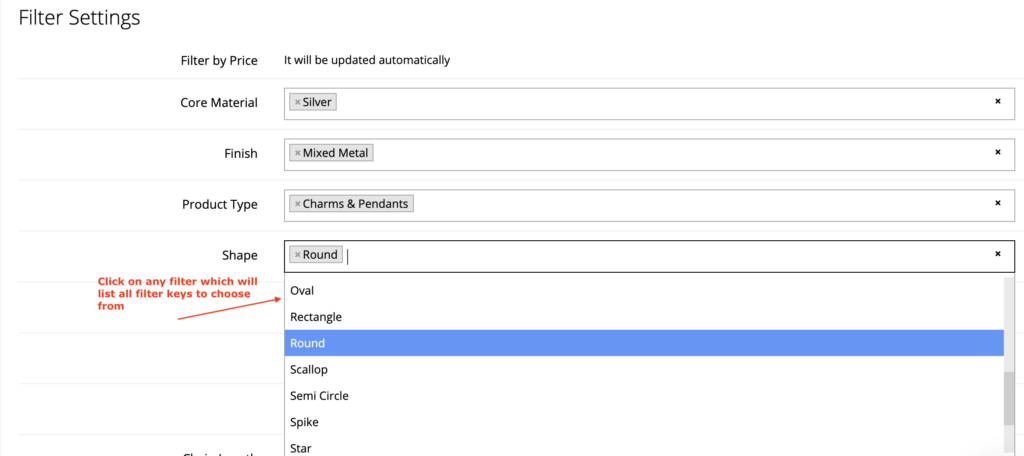
On the General tab, scroll down to locate the Filters Settings section. It shows all the custom filters that you have set up. Clicking on any of them will show a complete list of keys to select a value.

Fill in values for the relevant filter and click Save. It will ensure the product will show on the front-end when those filters are selected.
Excel Import/Export
For bulk assignment of product filters, you can leverage the export/import feature.
On Catalog > Products, click Tools and choose Product Filters under Export.

After making changes, import the file back into the system by selecting Product Filters under Import.
It is recommended to create filters by following the above-mentioned steps so when you export the file, you are aware of which column in the excel sheets holds what data.
For assigning filters to category pages, see our tutorial on How To Add Filters To Category Pages.

