
Configurator products allow a web store user to add different ERP products to a cart using only one product in the store. Configurator products are different from variants in the sense that there are multiple products added, not just one product, as is the case with a variant product.
In this article, we’ll show you how you can set up a configurator product and configure it using the array of settings available.
- Quickstart
- How to Create a Configurator Product
- How to Modify the Configurator Product Settings
- How to Add a Variant Product to a Configurator Product
- How to Add A Line Item Comment to the Configurator Product
- How to Allow or Disallow Certain Options in Dropdown Menus using the Decision Tree
Quickstart: Creating a Configurator Product and Modifying the Settings
See below for video instructions
To start exploring your options quickly, take the following steps:
- Login to your web store
- Go to Catalog > Product Configurator > Configurator Products and click New Configurator (or append
/admin/mproducts_configurator/detailsto your web store domain) - Input the Description and the Item Code
TESTING124 - Download this Excel file. In column A in the highlighted cells (yellow), add ERP item codes. For testing purposes, these can be any ERP item codes that are active in your catalog.
- Go to Catalog > Product Configurator > Configurator Products > Settings, and import your modified Excel file under the Export/Import section (or append
/admin/mproducts_configurator/settingsto your web store domain) - Assign
TESTING124to a category - Navigate to the product and observe the basic configuration:
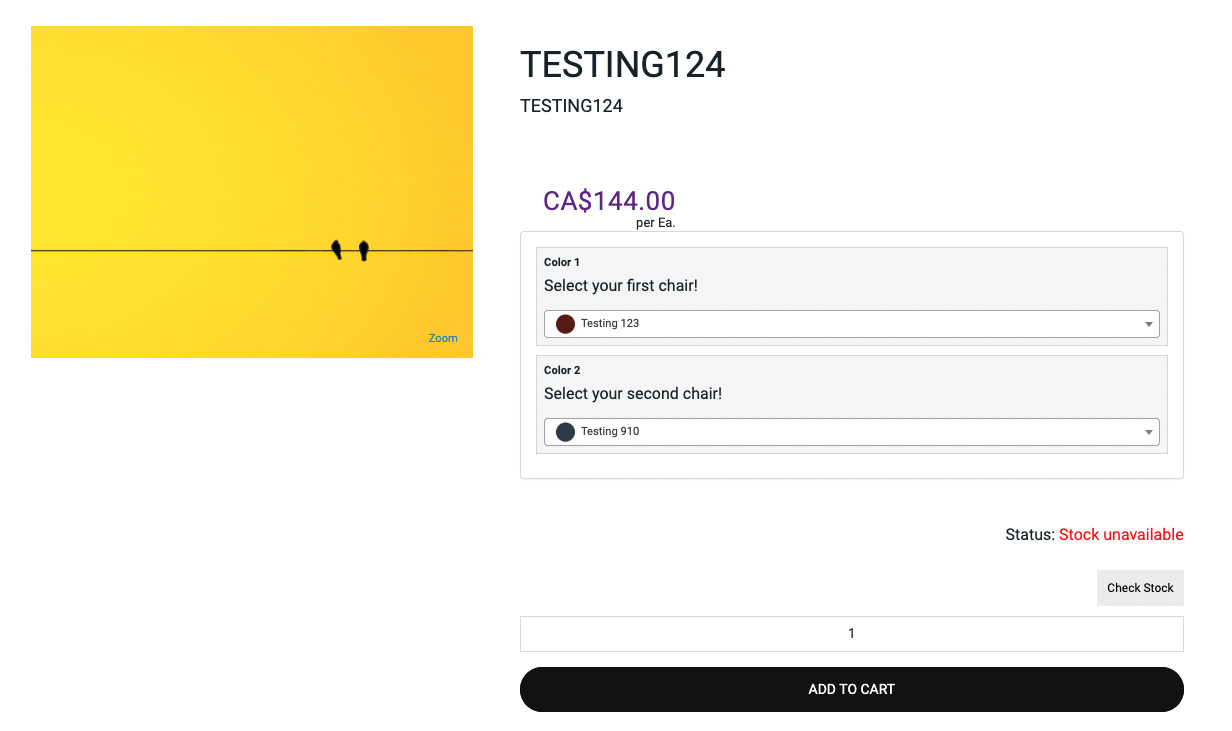
How to Create a Configurator Product
[videopress dxh7bhO2]In the video above, we cover steps 1, 2 and 3 from the Quickstart instructions.
How to Modify the Configurator Product Settings
[videopress lRyb36wv]In the video above, we cover steps 4, 5, 6 and 7 from the Quickstart instructions. From Step #4, we cover this information from the spreadsheet:
item_code– This field corresponds to the ERP item code, which is used to match up the price and the user selection with item codes in the ERP. This cannot be longer than 24 characters.desc– The description is how the selection should be presented in the configurator options in the product detail.swatch_name– The swatch name corresponds to the swatch codes created in Catalog > Product Configurator > Configurator Options (or append/admin/mproducts_configurator/optionsto your web store domain)is_product– Generally speaking, all values listed here would be considered a product.configurator_code– This is the Configurator product code to which each row corresponds.configurator_set– This is the set/section which houses all of the options.default product– This is the price itemno. Only one product should be considered the default price. This item is used to inform the initial price of the item before any option is selected.section_grouping– These are the different sections within the configurator options.section_desc– This is an additional description/header, which appears after thedescvalue.section_type– This is the type of element used. Options includedropdown,textline,textarea,radio, andcheckbox.section_default– In our case (using dropdowns), we use this section to select a default option.is_orderable– In our case (using dropdowns), we use this section to prevent ourNONEproducts from being orderable. These entries allow us to set thesection_default.quantity_multiplier– This is the quantity of each item that should be in the cart if 1 unit of the configurator product is ordered. Despite what our guidance in the admin panel says, this value must be numeric. It cannot be “no”.discount_percent– This is the percentage at which the price for the customer should be discounted. This allows you to offer a discount on an item as a part of a configurator product, whereas you may charge full price for the item purchased independently. It also allows you to set a single price (using thedefault productprice only). In our example, we set all products except thedefault productto give a 100% discount.hide_price– This setting allows you to hide the price on the front-end.
How to Add a Variant Product to a Configurator Product
[videopress 0eZLpL05]How to Add A Line Item Comment to the Configurator Product
[videopress ZVxCzE3v]How to Allow or Disallow Certain Options in Dropdown Menus using the Decision Tree
[videopress FSmWzlQm]In the video above, we cover the decision_tree and allow/disallow columns. The decision tree allows you to pre-specify which secondary options can be chosen based on a previous selection. This is useful if you wish to establish some level of control over which items can be paired with others in a configurator product.
The video shows how you can only allow one specific item to be purchased based on a previous selection.
However, you can also do the inverse, which would be to disallow the listed product from being ordered if a previous product is selected.
Additionally, you can set multiple values in the decision_tree column, separated by commas. So, rather than restricting a certain selection of items to one based on a previous selection, you can allow or disallow a number of items based on the previous selection.
If you’d like to download our final testing configurator sheet, please click here.