Role management in WooCommerce is extremely flexible when using the custom commercebuild functionality. In this article, we will walk you through how roles can best be used to manage users in your online e-commerce store.
What are roles?
User roles in WordPress define the set of permissions and capabilities assigned to each user on the site. These roles determine what actions a user can and cannot perform, such as creating or editing content, managing plugins, or handling e-commerce functions. By assigning different roles, site administrators can control access levels and ensure that users have the appropriate permissions to fulfill their tasks without compromising the site's security and functionality. Each role is designed to match specific responsibilities, from basic profile management to full site administration, facilitating a structured and secure workflow.
Below are the default roles that are available to WordPress/WooCommerce sites:
Administrator
- Permissions: Full access to all site settings, content, and user management. Can install and delete plugins and themes, manage other users, and change settings.
Editor
- Permissions: Can manage and publish their own posts and the posts of others. Can moderate comments, manage categories, and upload files.
Author
- Permissions: Can create, edit, and publish their own posts. Can upload files but cannot edit or delete posts created by other users.
Contributor
- Permissions: Can write and edit their own posts but cannot publish them. Posts must be reviewed and published by an Administrator or Editor. Cannot upload files.
Subscriber
- Permissions: Can manage their own profile and leave comments on posts. Typically used for users who need to log in to view or comment on content but do not need to create content.
Customer
- Permissions: Can view and manage their own orders and profile details. Customers have read access only, which is equivalent to the Subscriber role in WordPress. They cannot create or edit posts.
Shop Manager
- Permissions: Has the capabilities of both a Customer and an Editor, with added permissions to manage all WooCommerce settings and orders. They can create, edit, and manage products, view reports, and access all WooCommerce settings.
These roles come built-in with WordPress and WooCommerce by default, and are available to be assigned to users. You can modify an existing user’s role by navigating to “Users” in your WordPress admin (/wp-admin/users.php) and then by editing the user in question.
From their profile page, you will find a “Role” select box, allowing you to modify their assigned role.
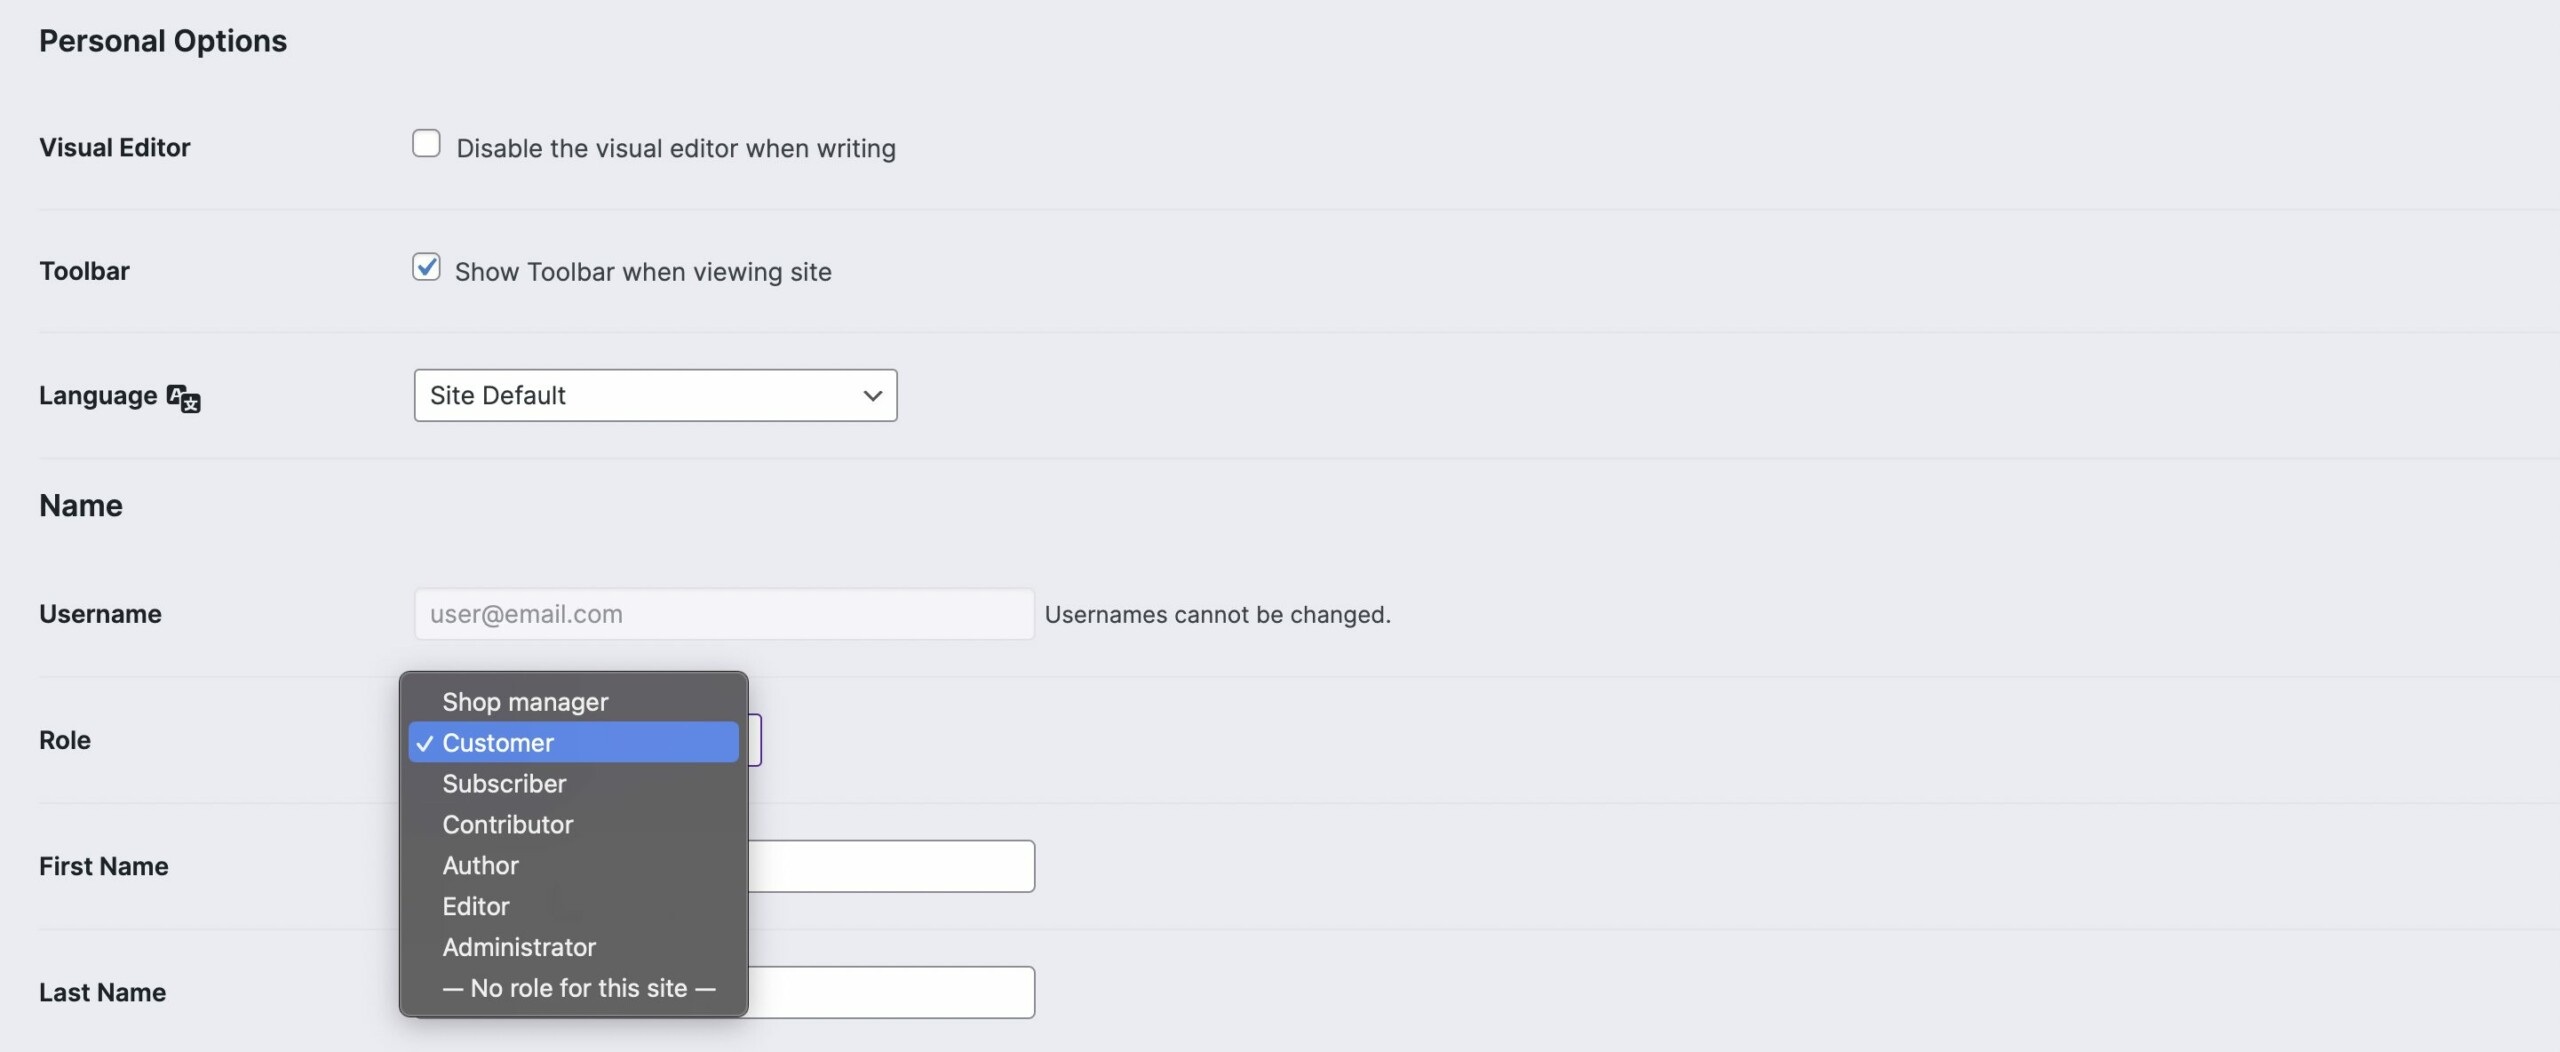
Creating new roles
You are not restricted to only the default user roles, however. You can also create your own custom roles, each with their own particular set of permissions. These roles could also be thought of as groups that you are assigning your customers to.
To create a new role, navigate to the WordPress admin → commercebuild → Roles Management (/wp-admin/admin.php?page=cfw_config_role_management).
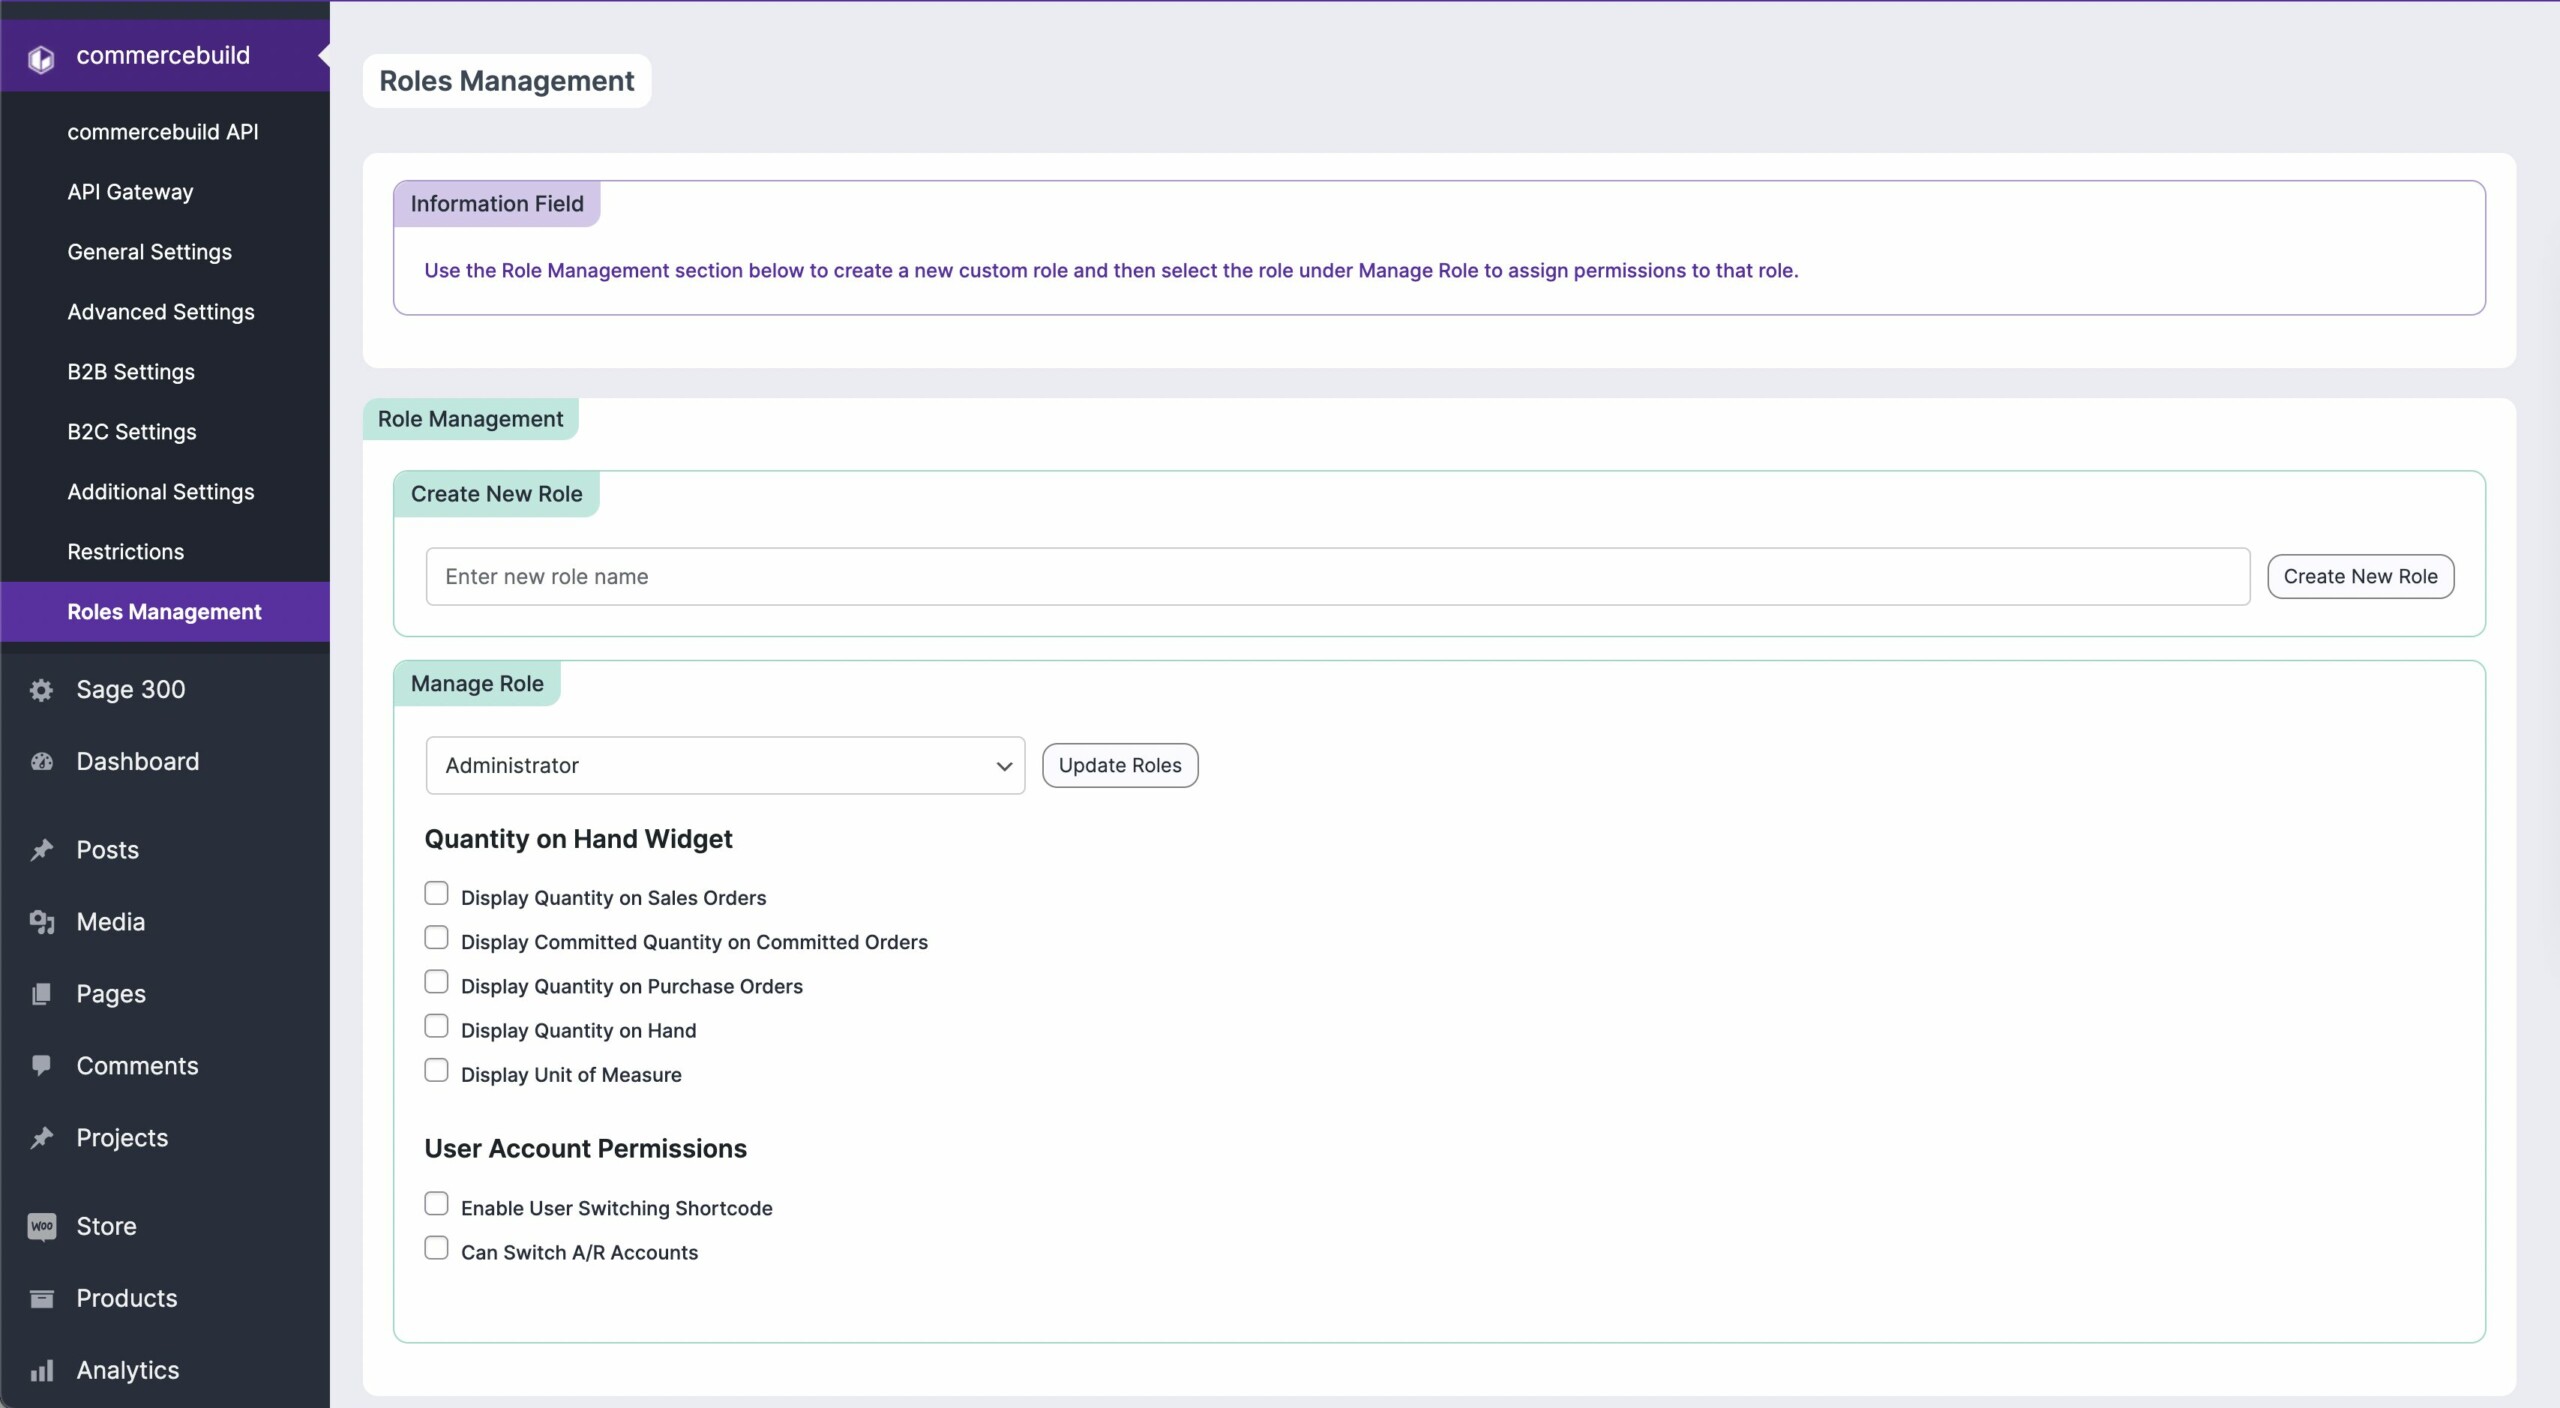
You will first need to enter a custom name into the “Create New Rule” input field, and then press the “Create New Role” button.
Now from the “Manage Role” section of the page, you can select your new role.
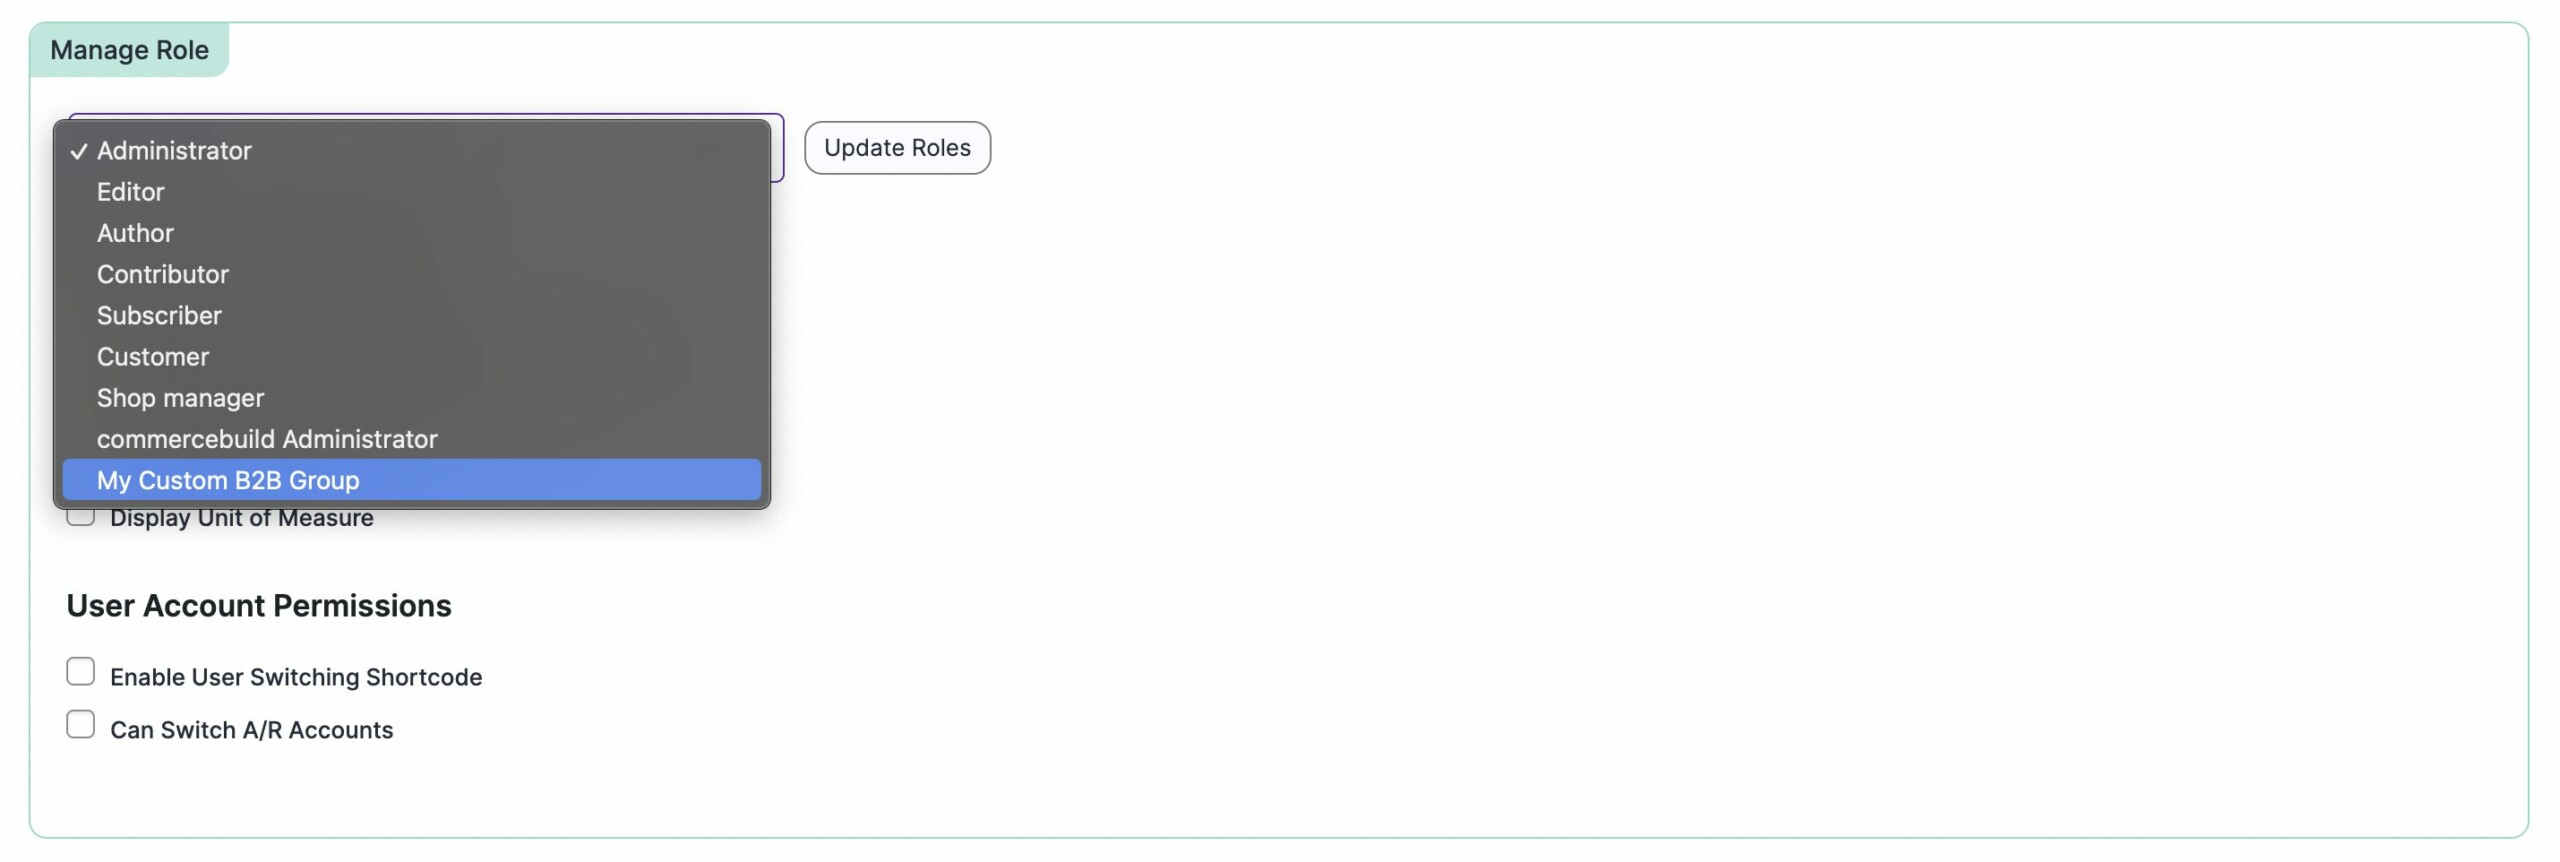
Adjust the permissions for this group to your needs, and then press the “Update Roles” button.
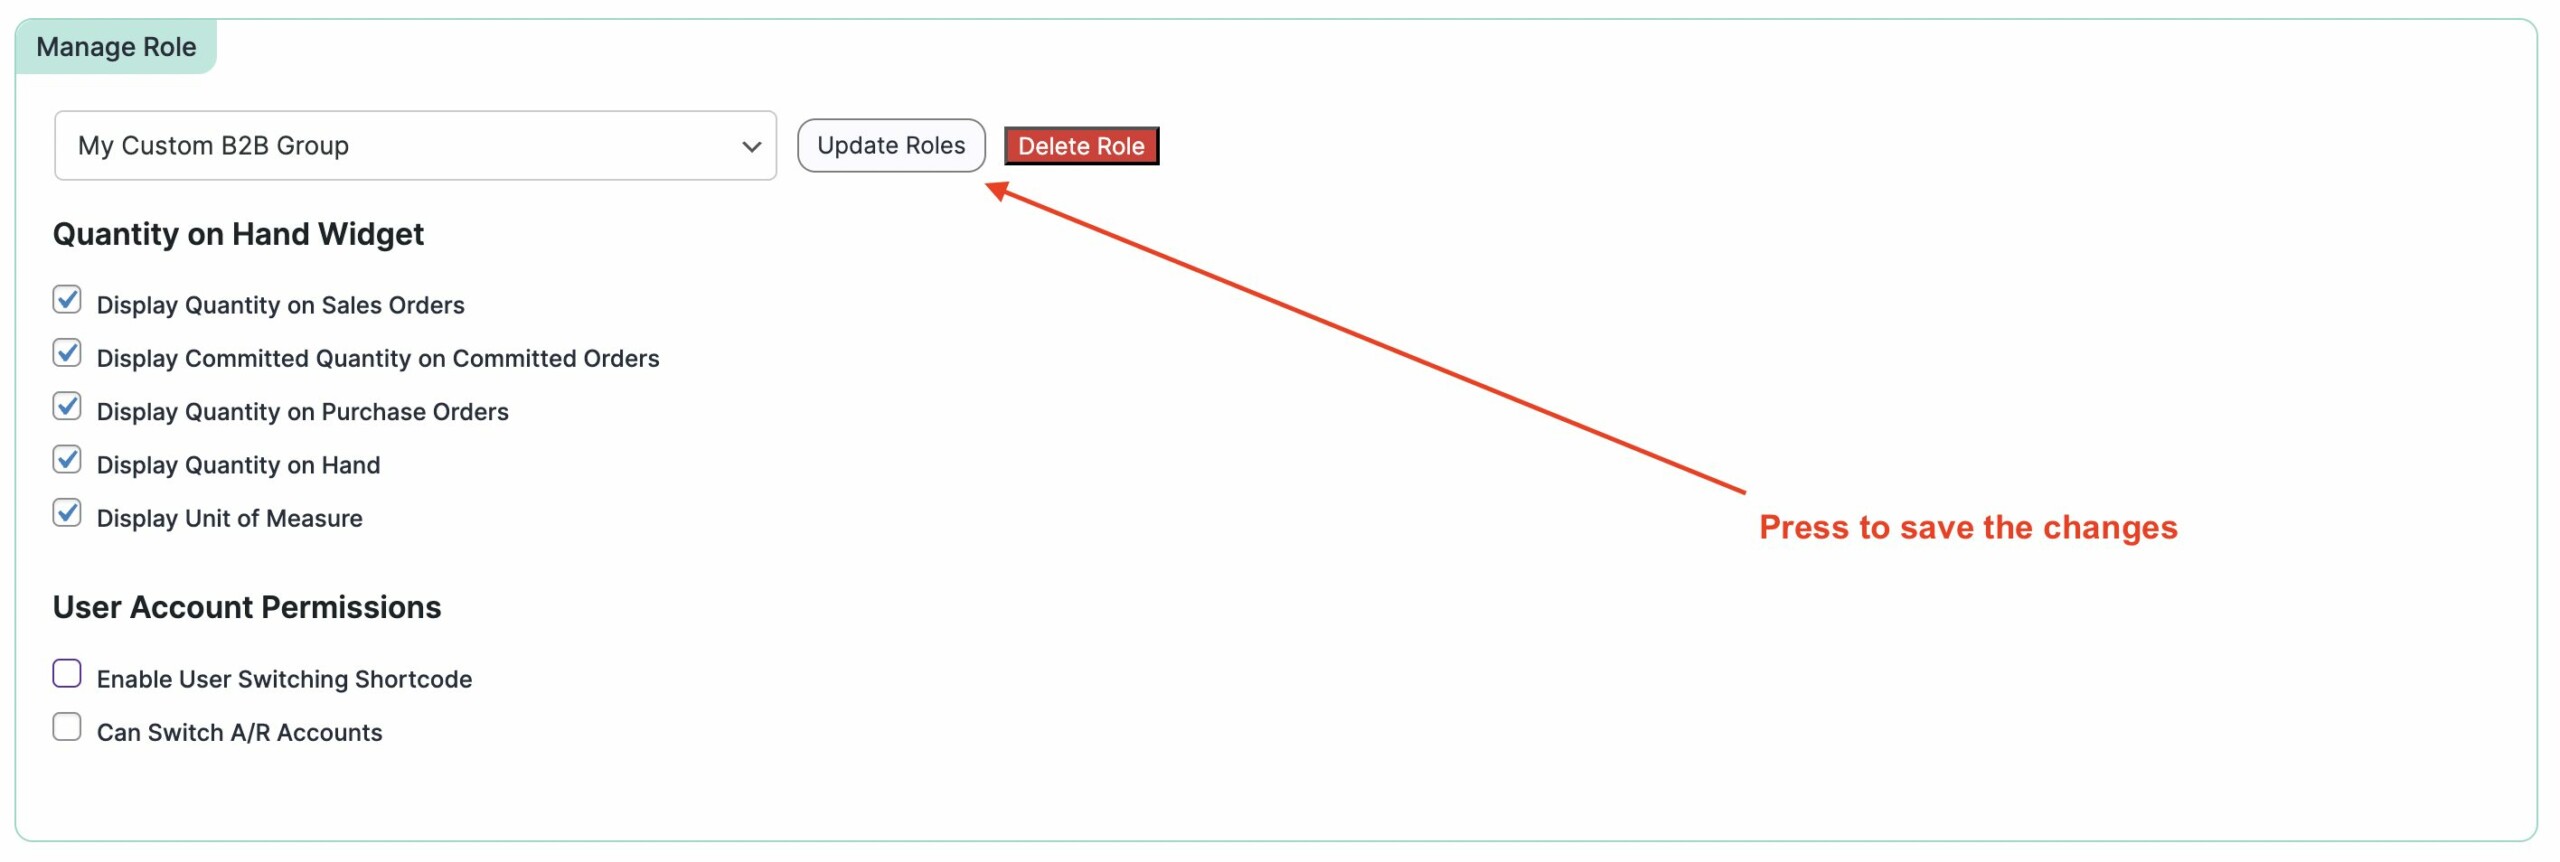
As you can see from the screenshot, you also have the ability to delete custom roles from the interface as well, if needed in the future.
Restricting access to products/pages based on role
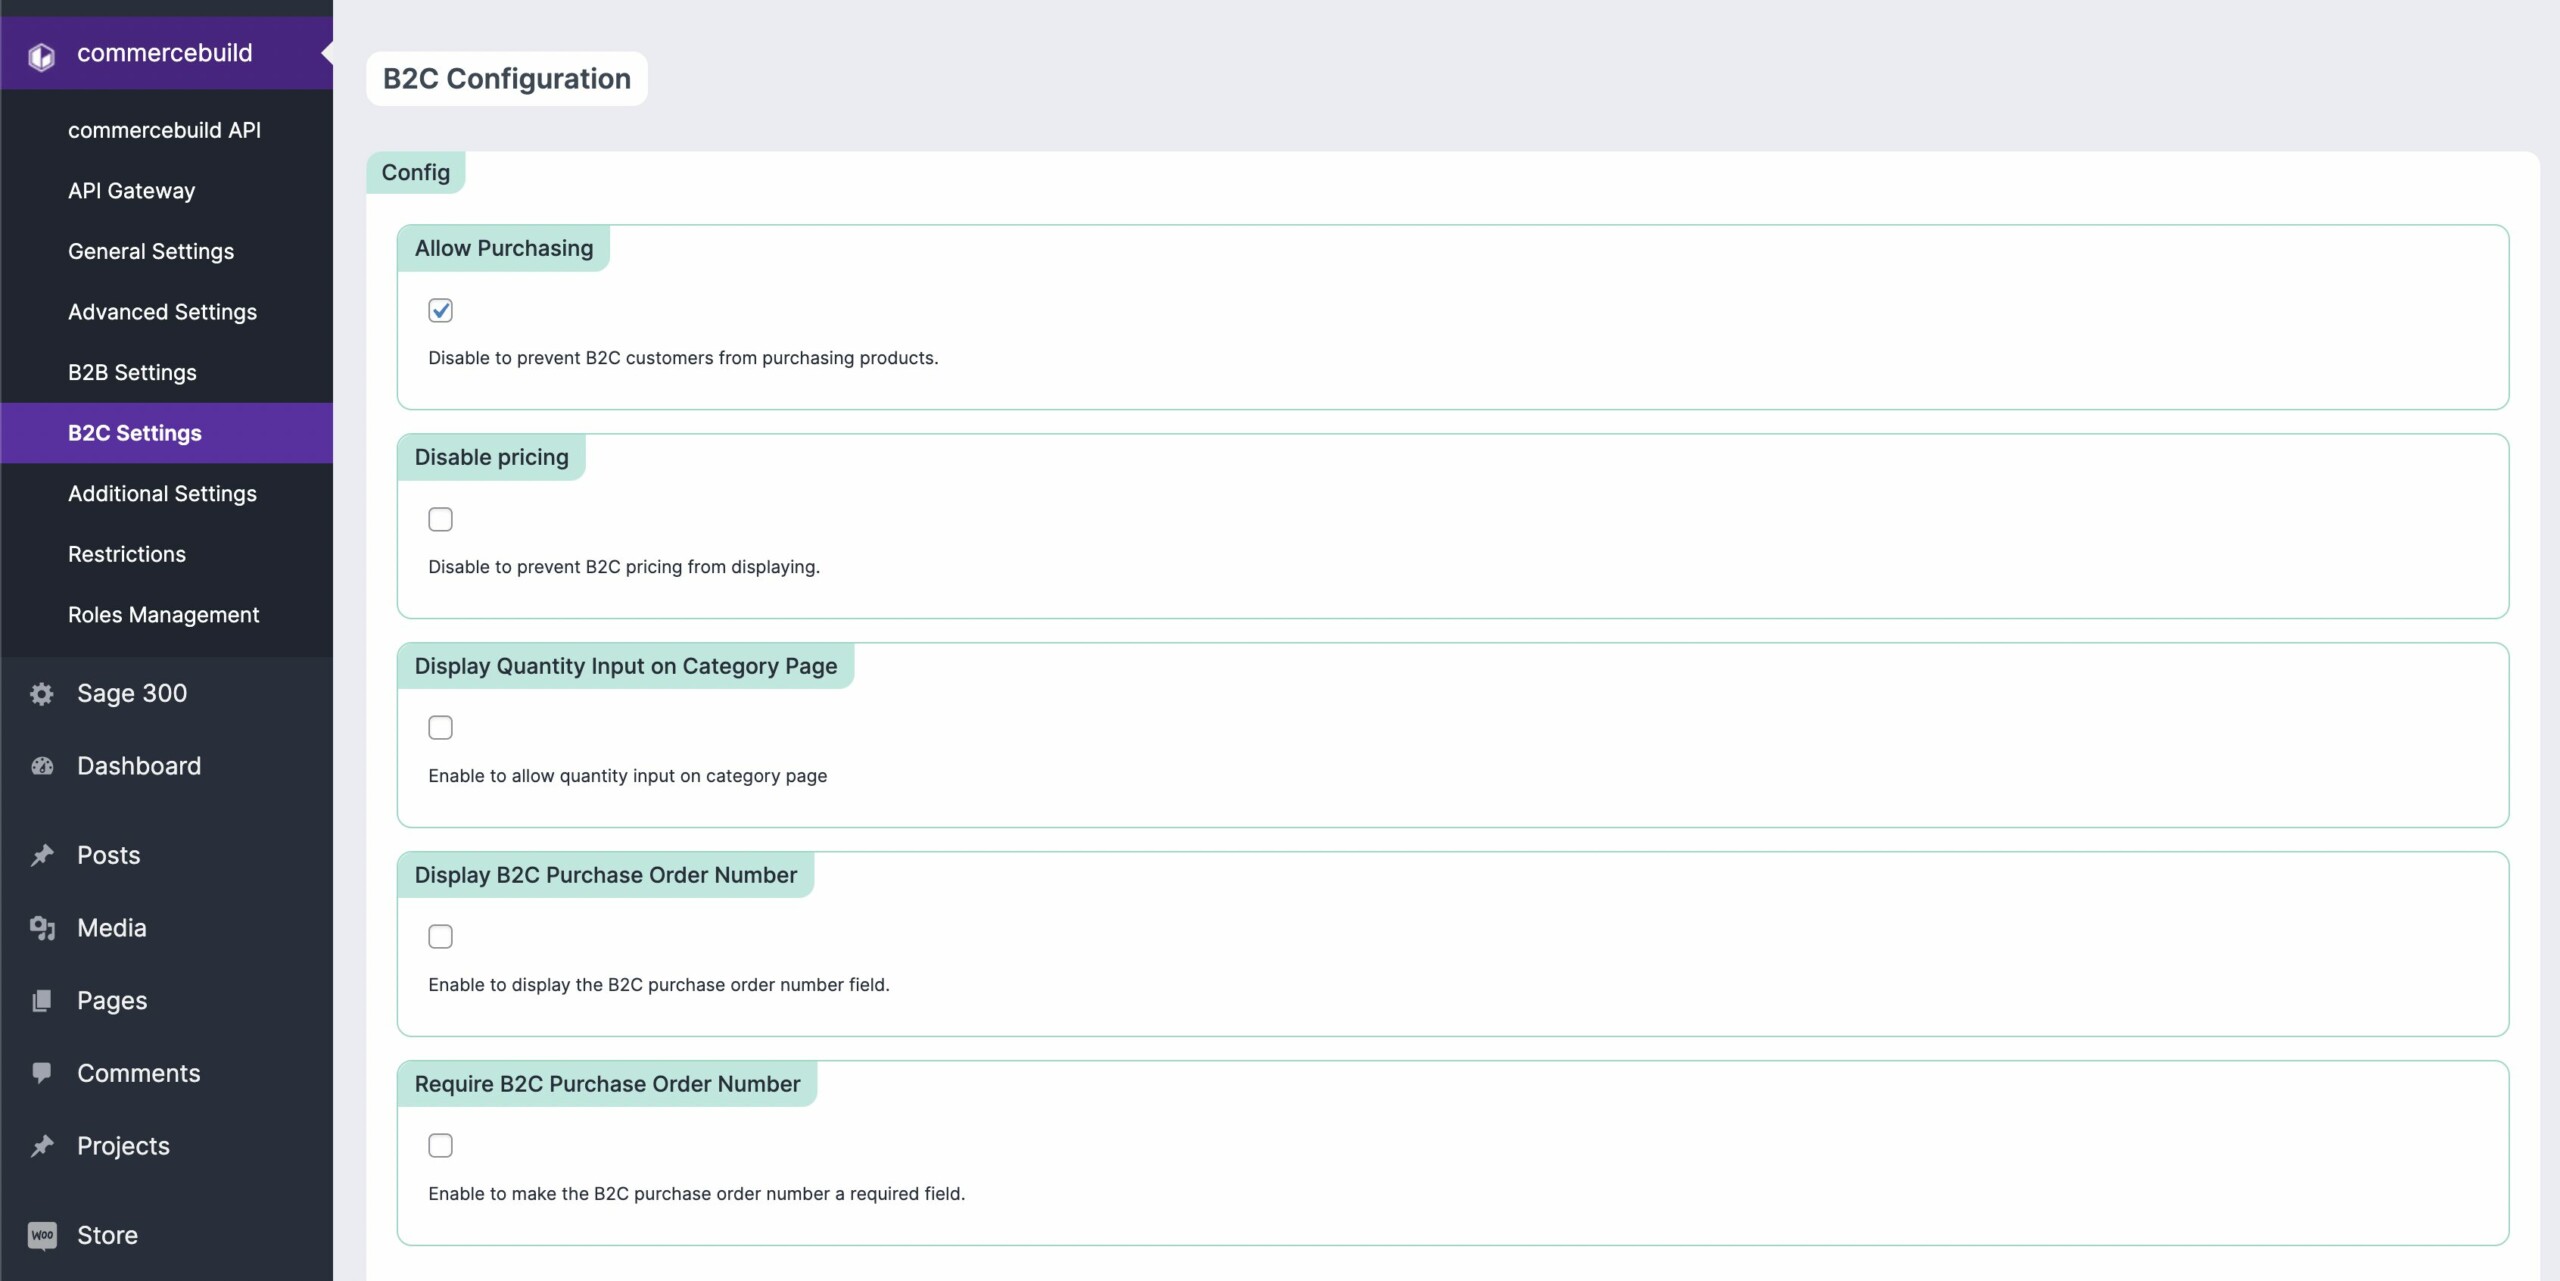
There are broad settings for B2B and B2C users, in which the ability to view pricing or place orders can be controlled for both types of user groups. Those settings can be found under “commercebuild → B2B Settings” and “commercebuild → B2C Settings”.
You can also restrict access to individual products based on single A/R customer IDs. You would do that by editing the product, and then entering the A/R customers allowed to access it:

The ability to restrict access to products and categories of products is not yet a built-in feature of the commercebuild WooCommerce web stores, but it is a feature in development and should be available in the near future. We will update this article with the details of that functionality when it is released.

