Overview
Managing groups and group users in WooCommerce makes it easy to control what different users can See and do on your site. Whether you want to give certain customers special access, limit specific features, or organize users into clean permission-based buckets, groups help you keep everything structured without stress.
With the Group Management tools inside your WordPress Admin, you can create new groups, adjust their permissions, assign users to one or more groups, and even bulk-import everything when you’re handling bigger updates. The whole idea is to give you full control over user access while keeping the workflow smooth and manageable.
How to Manage Groups and Assignments
This guide walks you through each part, creating groups, editing permissions, assigning users, and importing group data, so you can manage everything confidently and keep your store running the way you want. Let's get started by Creating Groups.
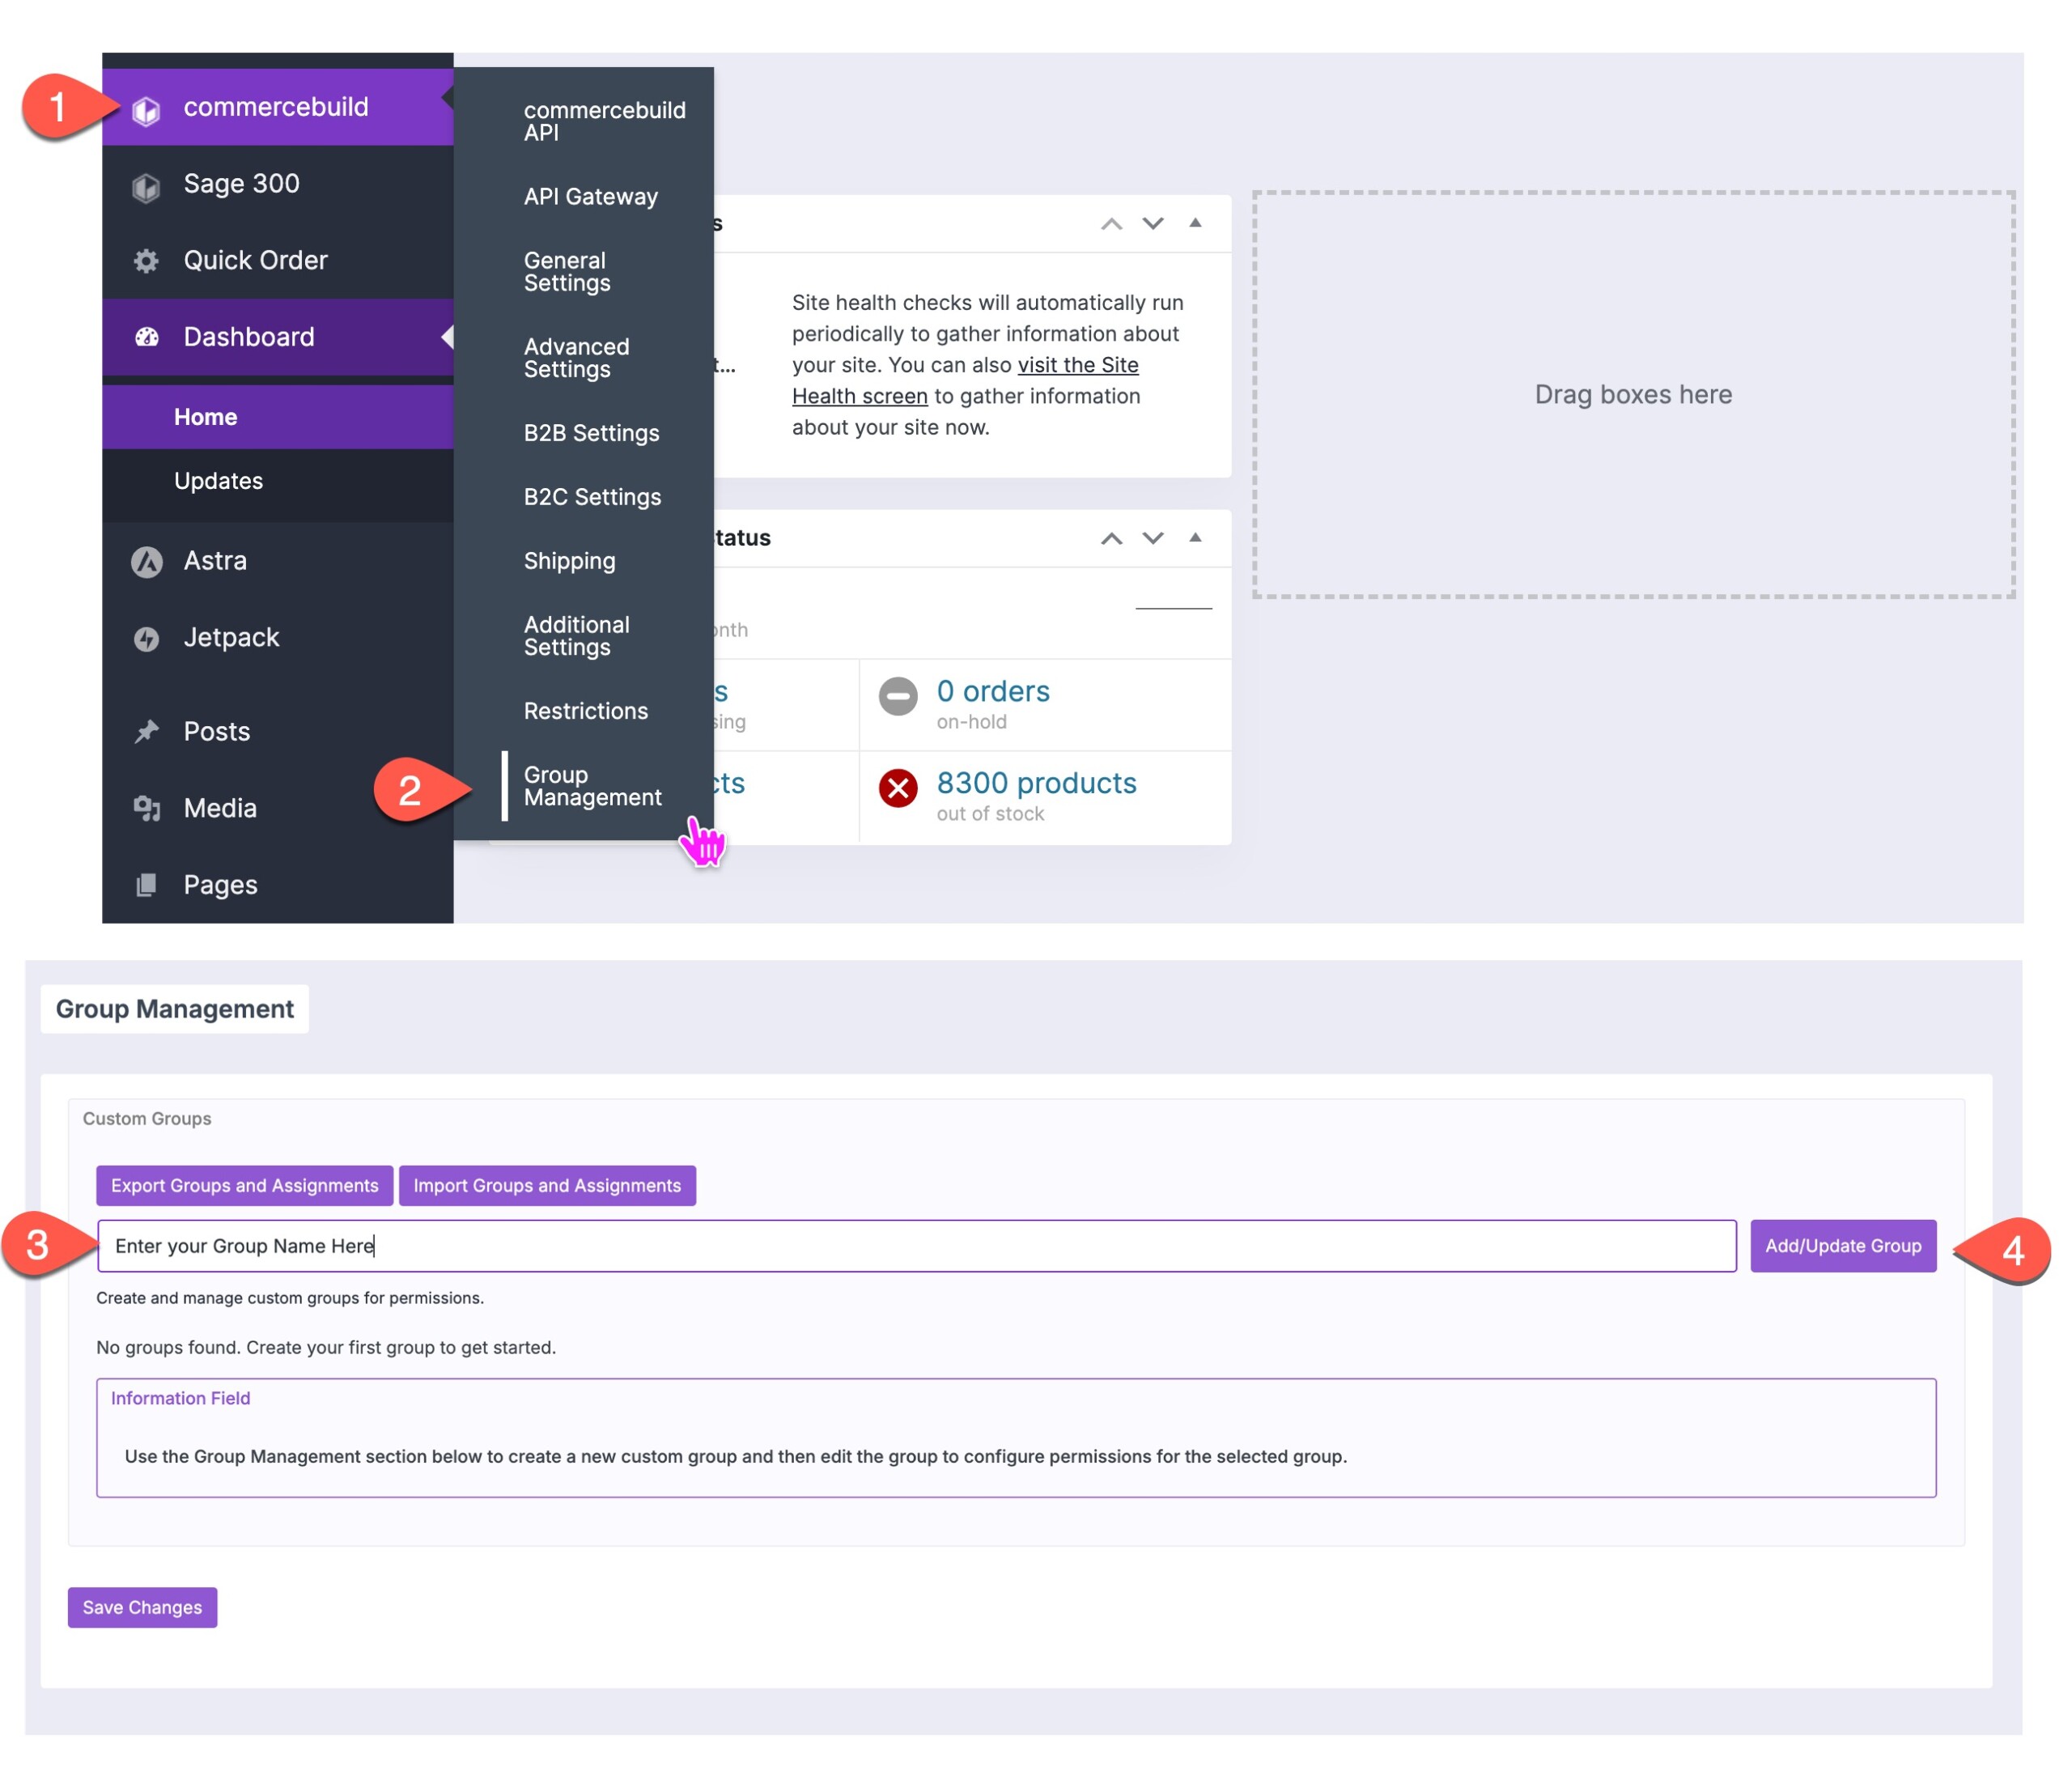
Creating Groups
- Go to WP Admin > commercebuild > Group Management.
- Enter a group name in the "Add/Update Group" field.
- Click Add/Update Group.
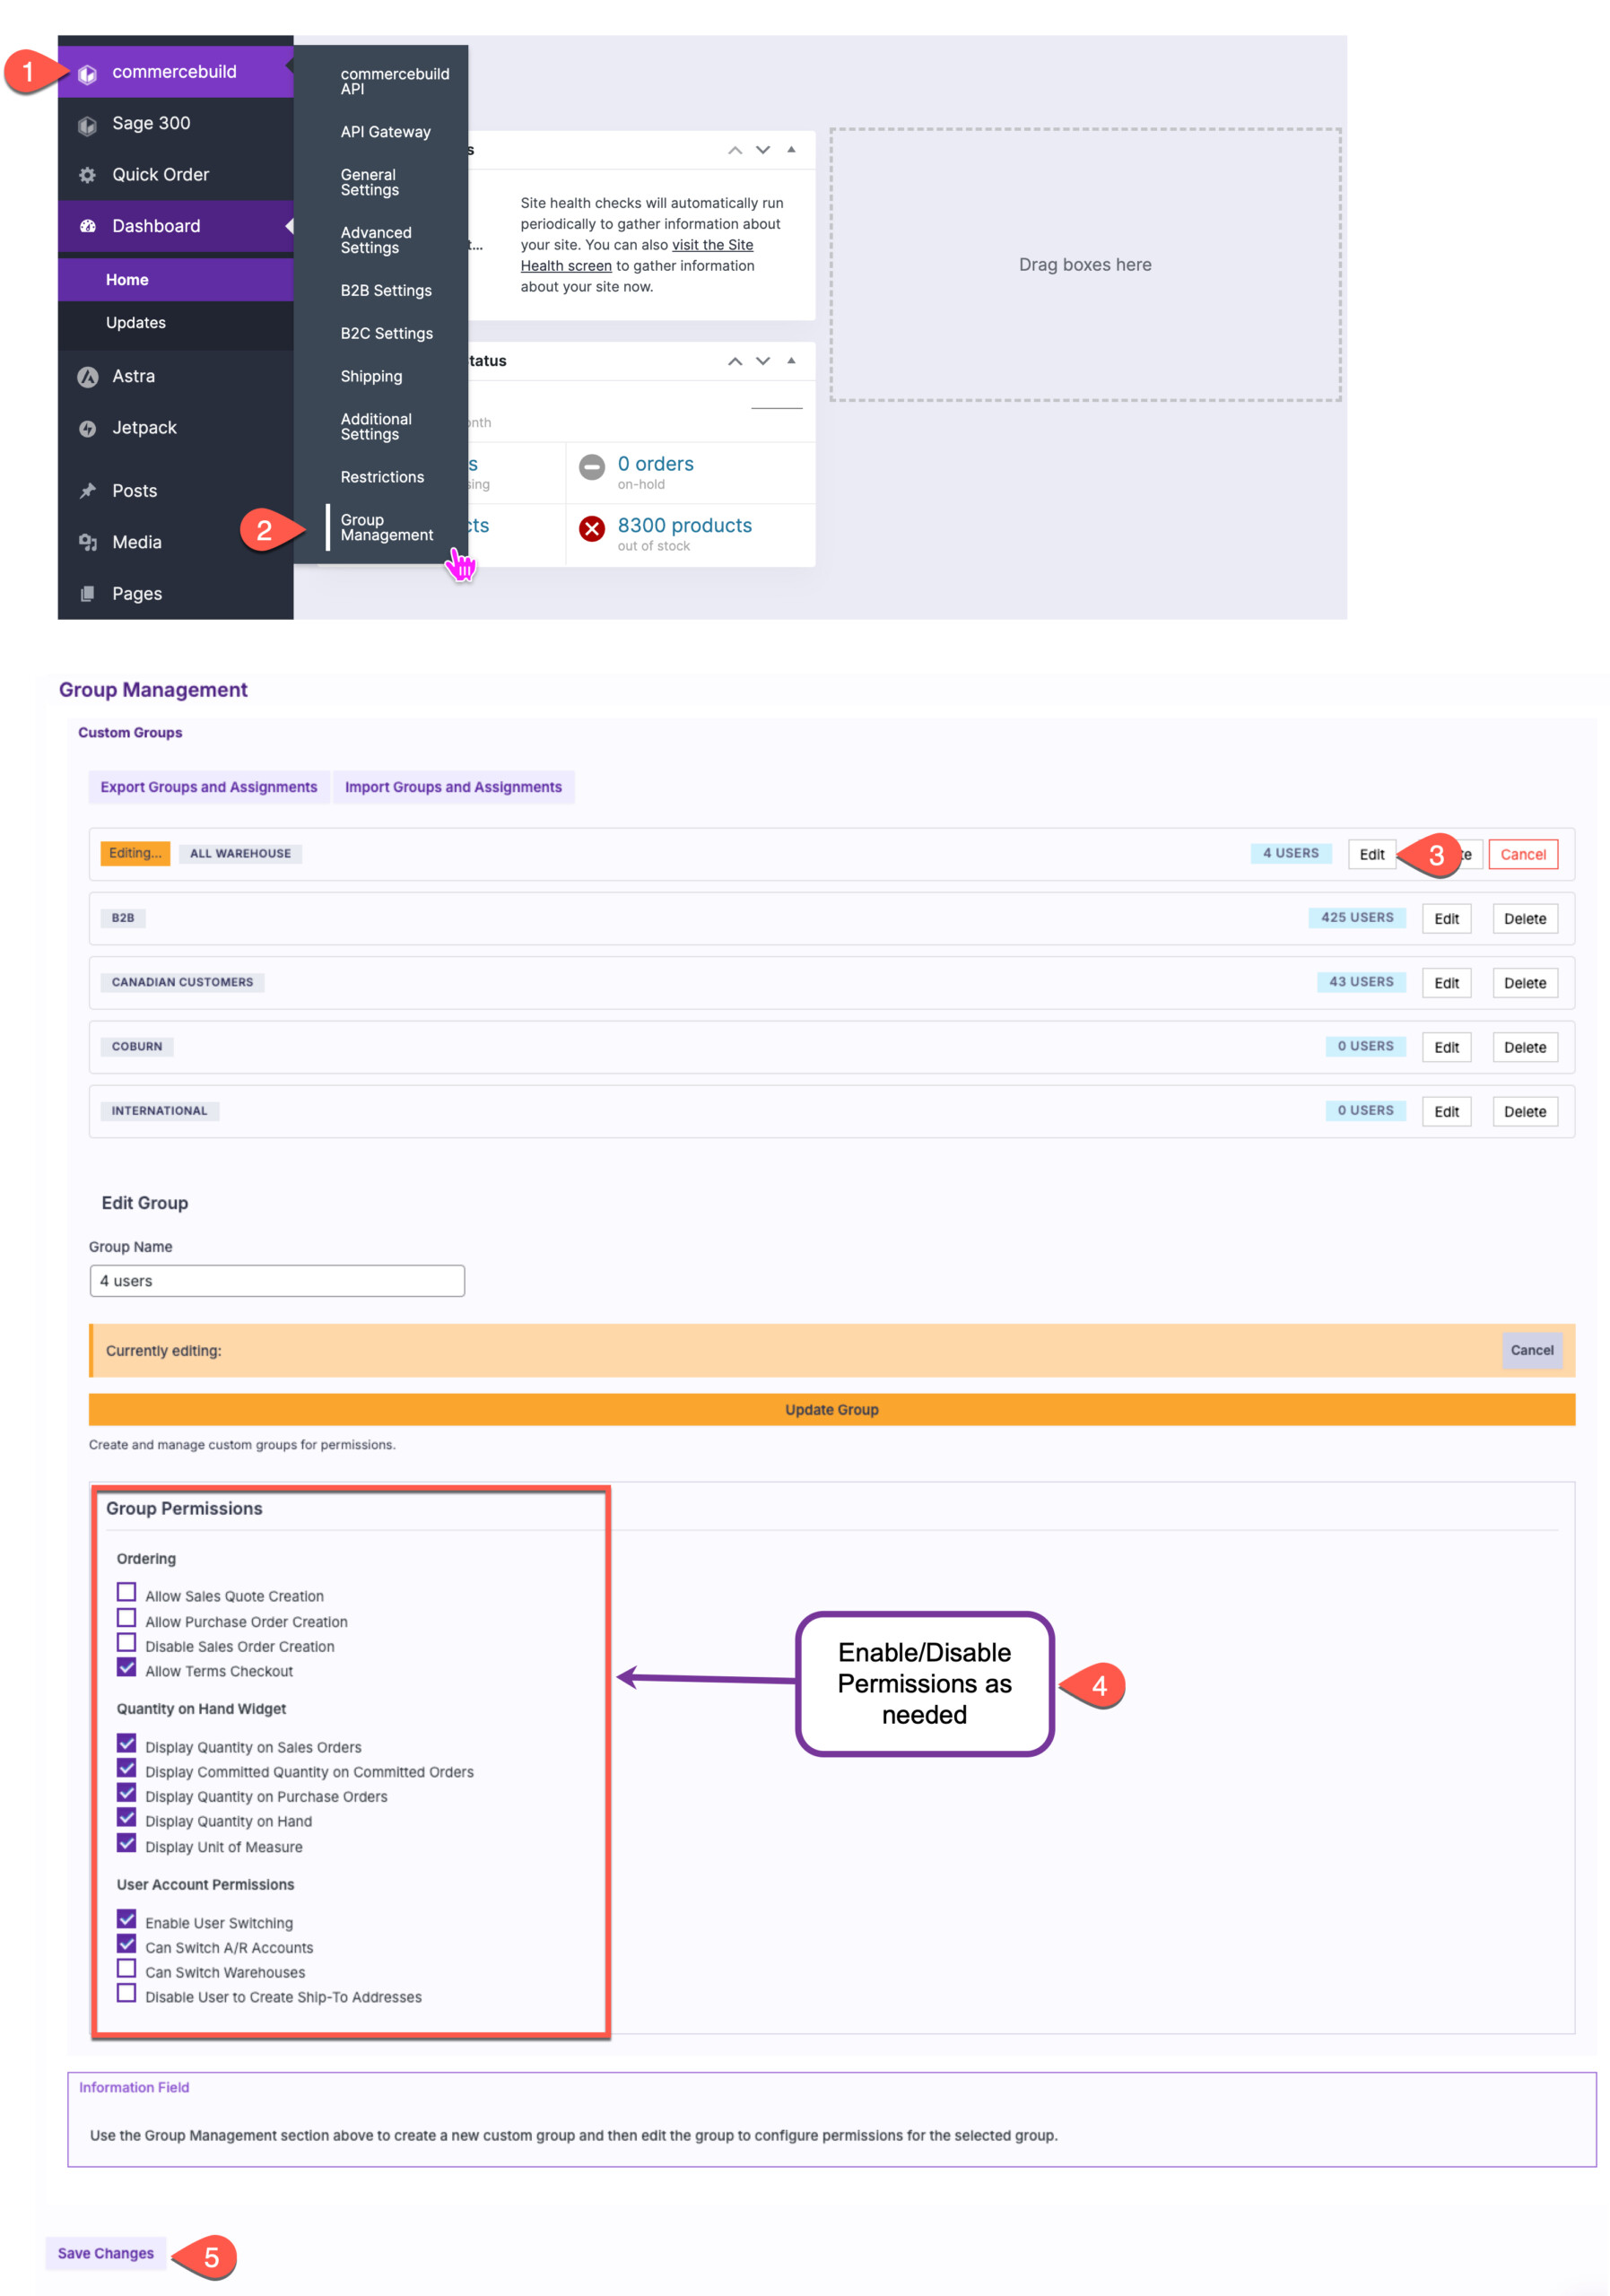
Edit / Manage Group Permissions
- Go to WP Admin > commercebuild > Group Management.
- Find the new group in the list and click Edit to enable or disable features > Save Changes
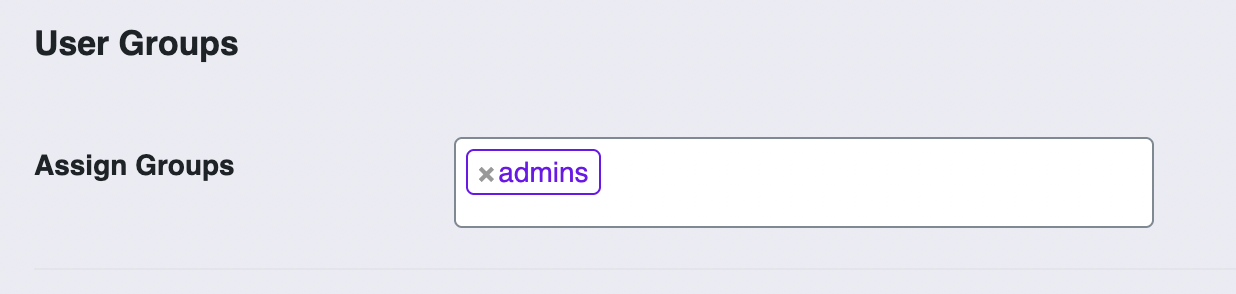
Assigning Groups to Users
- Go to Users > All Users
- Click Edit on the user you plan to manage groups for
- In the User Groups section, select the group(s) to assign in the "Assign Groups" field.
- Scroll down and click on Update User to save the changes.
Importing Groups and Assignments
You can bulk manage groups, group permissions, and user assignments by importing files. Here’s how:
1. Export Existing Data
Click Export Groups and Assignments to download three CSV files:
groups.csvgroup_permissions.csvuser_assignments.csv
2. Edit the Files
Use the following structure to make your changes:
Groups (
- Add group names in the
namecolumn, one per line.
Group Permissions (
- Add group names (from the
groups.csvfile) in thegroup_namecolumn. - Add the corresponding permission ID in the
permission_idcolumn.- Find permission IDs in the
cfw-group-permissions.jsonfile.
- Find permission IDs in the
User Assignments (
- Enter the user’s email in the
user_emailcolumn to assign a group to a specific user. - Enter a customer code in the
customer_codecolumn to assign a group to all users under that code. - Add the group name in the
group_namecolumn.- Leave the
group_nameblank to remove a user or customer group assignment.
- Leave the
3. Import the Files
- Click Import Groups and Assignments.
- Upload the files in this order:
groups.csvgroup_permissions.csvuser_assignments.csv
Note: If you’re only updating user assignments or permissions, you don’t need to re-import the groups.csv file unless new groups have been added.
By following these steps, you can efficiently manage groups and permissions for your users!