Before you begin adding a new user to your webstore, you will first need to decide whether the user will be a B2C user or a B2B user. The difference between the two can be reviewed in this article »
Jump to a section:
- Create a new B2C user
- Create a new B2B user
- Create a new administrator user
- Remove a user
- Import users in bulk
- Remove users in bulk
Create a new B2C user
- Log into your store and navigate to Customers → Manage Customers (/admin/musers/)
- Press the "New Public User" button
- Fill out all of the required fields and then press "Apply"
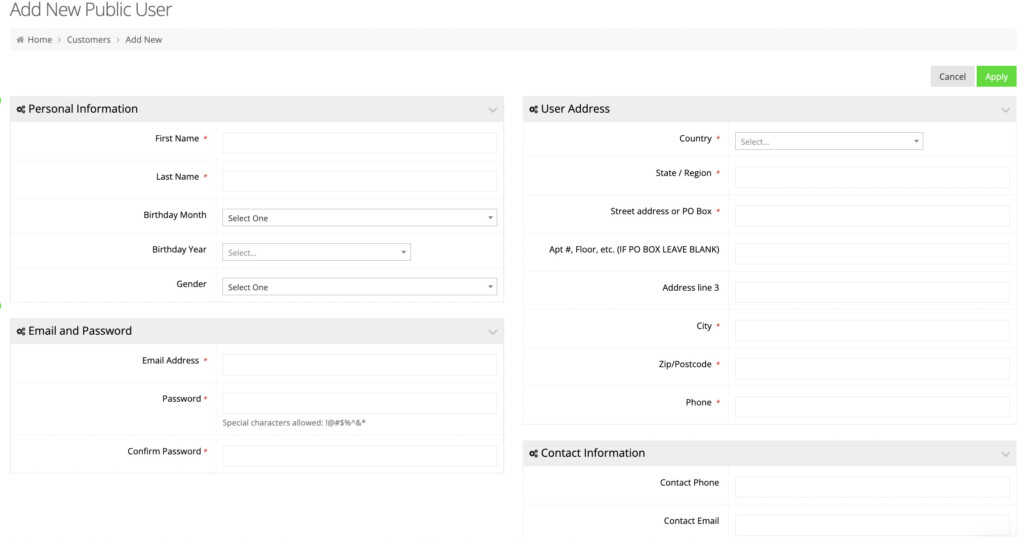
- Your new user will be created, assigned to the group "Public Users (Registered Users/B2C)"

Create a new B2B user
- Log into your store and navigate to Customers → Manage Customers (/admin/musers/)
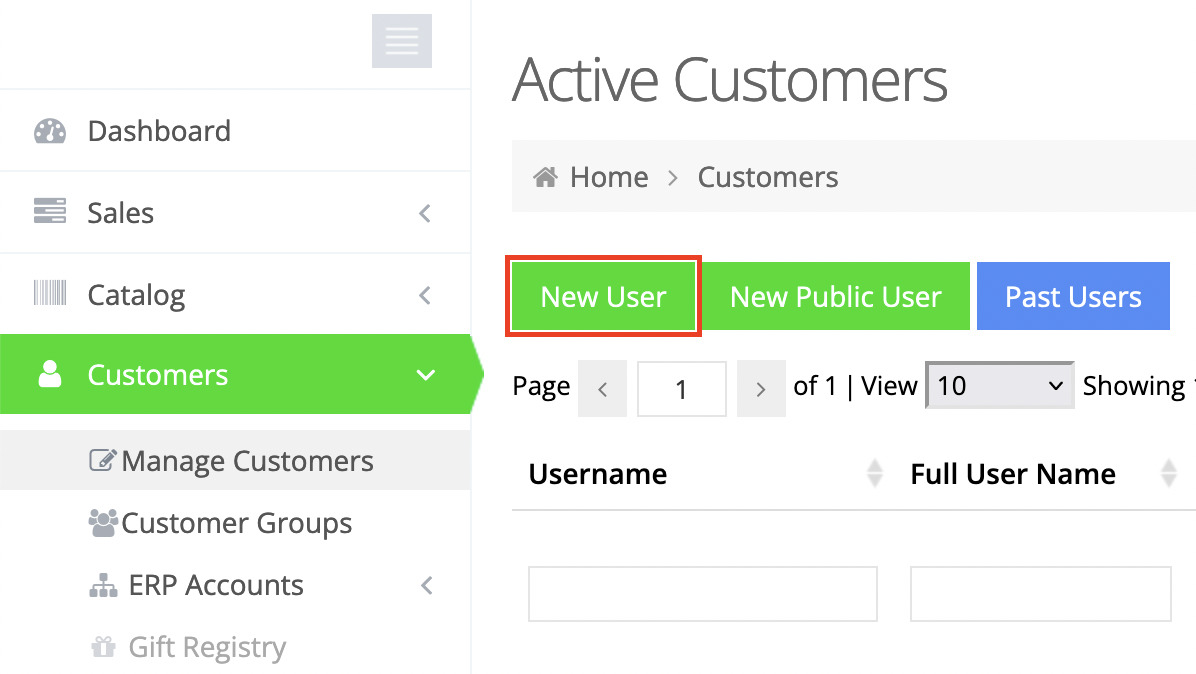
- Press the "New User" button
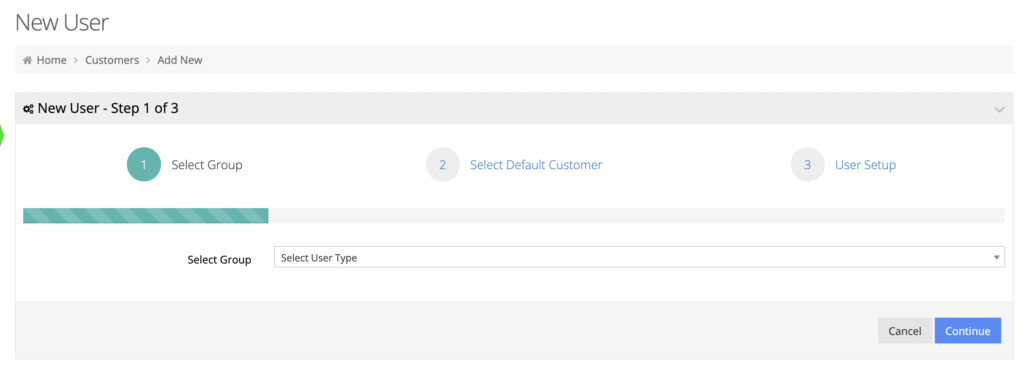
- First select the group that this user will be assigned to, and then press "Continue"
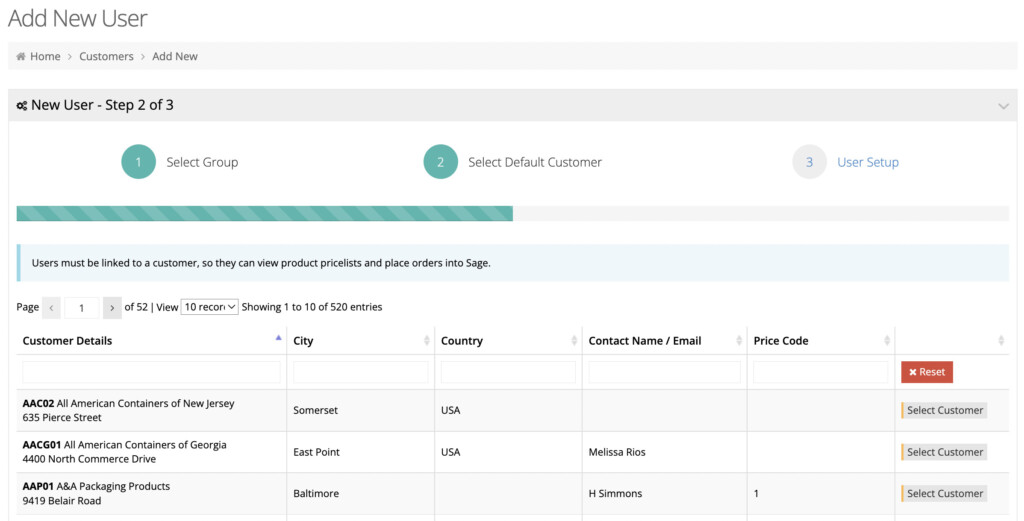
- Users must be linked to a customer, so they can view product pricelists and place orders into the ERP. On step 2, assign this new user to an ERP customer.
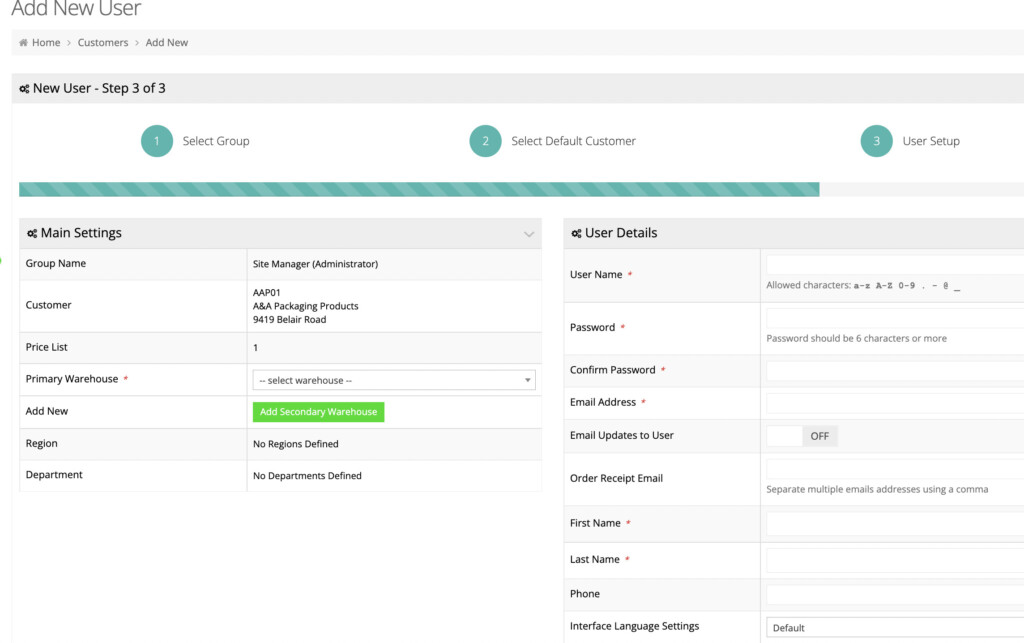
- Finally, fill out the required fields on step 3 and press "Continue"
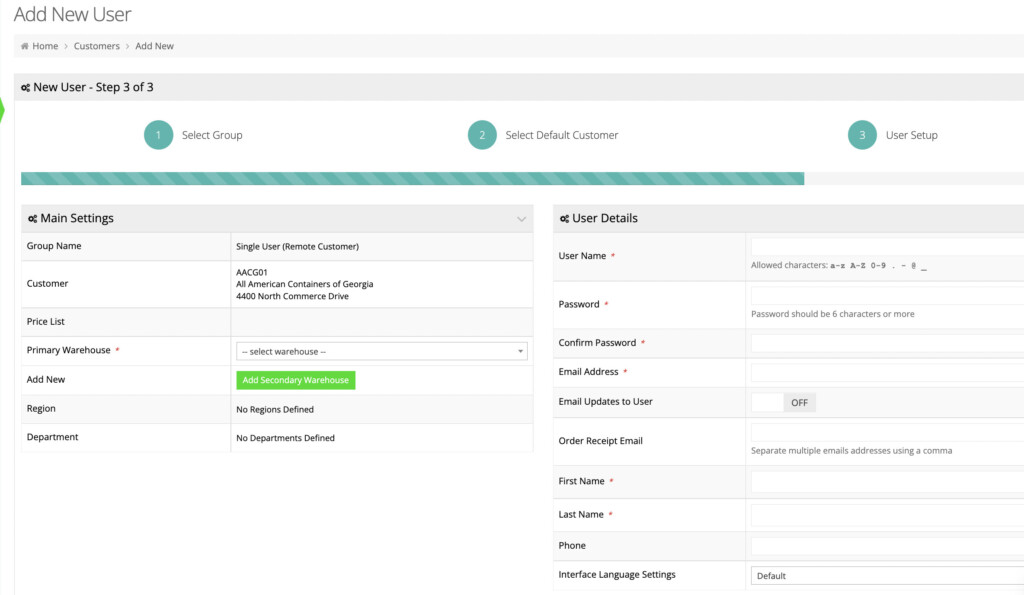
- Your new user will be created and will be assigned to the group you selected for them
Create a new administrator user
- Log into your store and navigate to System → Site Administrators (/admin/musers/administrators)
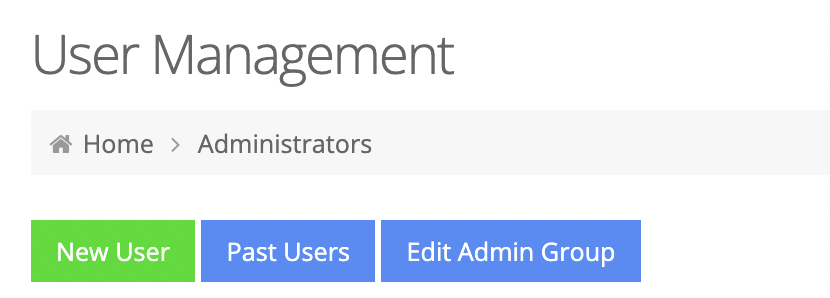
- Press the "New User" button
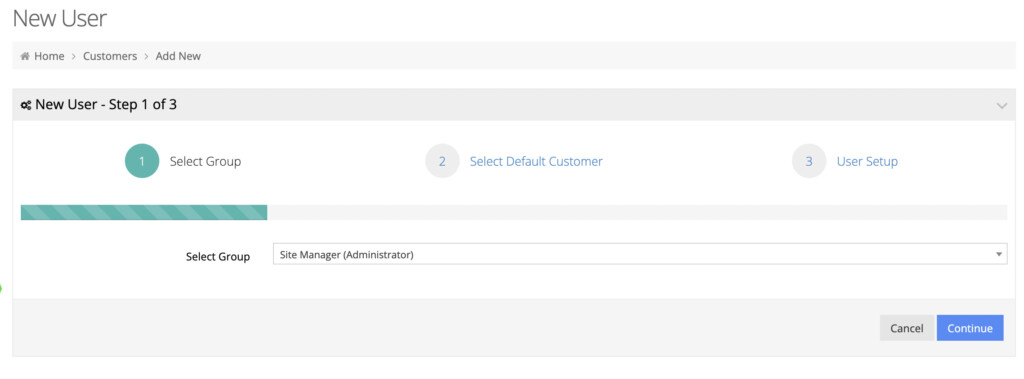
- First select the user type for this user, and then press “Continue”
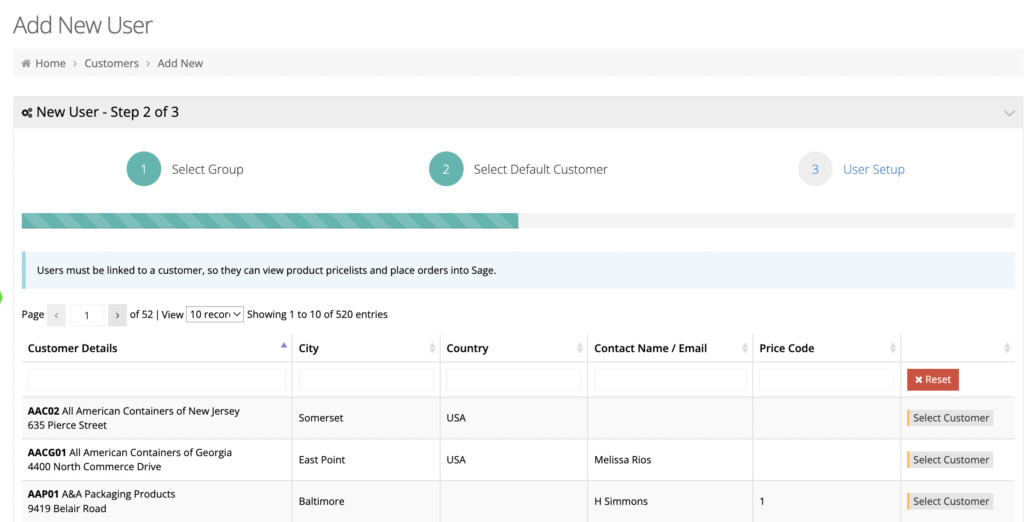
- Assign this user to a default customer by pressing the "Select Customer" to the right
- Finally, fill out the user details and press "Continue" to submit
Remove a user
- Log into your store and navigate to Customers → Manage Customers (/admin/musers/)
- Locate the user you wish to remove, and press the "Delete" button in their row
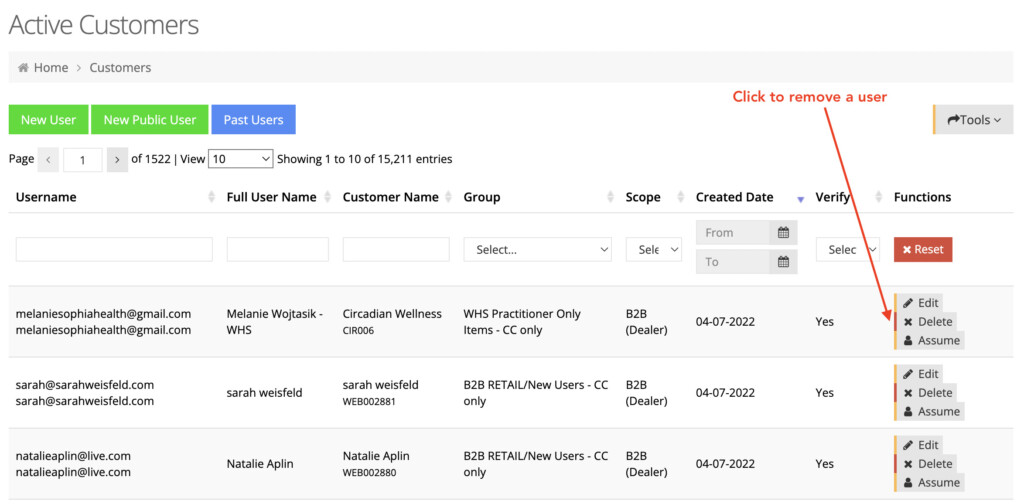
- You will be prompted to confirm the deletion, and once you confirm, the user will be removed
Import users in bulk
New customer accounts can be created and imported in bulk through a CSV or XLSX file. First, prepare your file (Download a sample here →). The following columns are required, while the others can be left optionally blank:
- Customer Code: The A/R customer account to assign to this user. Must already exist in the web store
- Username: The user name for their account
- Email: The email address for their account
- Password: An arbitrary password. They can do a password reset when first accessing their account to set one of their choosing.
- User Group: The web store user group to assign them to. Must be spelled exactly as it is in the store admin.
- Primary Warehouse: The primary warehouse code to assign them.
- First Name and Last Name: The user's name
- Approved? (true/false): true
- Deleted? (true/false): false
- Reset Password Required? (true/false): your choice whether to make this true or false
- B2b User? (true/false): Depends on whether you are assigning them as a B2B user or B2C
Once your sheet is prepared, you can import it through these steps:
- Log into your store and navigate to Customers → Manage Customers (/admin/musers/)
- Click Tools → Import
- On the Import Users screen, under user group be sure to select an appropriate default group for your users. If any user in the sheet fails to have a group set, or that group is misspelled, they will default to whichever group is selected here.

Remove users in bulk
- Log into your store and navigate to Customers → Manage Customers (/admin/musers/)
- Click Tools → Export
- Download the Excel sheet. When finished, open the sheet and find column AE, i.e.
Deleted? (true/false) - For the users you wish to delete, change the column from
falsetotrue. - Save the Excel sheet. Return to Customers → Manage Customers, and click Tools > Import to import your newly saved Excel sheet.
To verify that a user has been deleted, navigate to Customers → Manage Customers, and then click Past Users. You can then search for the user by their email address or name to verify that they have deleted.
