Your online store's security is of utmost importance, and one key aspect of it is having a strong password policy in place. By enabling a robust password policy, you can enhance the security of your web store and protect sensitive customer information. In this guide, we'll walk you through the steps to create and apply a password policy to your web store.
Step 1: Contact Customer Support
Before you can set up a password policy, you will need to reach out to our dedicated customer support team, as this is a feature they will need to enable within your store beforehand. You can do this by sending an email or using our chat support system to request the activation of the password policy feature.
Step 2: Accessing Password Policies
Once the customer support team has enabled the password policy feature for your web store, follow these steps to create a password policy:
- Log in to your web store admin panel.
- Navigate to "System" and then select "Modules."
- Click on "Password Policies."
Step 3: Adding a New Password Policy
Now, you're ready to create a new password policy. Follow these steps:
- Click the "Add New Password Policy" button.
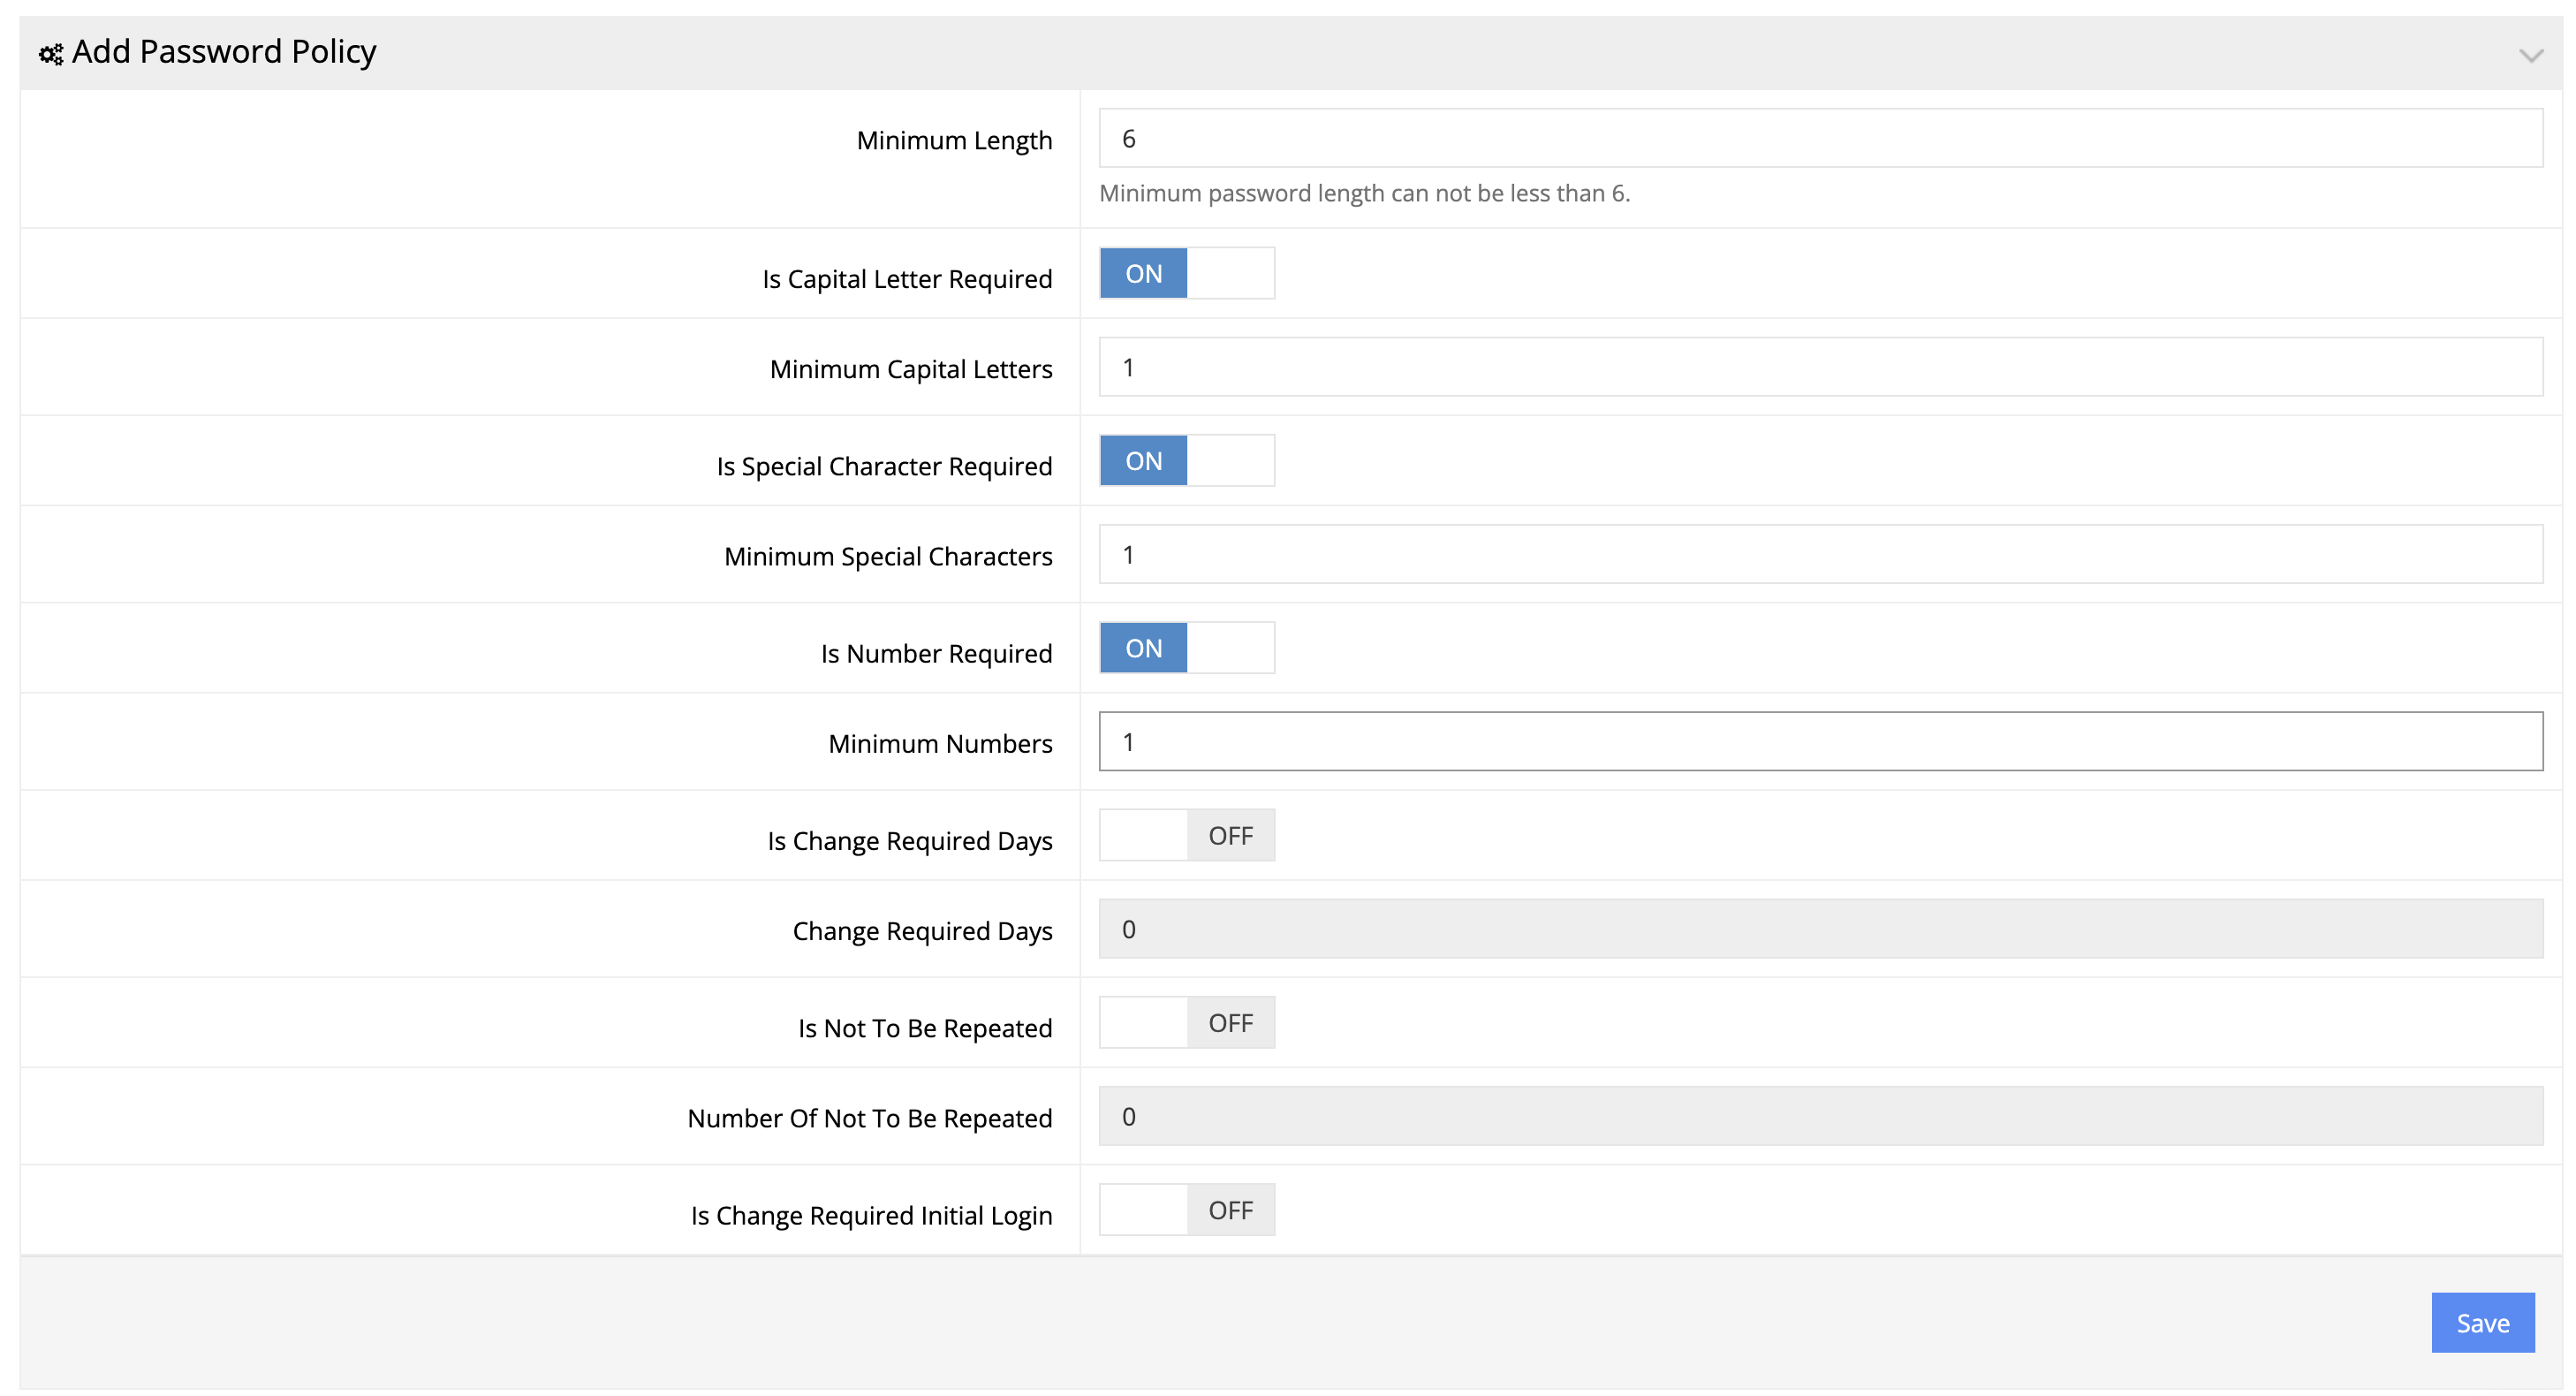
- You will be directed to a page where you can configure your password policy settings. Here are the available options:

- Minimum Length: Set the minimum password length (must be at least 6 characters).
- Is Capital Letter Required: Specify whether a capital letter is required.
- Minimum Capital Letters: Set the minimum number of capital letters required.
- Is Special Character Required: Indicate if a special character is needed.
- Minimum Special Characters: Define the minimum number of special characters.
- Is Number Required: Determine if a number is necessary.
- Minimum Numbers: Set the minimum number of digits required.
- Is Change Required Days: Decide whether users must change their passwords after a certain number of days.
- Change Required Days: Specify the number of days for password changes.
- Is Not To Be Repeated: Choose whether previously used passwords cannot be reused.
- Number Of Not To Be Repeated: Set the number of unique passwords required before reuse is allowed.
- Is Change Required on Initial Login: Decide if a password change is required upon the first login.
Step 4: Saving Your Password Policy
After configuring your password policy settings, click the "Save" button to store your policy.
Step 5: Applying Your Password Policy
The final step is applying the password policy to a web store group. You can do this as follows:
- Navigate to "Customers" and select "Customer Groups"
- Next to the user group you want to apply the password policy to, click the "Password Policy" button.
OR
- Navigate to "Sales Rep" and choose "Manage Sales Rep."
- Next to the user group you want to apply the password policy to, click the "Password Policy" button.
OR
- Edit the administrator groups under "/admin/musers/groups/administrators."
- Next to the user group you want to apply the password policy to, click the "Password Policy" button.

- On the following page, click "Select" next to the password policy you created earlier.

Conclusion:
By creating and applying a strong password policy to your web store, you're taking a crucial step in safeguarding your online business and customer data. If you have any questions or need further assistance, don't hesitate to reach out to our customer support team. We're here to help you ensure the security and integrity of your web store.

