Overview
Promotions are a fantastic way to encourage customers to make purchases on your web store. Whether you're offering discounts, special deals, or free shipping, setting up a promo code is a simple process. Let's walk through it step by step!
Step 1: Enable Promotions
Before setting up a promo code, you need to make sure that the promotions feature is enabled in your store. If you haven't done this yet, check out this help guide: How to Set Up Promotions.
Once that’s all set, you're ready to create your promo code!
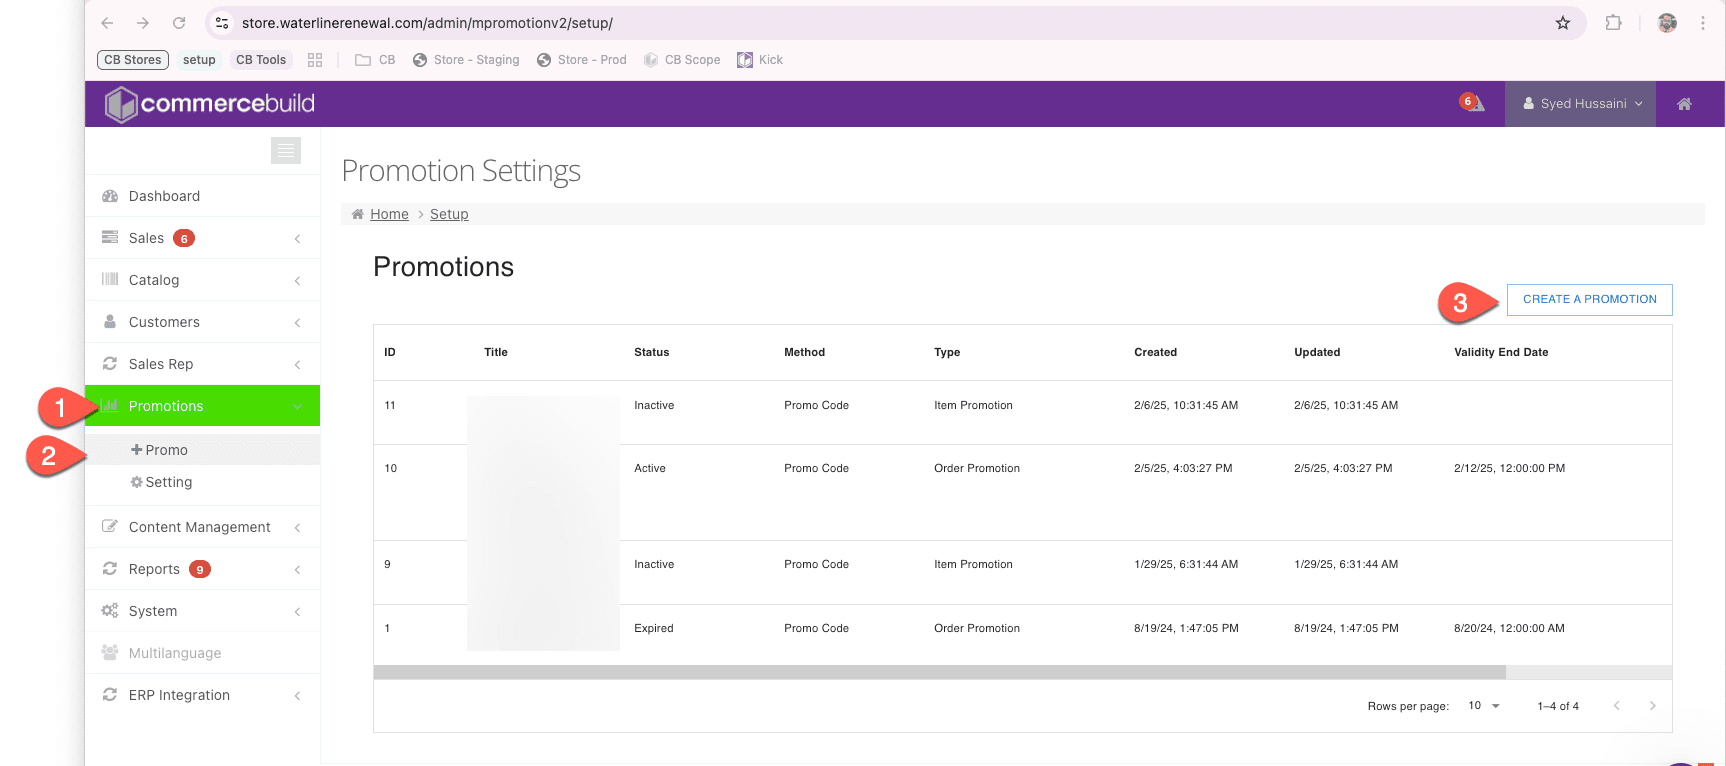
Step 2: Navigate to the Promotions Page
Go to Promotions → Promo "YourWebStore.com"/admin/mpromotionv2/setup/ to start setting up your promo code.
At the top, you'll see an option to Activate (check this box to enable the promo) or leave it Inactive (unchecked means it won’t be applied yet). Here is a screenshot of the Promo Configured for 25% discount based on the Order Value of minimum 500.
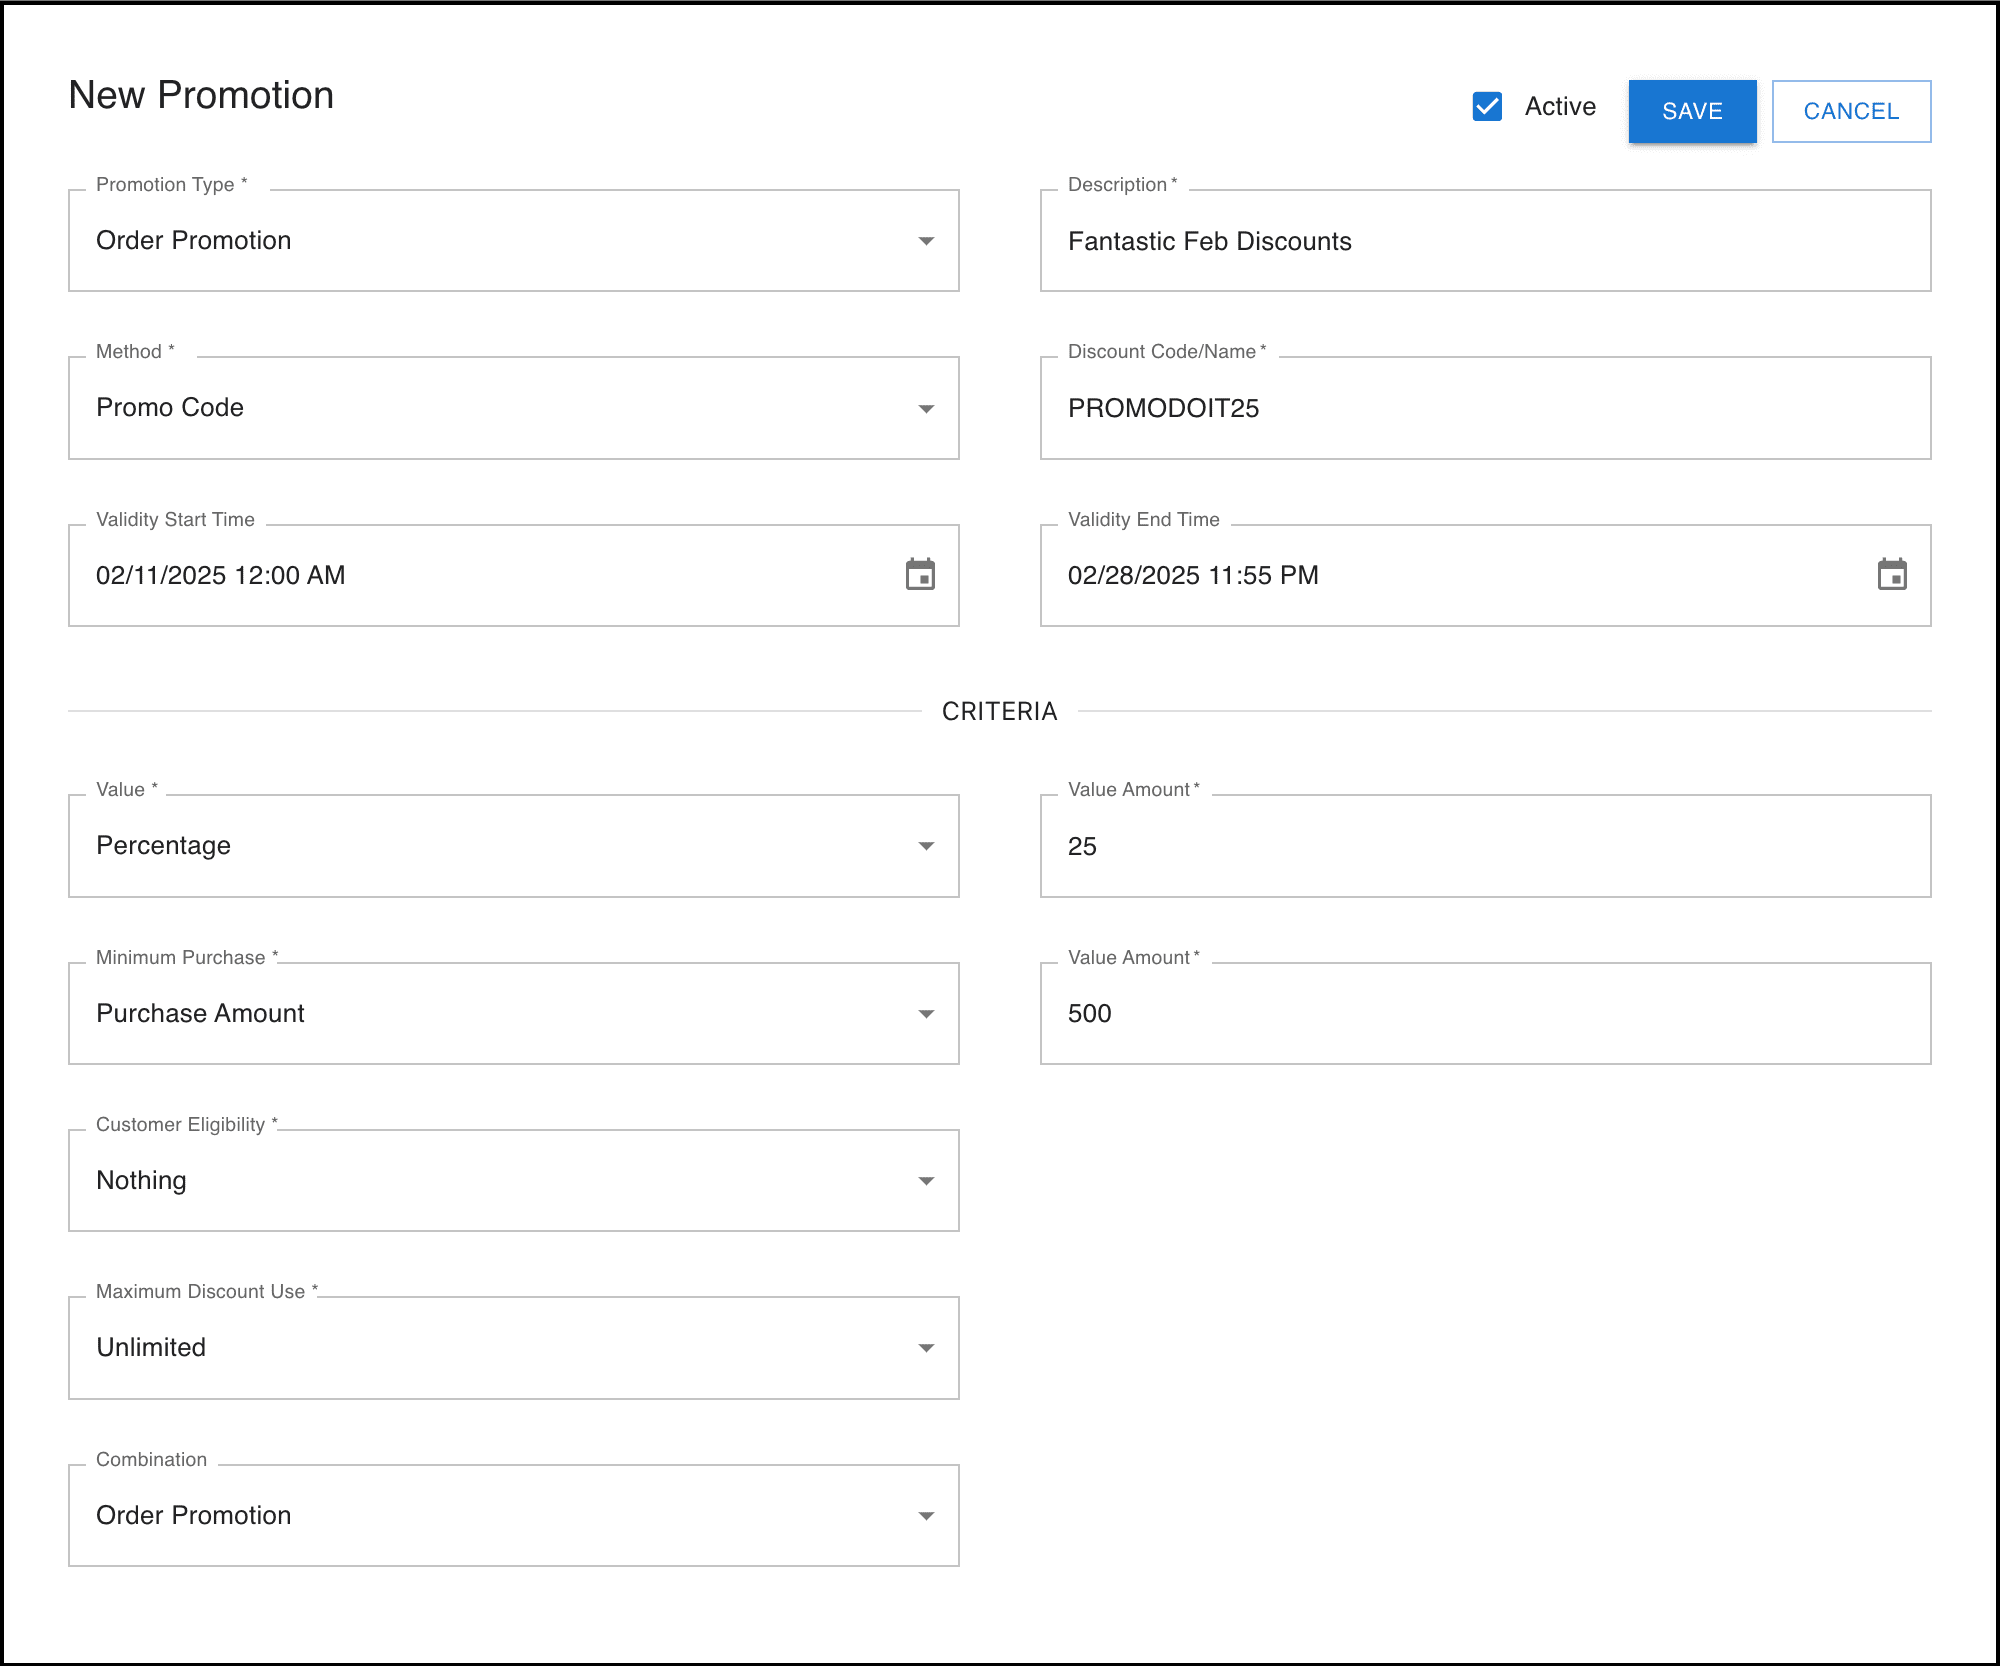
Now, let's go over the key fields you'll need to configure.
Step 3: Core Promo Code Settings
Promotion Type
This determines whether the promo applies to the whole order or specific items.
- Order Promotion – Applies to the entire order.
- Item Promotion – Applies to specific items or categories.
Description
This is where you add a short description of the promo for reference.
Method
You can choose whether the promo code is applied manually or automatically:
- Promo Code – Customers must manually enter a code at checkout.
- Auto Promo – The discount is automatically applied based on your set criteria.
Discount Code/Name
Enter the actual promo code here (e.g., "PROMXYZ").
Step 4: Set Validity Dates
You need to define the period during which the promo code will be active. If you leave these fields blank, the coupon will work without any time limit.
- Validity Start Date – Set the start date and time for the promo.
- Validity End Date – Set the expiration date and time.
Step 5: Define Promo Criteria
This section helps set the discount value, purchase conditions, and usage limits.
Value
- Percentage – Apply a percentage discount (e.g., 10% off).
- Fixed Amount – Apply a fixed discount (e.g., $5 off).
Value Amount
Specify the percentage or fixed discount amount based on the selection above.
Minimum Purchase Requirement
- No Minimum – The promo applies to any purchase.
- Purchase Amount – The order must reach a certain value to be eligible.
- Quantity of Item – A minimum number of items must be in the cart.
Customer Eligibility
- No Restrictions – Any customer can use the promo.
- Customer Code – Limit the promo to specific customers.
- Customer Group – Restrict the promo to a particular group.
Maximum Discount Usage
- Unlimited – The promo can be used any number of times.
- One Per User – Each customer can use the promo only once.
- Limited Usage – Set a specific number of times the promo can be used overall.
Step 6: Define Promo Combinations
Decide how this promo code interacts with other promotions. Here are the options:
- Order Promotion – Applies to the whole order.
- Item Promotion – Applies to selected items.
- Buy X, Get Y – Set up "Buy One, Get One" type deals.
- Free Shipping – Offer free shipping as part of the promo.
Important Notes
You might also note that some features of Promo v2 are still in development:
- Free Shipping was recently completed in the last sprint and is pending release to production.
- Buy X, Get Y is still in progress and actively being worked on.
Final Step: Save and Activate Your Promo Code!
Once you’ve configured all the settings, save your promo code and make sure it’s activated. Now, customers can use it according to the conditions you set.
If you ever need to update or disable it, just return to the Promotions page and make your changes.
That’s it! You’re all set to run promotions on your store. Need more help? Feel free to reach out to support!