Introduction
Our shipping carriers are what your users select during their checkout process. The term "carrier" might be a little confusing. UPS is a carrier, but here we refer to a record in our platform that your users select for shipping. You may build a carrier in the platform that refers explicitly to an external carrier like FedEx. Or you may build a carrier in the platform that refers to a general method like "Ground Shipping".
There are three primary functions you should consider when setting up a carrier: The words you use to convey the shipping expectations to users, the geographic area that you serve, and the price of shipping.
Words are important - keeping a short but meaningful description for shipping options is recommended. You want to set an accurate expectation of the shipping service. For example, Ground, Expedited, and Overnight convey a standard understanding for most users, most of the time. The geography: you can set carriers to only service some areas. You may allow users in your State or Province to get a delivery by your own internal fleet of delivery trucks, but users outside of this boundary need to use UPS. And setting the price of shipping could be as simple as "to be determined". This might be appropriate when your clients have terms and you don't request a shipping rate from carriers until the pallets of product have been assembled and weighed. But if you're shipping direct to consumers and charging a credit card, you will need to have a shipping price.
It is important to note as you're creating your carriers, you'll essentially be creating a series of rules that must be met in order for the carrier to display. Those rules target the ship to address of the order and if the address doesn't meet those rules, the carrier will not display to that user. If we are reading the ship to addresses from the ERP, the data must have country and the State/Province. If there is an integration with UPS, FedEx, etc then zip/Postal Code and street address will need to be accurate.
Create a Carrier
For this example, we know that we are going to create a ground shipping option for clients in the USA, excluding Alaska and Hawaii. We are also not going to use a shipping integration, and we have a good idea about the charges that will need to be applied. First, navigate to System > Shipping Setup > Carriers in the admin panel. Click on the Add button.
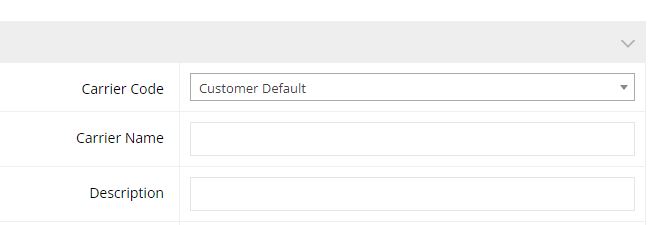
The first task is to select the carrier code, and write something about this carrier. The carrier code data comes from the ERP.

This can be edited any time, so if you want to be a little wordy right now to keep the intent clear, do so. Below, a carrier has been selected from the ERP list, and a simple carrier name of "Ground Shipping". We also added a note that this is for the lower 48 states and D.C. The intention is not to keep that description there. It's just handy when creating a lot of carriers and you want to make sure during testing that it's behaving as expected.

When a user makes an order using this carrier, the Ship Via in the ERP will refer to "EPS - Express Parcel Service". The words we choose - Ground Shipping - should be synonymous with EPS. You want your operations team to meet the expectation of your user. Often this means you might create more carrier codes in your ERP specifically for the web environment to be crystal clear.
Note: X3 clients will have an extra Carrier Mode option. It is required that you select an option from the list. Like the carrier code, the options are from the ERP.
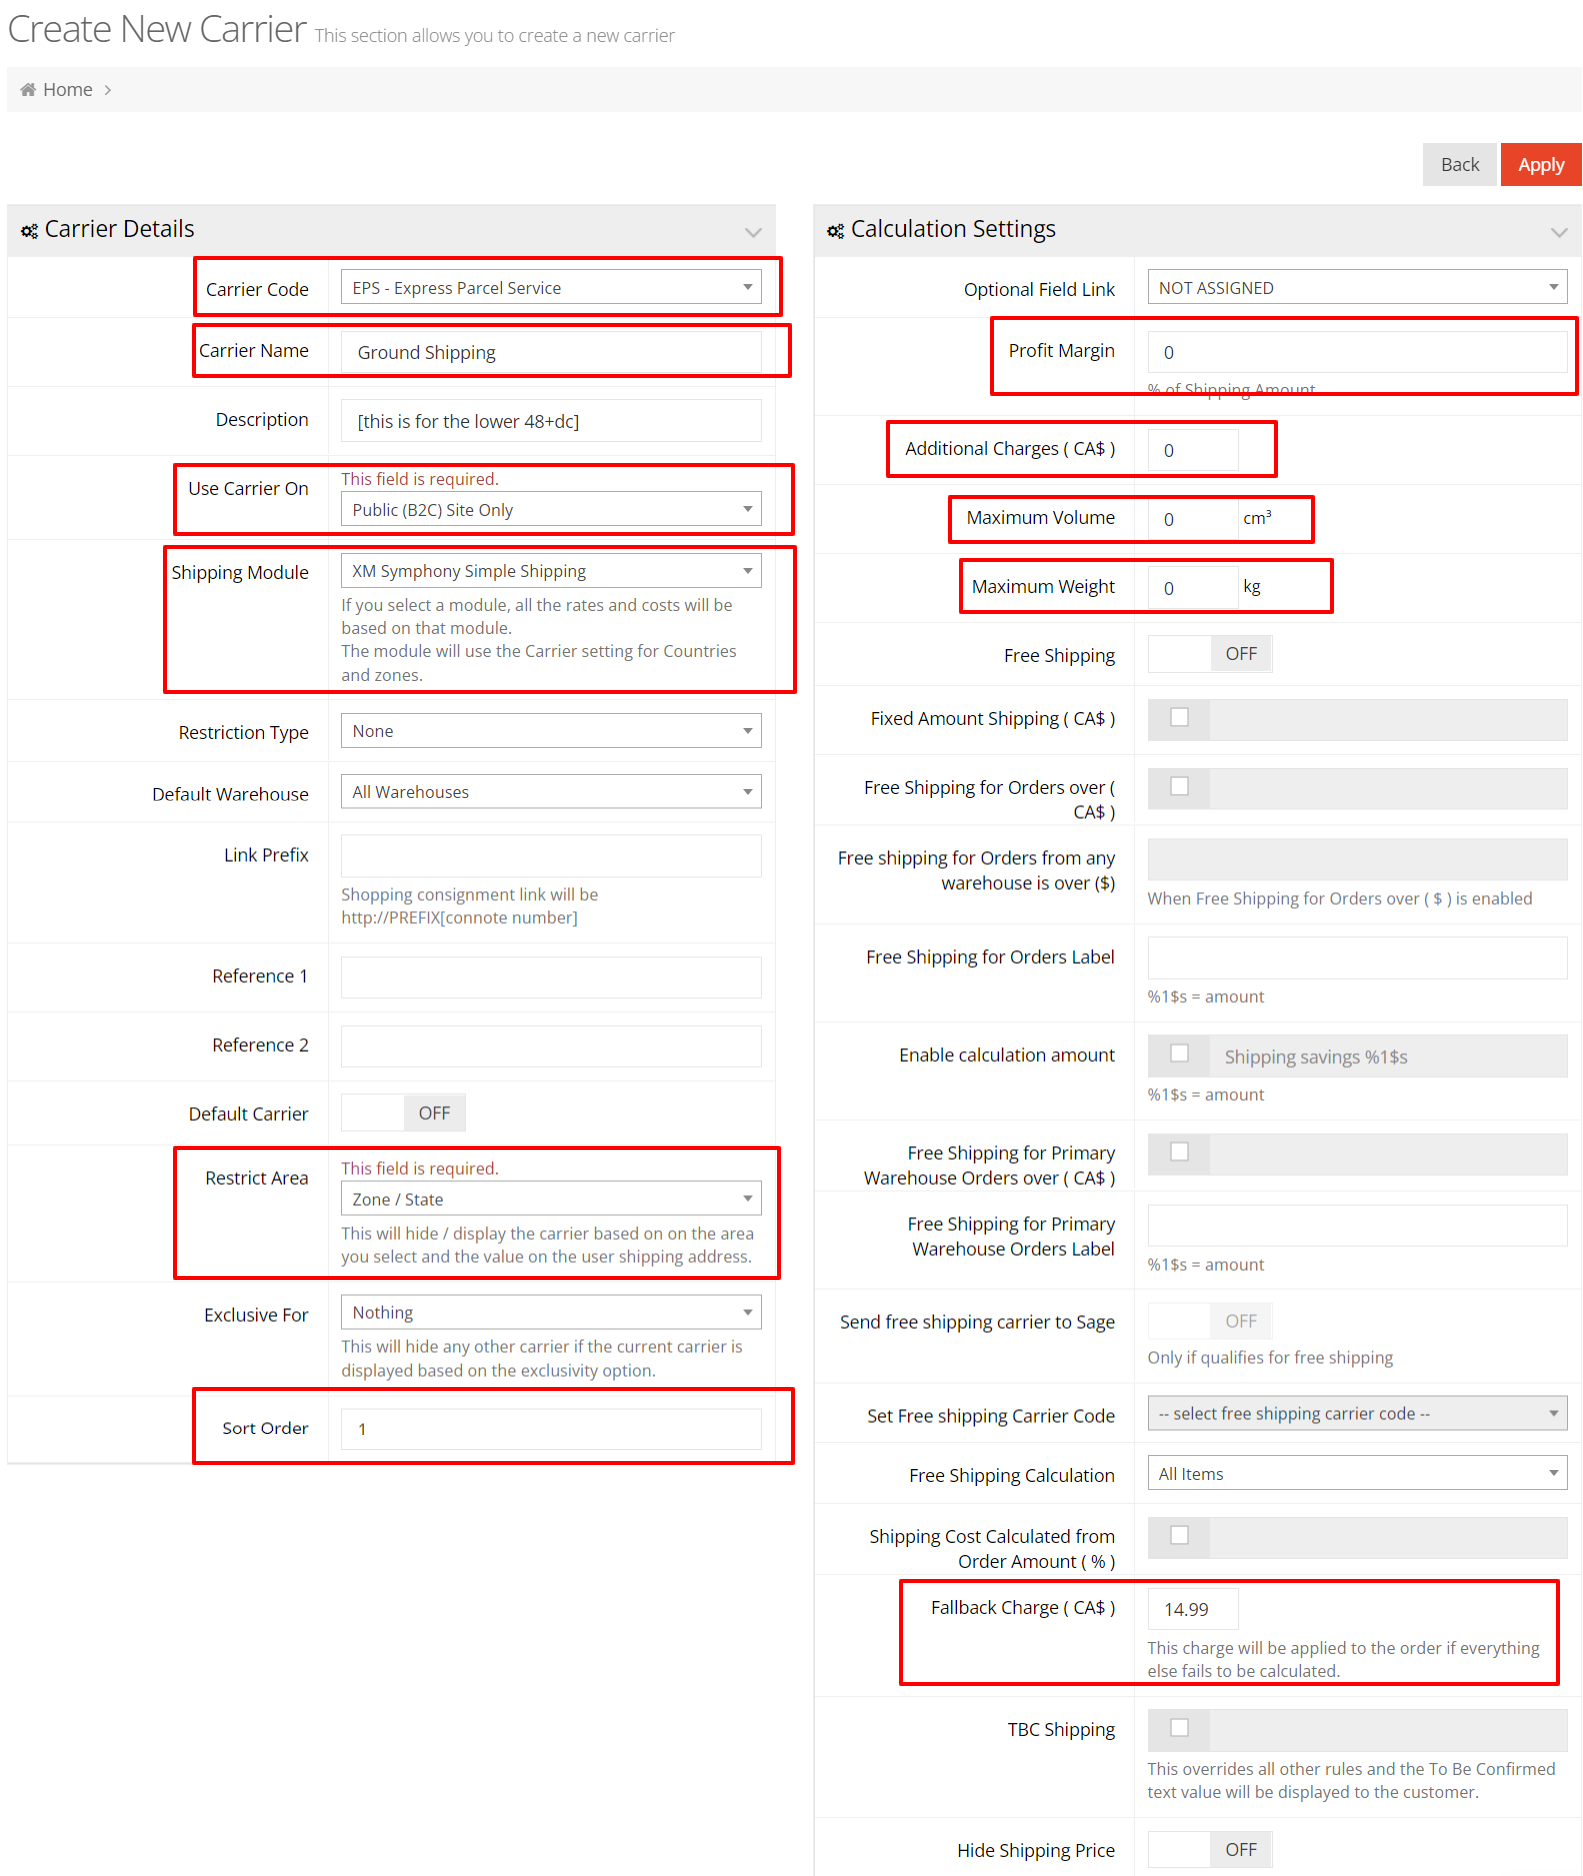
Save the carrier settings, but before you do, fill out some required information. You can change this in the future. These settings are a good baseline.

To save your settings, click Apply. You'll be redirected to the Carrier Page.

General required settings information
- Carrier Code: Ship via code to be associated with this carrier.
- Carrier Name: Label displayed in the eCommerce Console and front end of your webstore.
- Use Carrier On: The environment this carrier will be available for. If only set to one of them (B2B or B2C), this carrier will not display for the other.
- Shipping Module: The service this carrier should be integrated to. If it won't be integrated to a service, set this to Simple Shipping.
- Restrict Area: Restricts the carrier to customers with ship to addresses that match this field. For example, if this is set to Country and the carrier is configured for Canada, this carrier will not display for a ship to address to the US. Another example may be if this is set to Zone/State and the carrier is configured for British Columbia and Alberta; this carrier will not display for a ship to address to Ontario.
- Sort Order: The order in which the carriers are displayed in the eCommerce Console and front end of your webstore; #1 placed at the top of the list.
- Profit Margin: Used when integrating with carriers like FedEx, you can add a margin to the shipping cost the API returns. Adds percentage of order value to the shipping charge. Does not require the percent sign (%), fill in with numbers only. Set to "0" if not needed for the carrier.
- Additional Charges: You can set a dollar amount that will apply to all orders for this carrier record.
- Maximum Volume: Orders with a total volume over this number will not display during checkout. This will require your products to have volume values. Set to "0" if not needed for the carrier.
- Maximum Weight: Orders with a total weight over this number will not display during checkout. This will require your products to have weight values in your ERP system. Set to "0" if not needed for the carrier. Note that there is a Minimum weight field, but only displays after you save the record.
- Fallback Charge: Primarily used with integrations as a backstop. If UPS's servers fail and the API isn't available, some sort of charge can be placed on the order. It is required, even if you're not using an integration.
Set the Geography
Add countries
Even if you intend to restrict the carrier by Zone/State, you'll need to create the list of countries first in which to create those zones inside of. For example, if you'd like this carrier to be available for ship to addresses to Canada and the US, you should add those two countries and nothing else. If you'd like to restrict this carrier for ship to addresses to Alberta only, you'll still need to add Canada to the carrier. For this example, I just want to add the USA, and then set the lower 48 + DC.
Click Edit next to your carrier

At the bottom of the page, there is a whole new section. Select a country from the dropdown and click Add

If you need to add more than one country, repeat step 2 until all relevant countries are listed

Assign zones
Assigning zones are important for two reasons. First, they offer further calculations such as an amount per weight, volume, or order total (e.g. $3/lbs, $3/cm3, $3/$15) for every zone. You'll be able to charge different rates to different zones.
Secondly, it forces a consistent written form of the zones. A dropdown list of all created zones from all carriers will appear for users to choose from instead of typing it themselves. A user could type in a ship to address with the province of BC, Bc, British Columbia, british columbia, or any other variation. This will create problems. It is recommended to use zones most of the time.
You can create zones manually in the eCommerce Console or use an Excel export/import. This example we'll manually create the rules for shipping to NY state.
Click Assign Zone

Click Add New

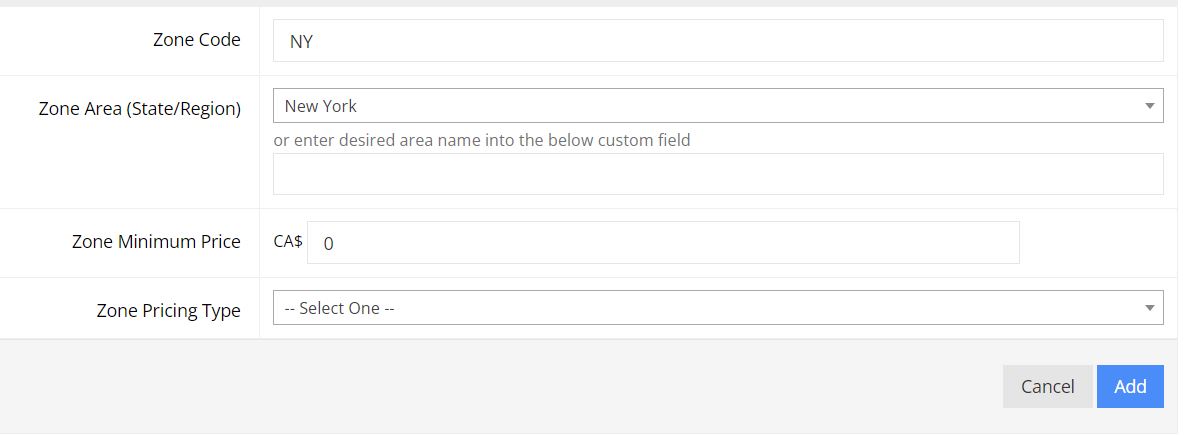
Type in a Zone Code, select the matching Zone Area, set a minimum Price.

Set Pricing
Now that there is a country set and I'm adding zones to it, I'm also going to build the pricing logic into our system. This is where we'll select what kind of Zone Pricing Type we'll use, and the amount of money we will charge. Even if you do not want a charge per zone, you will still need to select a type.
Zone Pricing Type: Calculated
If we decided to use the calculated method, we should only use one of the fields while the other two are set to "0". Each field calculates the amount per increment of the order. These calculations will only be applicable for this specific zone; every zone (zone in this example are the States) could have unique calculations. If you wanted no charges, you would enter in zero for every zone price field.

Zone Pricing Type: By Range
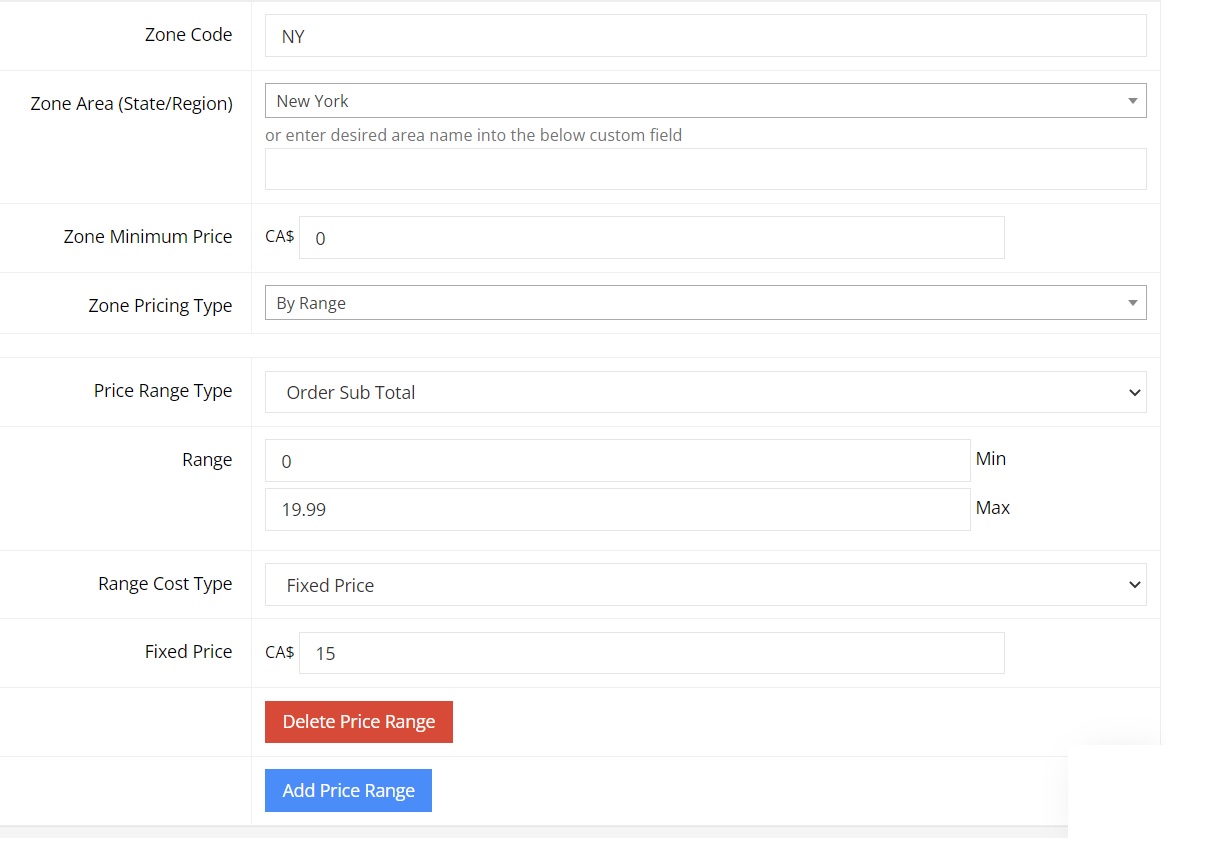
This creates ranges for which to charge a flat amount for this specific zone. In this example I'm shipping to consumers, and I want really consumer friendly pricing. For New York State, here's my pricing logic.
- $0 - $19.99 are charged $15 in shipping
- $20 - $39.99 are charged $7 in shipping
- $40+ are charged $0 in shipping
I could have done this by volume or weight, but for B2c, subtotal makes the most sense.

- Add additional price ranges until all the pricing logic is captured for the State of NY.
Don't forget to click on the Add button to save your work!

Repeat for all the US states you want to include for this carrier. This file may help! !!USA 51 zones
Next Steps
In this example, we started to create a carrier that will hold enough information to ship to most of the states in the USA. We created some rules around shipping, and these rules explicitly excluded Alaska and Hawaii, any other countries we may need to ship to, any other method of shipping like overnight, and any B2B user. If we need to ship to any of these areas, or types of customers, we'll need to create more carriers in commercebuild.
We didn't look at carrier integrations, or other restrictions with products, warehouses, or users.
Other settings
- Free Shipping: Sets the carrier as a cost of "0". Must be set to OFF to use the next three settings.
- Fixed Amount Shipping: A flat amount to charge for shipping. Must check the box to enable.
- Free Shipping for Orders over: Orders over this number will produce free shipping at a cost of "0". Orders under this number will calculate based on integrations or rules you have set up.
- Shipping Cost Calculated from Order Amount: A percentage of the total order amount charged as shipping cost.
- TBC Shipping: Overrides all other rules and "charges" a value of "To Be Calculated" rather than any numbered value. This is typically used for shipping carriers where you'd like to calculate the cost of shipping separately or would like your customer to provide their own shipping information.
- Default Warehouse: Ships products from this warehouse only. If an order has products from other warehouses, this carrier will be hidden. It is more common to control warehouse restrictions like this at the user level and have this set to All Warehouses.
- Link Prefix: Used for linking tracking codes to their services tracking API.
Link Prefix
The following link prefixes can be used, depending on your carrier. Please note that while these URLs are valid at the time of this writing, they could always be changed by the carriers. It's good to double check with your carrier that the URL is correct.
UPS:
http://wwwapps.ups.com/tracking/tracking.cgi?tracknum=FedEx:
https://www.fedex.com/apps/fedextrack/?action=track&tracknumbers=USPS:
https://tools.usps.com/go/TrackConfirmAction.action?tRef=fullpage&tLc=1&text28777=&tLabels=Purolator
https://www.purolator.com/purolator/ship-track/tracking-summary.page?pin=Canada Post
https://www.canadapost.ca/trackweb/fr#/search?searchFor=DayRoss
https://dayross.com/fr/track/shipment/history?probill=
