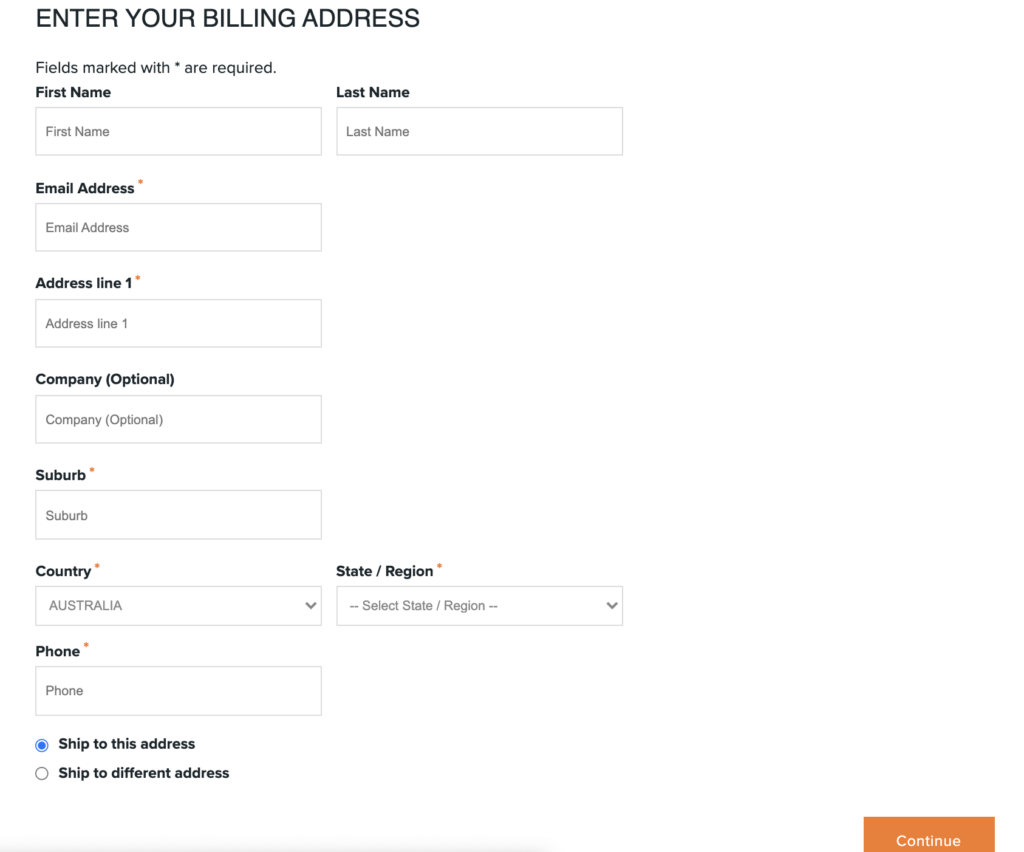
One Page Checkout form appears when a guest user adds items to the cart and proceeds to checkout. The form has fields to enter billing/shipping addresses; you can modify the form to include fields to suit your business needs.

Getting Started
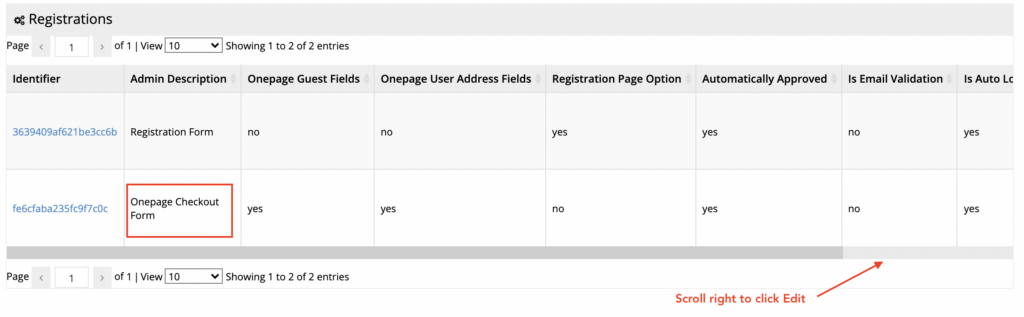
Go to your admin dashboard and navigate to System > Modules > User Registration. Scroll right to find the Edit button to modify the Onepage Checkout Form.
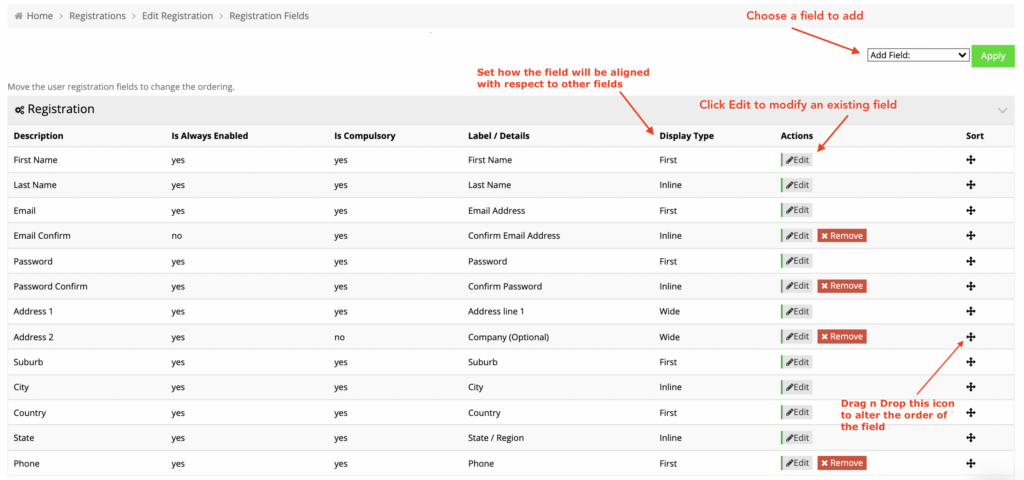
On the Edit Registration screen, click the Fields button to add a new field or edit an existing one.

Add/Edit fields
Select an option from Add Field dropdown to add a new field on the form.
The new field will be added in the last, so use the icon "+" to drag and drop the field to its desired position. Please ensure to click Apply after every such movement.
Next, click Edit to modify its details.
On the Edit Field landing page, select Display Type to choose how it will be displayed with respect to other fields on the form.
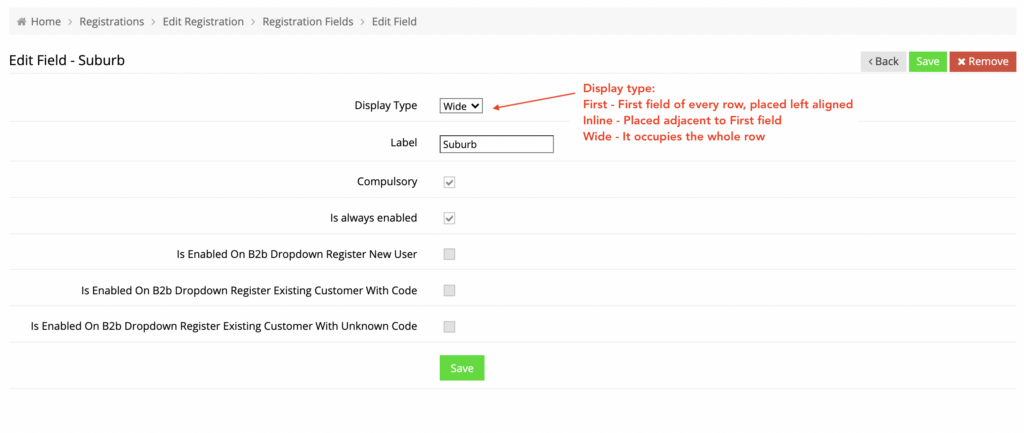
You can make a field mandatory by checking the Compulsory box. Finally, click Save to save your changes.
This is how the One Page Checkout form will look after including an additional field.