Overview
This guide walks you through getting the Commercebuild app up and running inside Microsoft Business Central, without overcomplicating things. Think of it as setting the foundation for your webstore to talk directly to your ERP.
You start by installing the Commercebuild app from AppSource and completing a few essential setup steps, like initializing the configuration and granting consent so Business Central and Commercebuild can sync properly. Once that’s done, you create your store, add a store name and admin email, and wait for the system to finish provisioning everything in the background.
After the store is ready, you get access to a fully connected Commercebuild environment where your Business Central data flows straight into the webstore. From there, you’re free to explore features, adjust settings, and move toward building a live, ERP-powered eCommerce experience.
Let's get started....
Step 1: Install the commercebuild app from the MS Extension Marketplace
- Login to Business Central
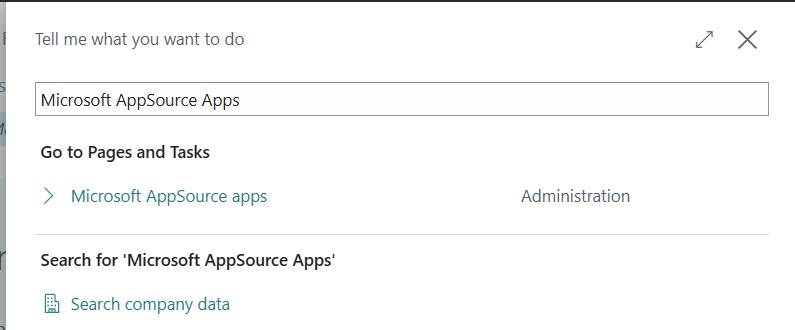
- Search for “Microsoft AppSource Apps”
![]()
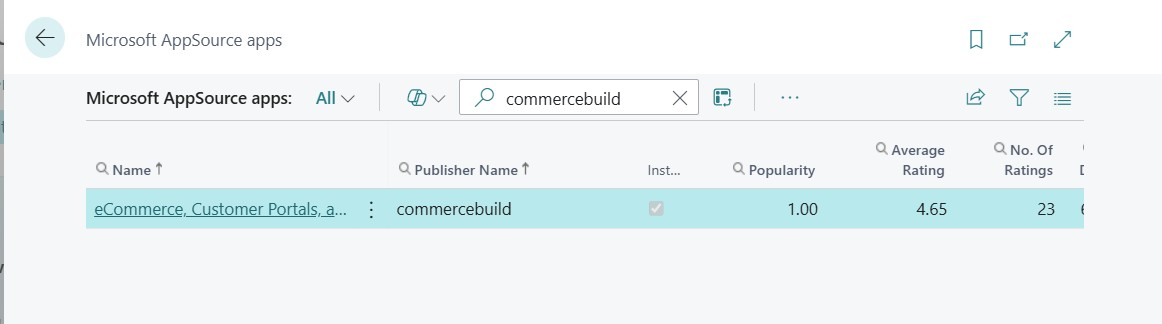
- Click to open the AppSource Apps listing and then search for “commercebuild”:
- Click the “Free Trial” button to install the commercebuild connector
- Once installed, access the commercebuild app settings from the Business Central navigation bar and click “System Configuration”

- Configure settings under the headings “General”, “General Posting Setup”, and “Cash Receipt Journal Setup”

- Add these settings:
- "S-PPINV" as the "Posted Prepayment Invoice No. Series Code"
- Enter "6" as the "Prepayment No. Series Trailing digits"
- Now, let's activate and authorize the commercebuild app for your Business Central environment:
NOTE: you may require assistance from a Business Central user with sufficient permission to complete the following steps:- Click "Initialize commercebuild Configuration"
- Finally, click "Grant Consent" - this will allow the webstore you're about to build to connect to your Business Central
Step 2: Create a Store
You can create a site directly from the commercebuild app. In fact, you can create multiple sites. Each site is valid for 14 days providing you time to evaluate many of the great features and benefits on offer. We urge you to reach out to one of our skilled staff to answer any questions you may have, and to recommend the right solution for your needs.
Building a site is easy:
- Click “Store List” from the commercebuild app menu
- Click "+ New"
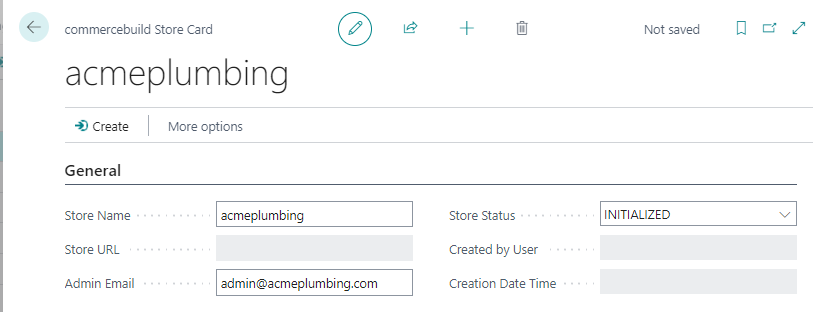
- Enter a name (single word, no special characters) for your store (e.g. "acmeplumbing"), plus the email address of the person who will administer the store:
NOTE: an email will be sent to the store administrator once the store creation process has completed, usually within a few minutes
- Click the "Create" button
- Check for an email indicating that the store is built and ready to be configured
- Click the link in the email to take you to your new store
Step 3: Explore
With your store built, data (products and customers, for example) will have synchronized automatically from your BC Environment and now we can work together on building out the webstore, exploring the features, and reviewing your requirements. There is so much to discover, so this is a great time to meet with a commercebuild consultant. Click here to find a suitable time - we look forward to working with you.