Once you have created variant options, you are now ready to begin creating a variant product and assigning child products to that variant product.
Getting Started
In your admin dashboard, navigate to Catalog > Product Variations > Variant Products
Click Add New Variant to create a new variant product.
Add details
On the following screen, enter data for the Item Code and Description which are mandatory fields. Please note that the item code cannot be more than 24 characters. The rest of the fields are optional and enabling those will depend on your business needs.
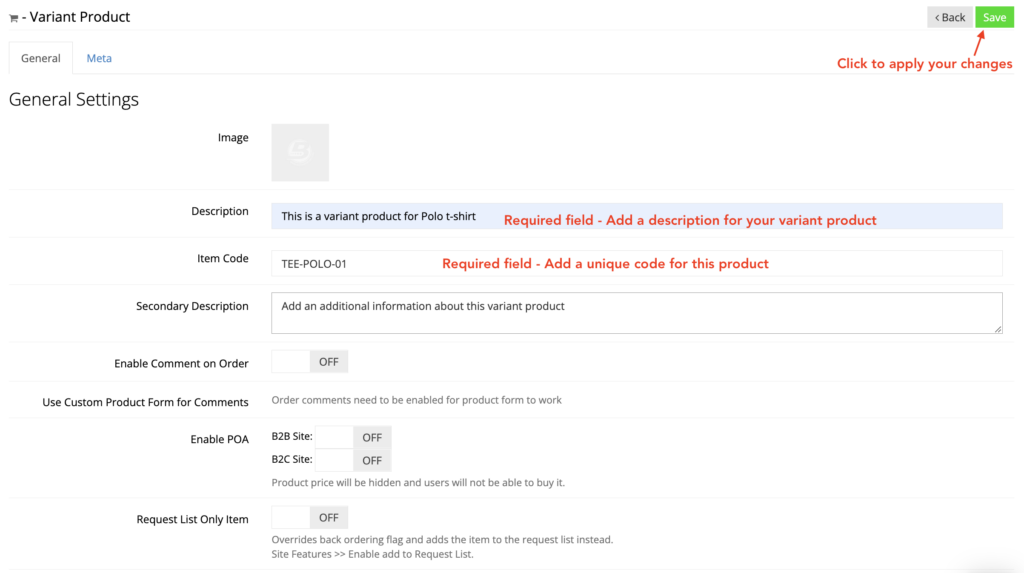
You may also choose to click the Meta tab to fill in meta information which is useful for SEO purposes.
Once a variant product is created, additional fields and tabs are brought into view to add more information to the product.

Other than those tabs, there are 3 more sections under General tab:
Variant Details -
This section is used to:
- assign a product that will set the initial price for this "parent" product.
- Enable Options Ordering - If there is more than one option, you can choose how to order them on the frontend.
Please note: You may need to assign child products before you can assign a product for the initial price or enable options ordering.
Item categories -
This section is used to:
- convey which B2B/B2C categories the product is assigned to.
- let you choose the canonical link for your product.
Please note: You may need to assign your product to a category to see the details in this section.
Filter Settings -
This section helps to assign filters to the product.
Assign child products
Click the Variants tab to select options and link products.
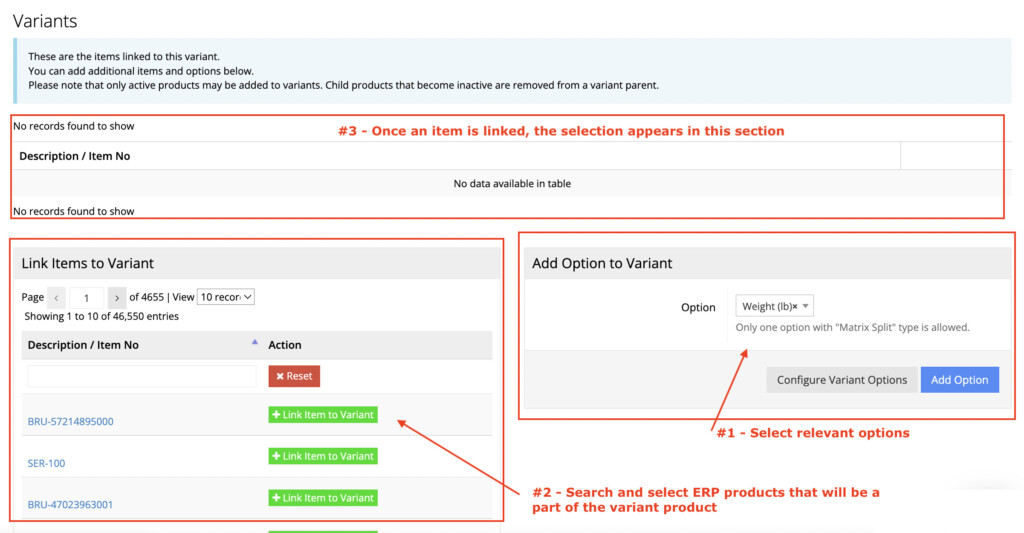
Add Option to Variant -
This section lets you choose various options that you have created as a part of How to Create Variant Options.
Choose an appropriate value from the Option dropdown and click Add Option.
Link Items to Variant -
This section helps to search and link ERP products to the variant product.
Search for your product and click the Link Item to Variant button.
The selection will be shown in the tabular section above. Select a value to which the assigned product will correspond and click Save.
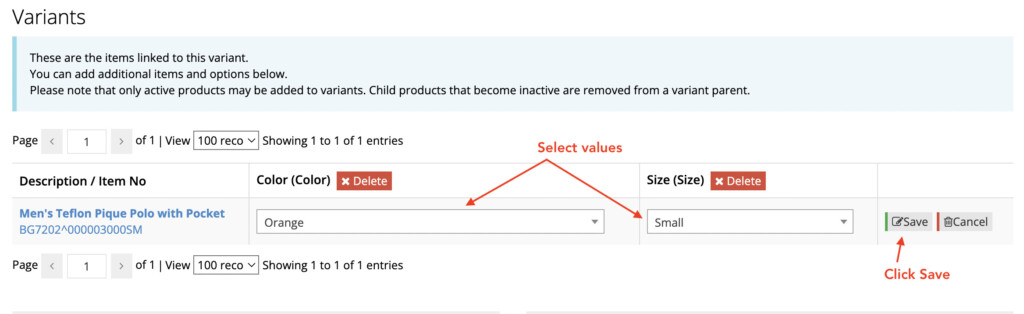
Once all the child products are linked, click Save from the top right corner of the screen.
Note: There may be an error about the missing initial price. Please ignore and follow the next section to assign the initial price.
Assign initial price
After assigning child products, click the General tab and scroll down to the Variant Details section.
Choose a product from the Price Itemno dropdown. The variant product will initially show the price of the chosen product.
Click Save from the top right of the screen to apply your changes.
Video demonstration
For bulk creation of variant products, you may take a look at our guidance How to set up product variants using Excel .