Google Analytics 4 offers additional controls over how your users' data is processed by their services. With the use of Google Tag Manager and some custom code, you can ensure that your web store is leveraging these controls.
Set up Google Tag Manager
For instructions on setting up Google Tag Manager and configuring your web store to use Google Tag Manager, please see our guidance here.
Video Guidance
The video below covers all steps in this guidance.
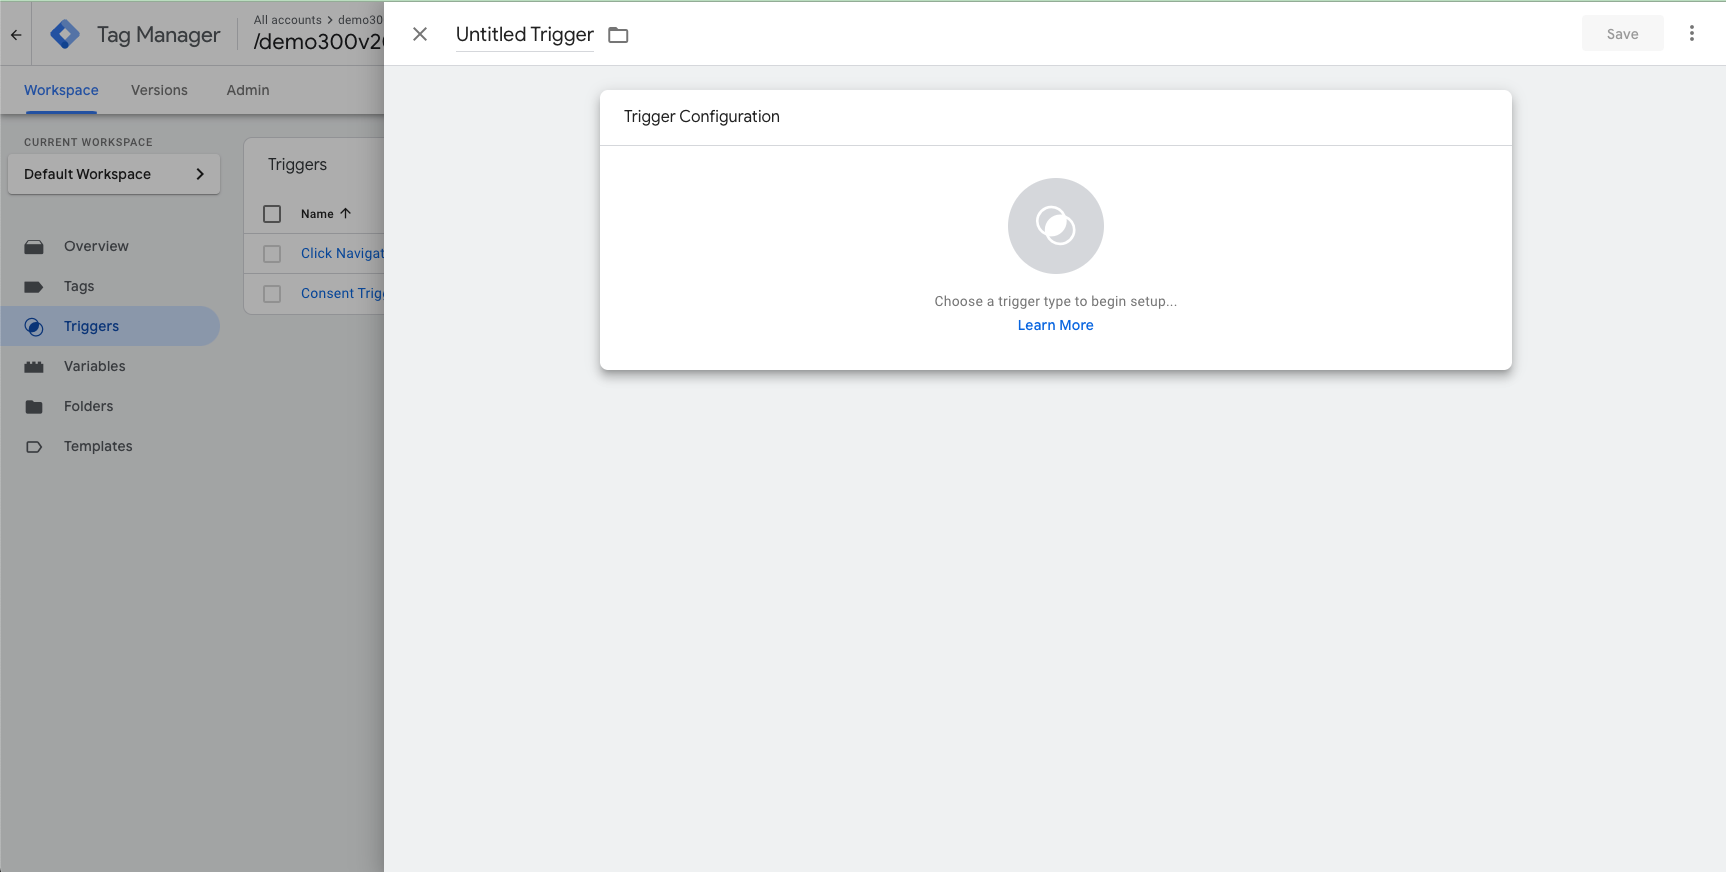
Create a Trigger
First, navigate to Triggers in Google Tag Manager and then click "New". You will see this screen:
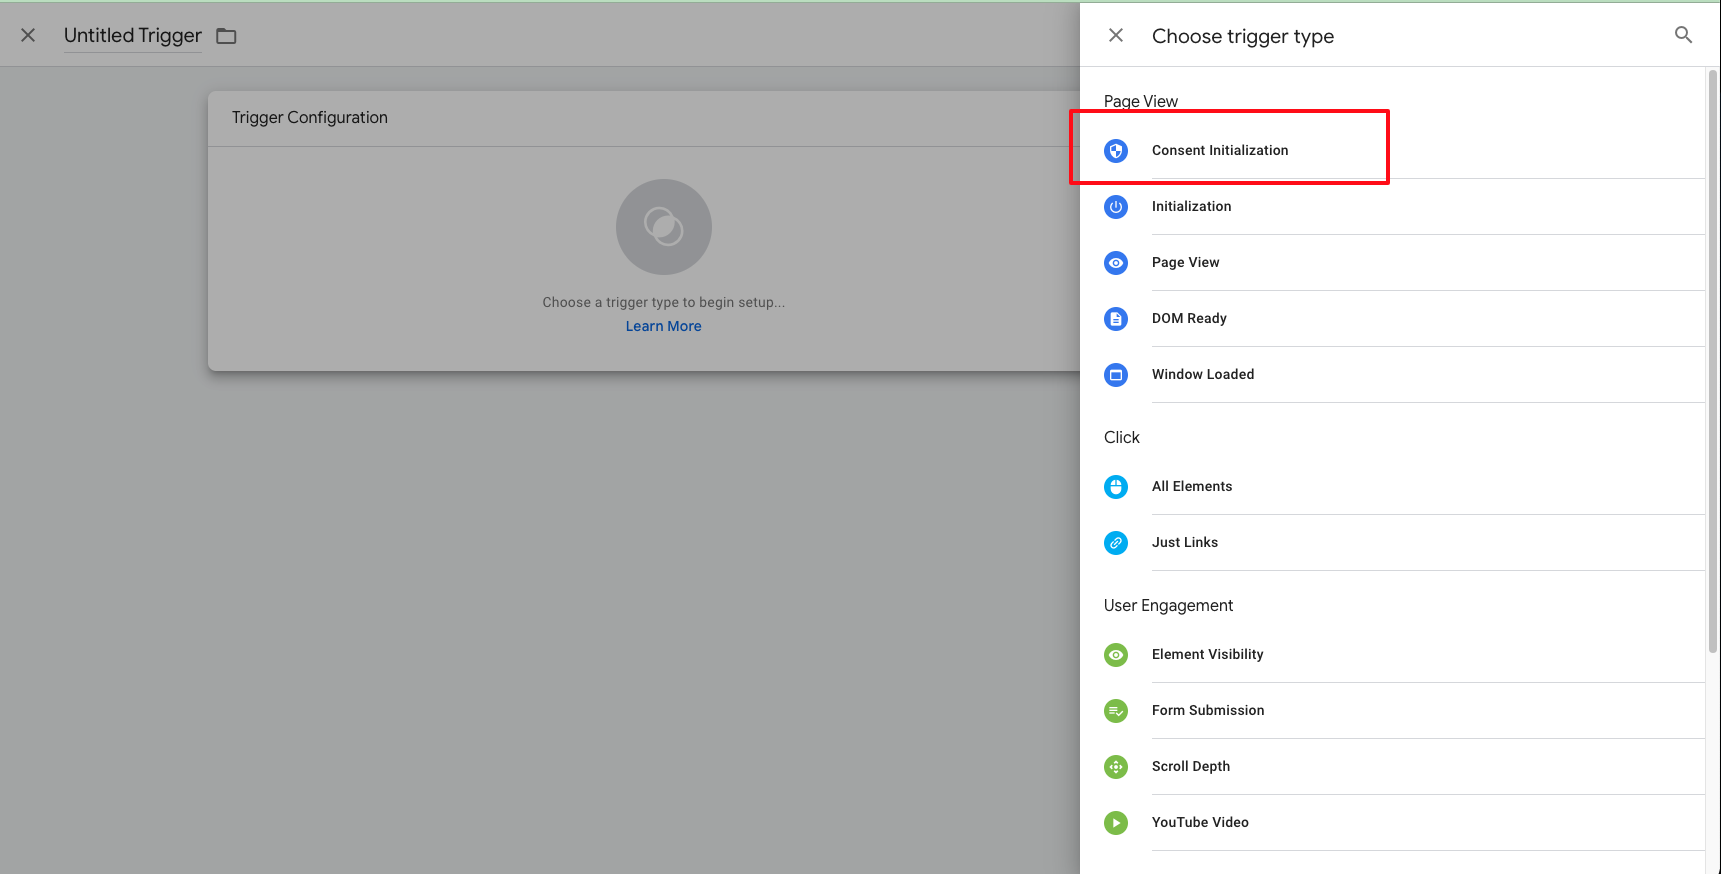
Next, click the "Choose a trigger type to begin setup...", which will show several trigger types. You'll want to choose Consent Initialization:
Ensure the trigger fires on All Pages, give your trigger an appropriate name (e.g. "Consent Trigger"), and then click Save.
Create a Tag
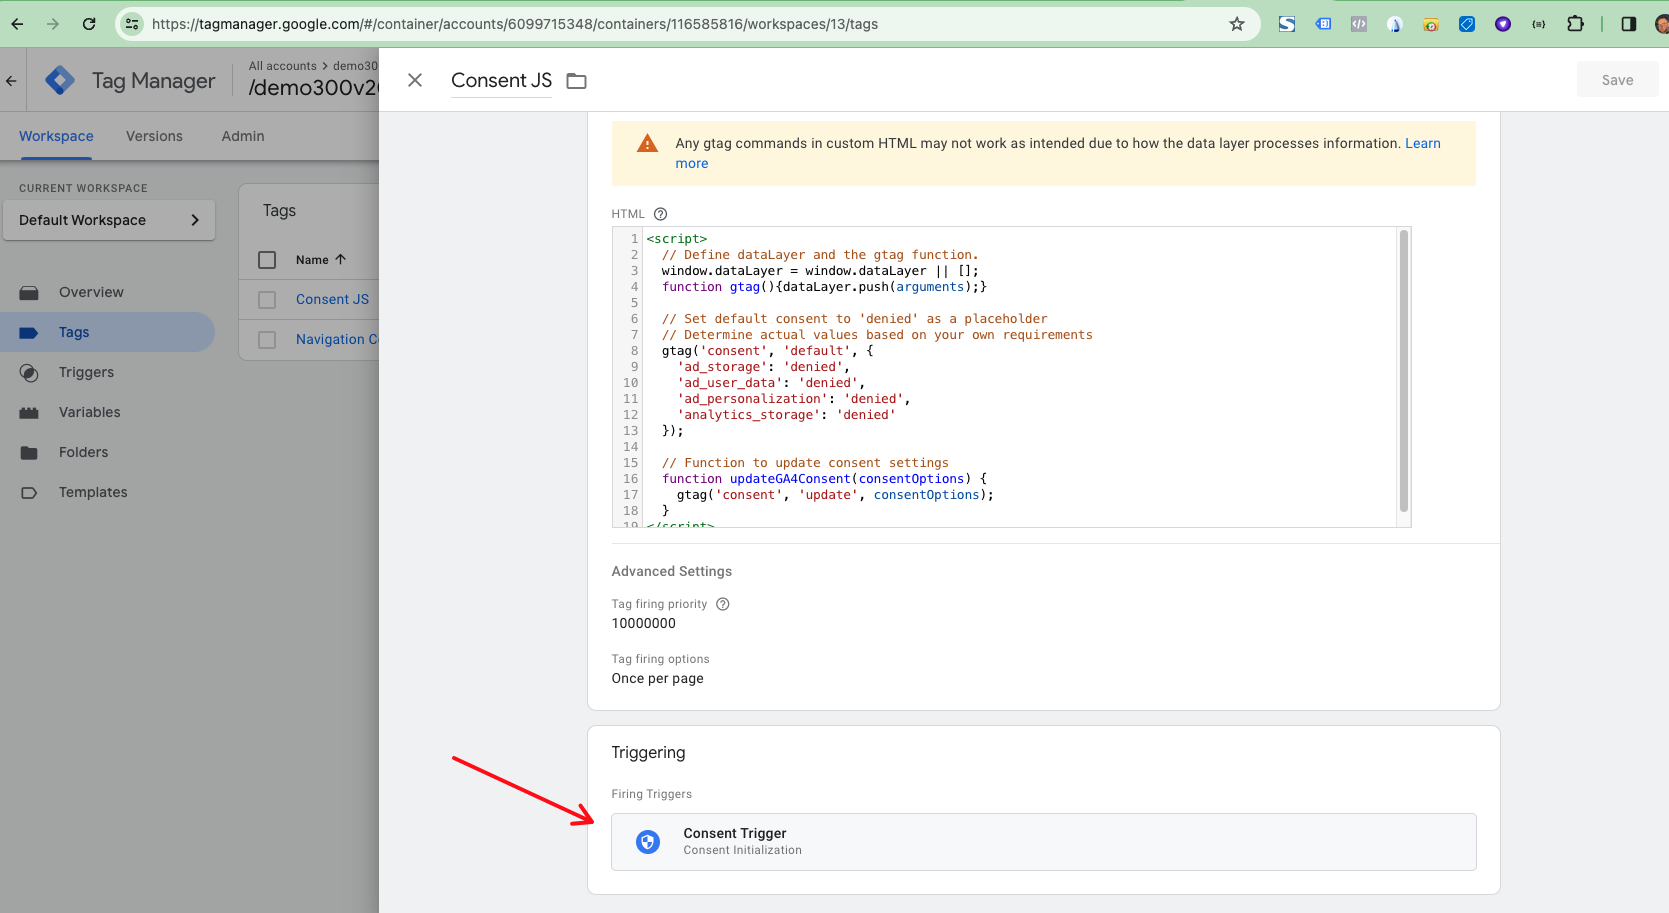
Once you have a trigger created, you'll need a tag. To ensure we modify the consent state on your site, you will need a JavaScript tag with Custom HTML set up. Here is how it might look:
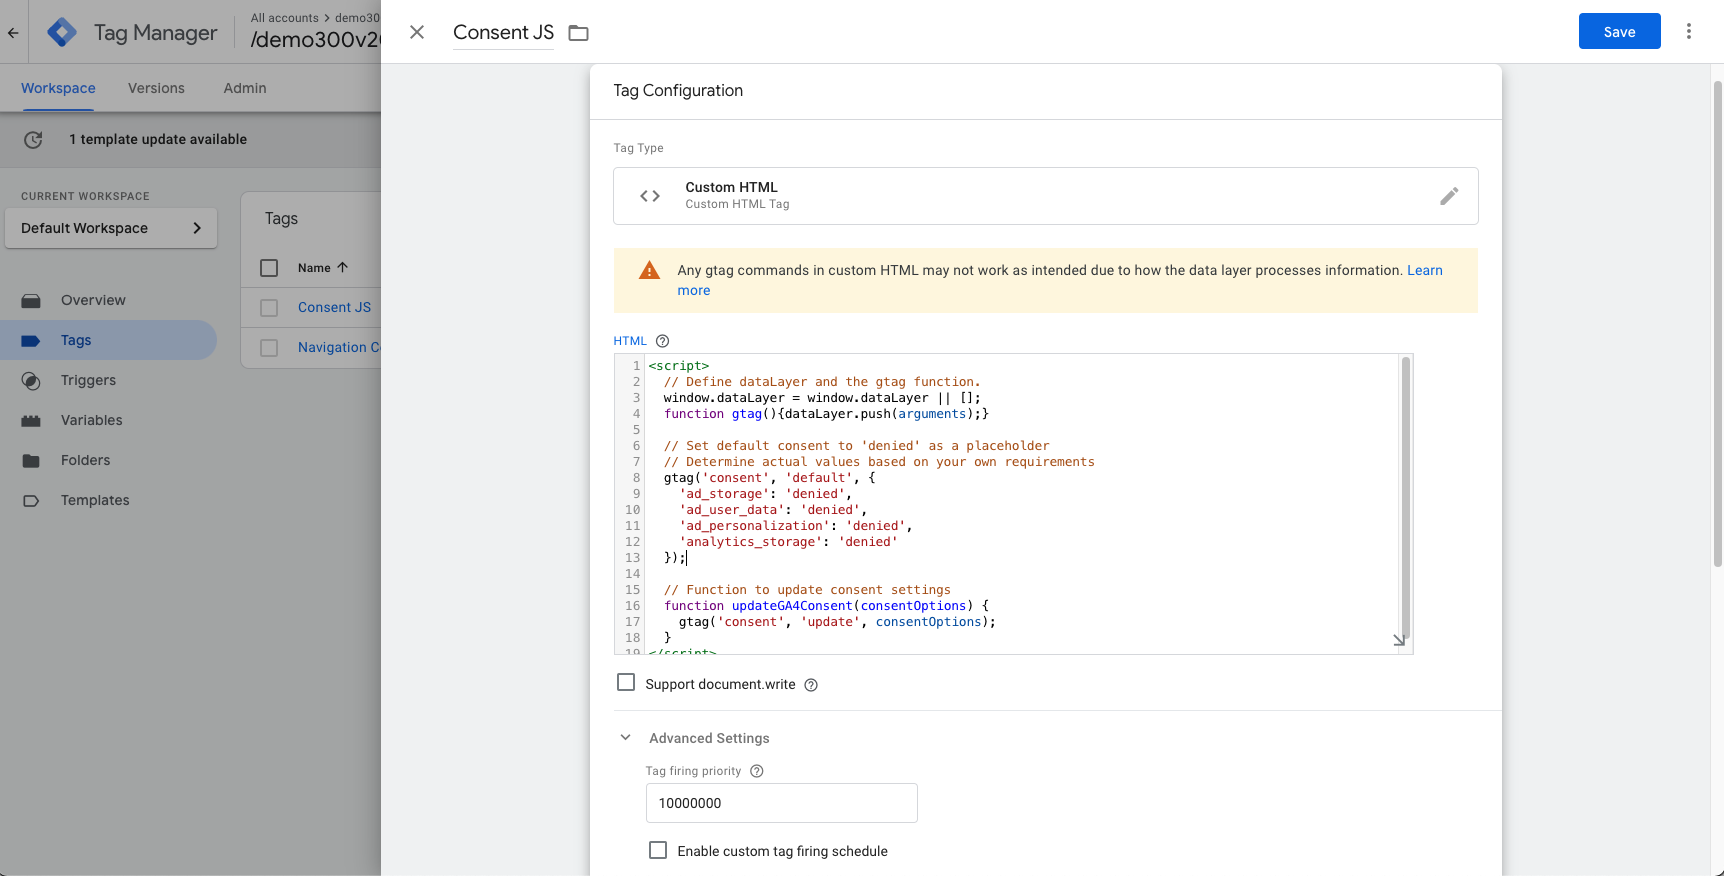
You may use and modify this code:
<script>
  // Define dataLayer and the gtag function.
  window.dataLayer = window.dataLayer || [];
  function gtag(){dataLayer.push(arguments);}

  // Set default consent to 'denied' as a placeholder
  // Determine actual values based on your own requirements
  gtag('consent', 'default', {
    'ad_storage': 'denied',
    'ad_user_data': 'denied',
    'ad_personalization': 'denied',
    'analytics_storage': 'denied'
  });

  // Function to update consent settings
  function updateGA4Consent(consentOptions) {
    gtag('consent', 'update', consentOptions);
  }
</script>
Note that the code, by default, denies all consent for all parameters specified. To learn more about the different consent state and consent types, please review Google's documentation.
Additionally, the code above offers a function to updateGA4Consent. This function can be renamed, but should be used in some fashion with a cookie consent banner to update the consent after the user has consented to the different types of data collection.
After you create your tag, be sure you have a Firing Trigger:
Save and Publish your Changes
After making these changes to Google Tag Manger, be sure to push them to your live version. For more information, see Google's documentation.
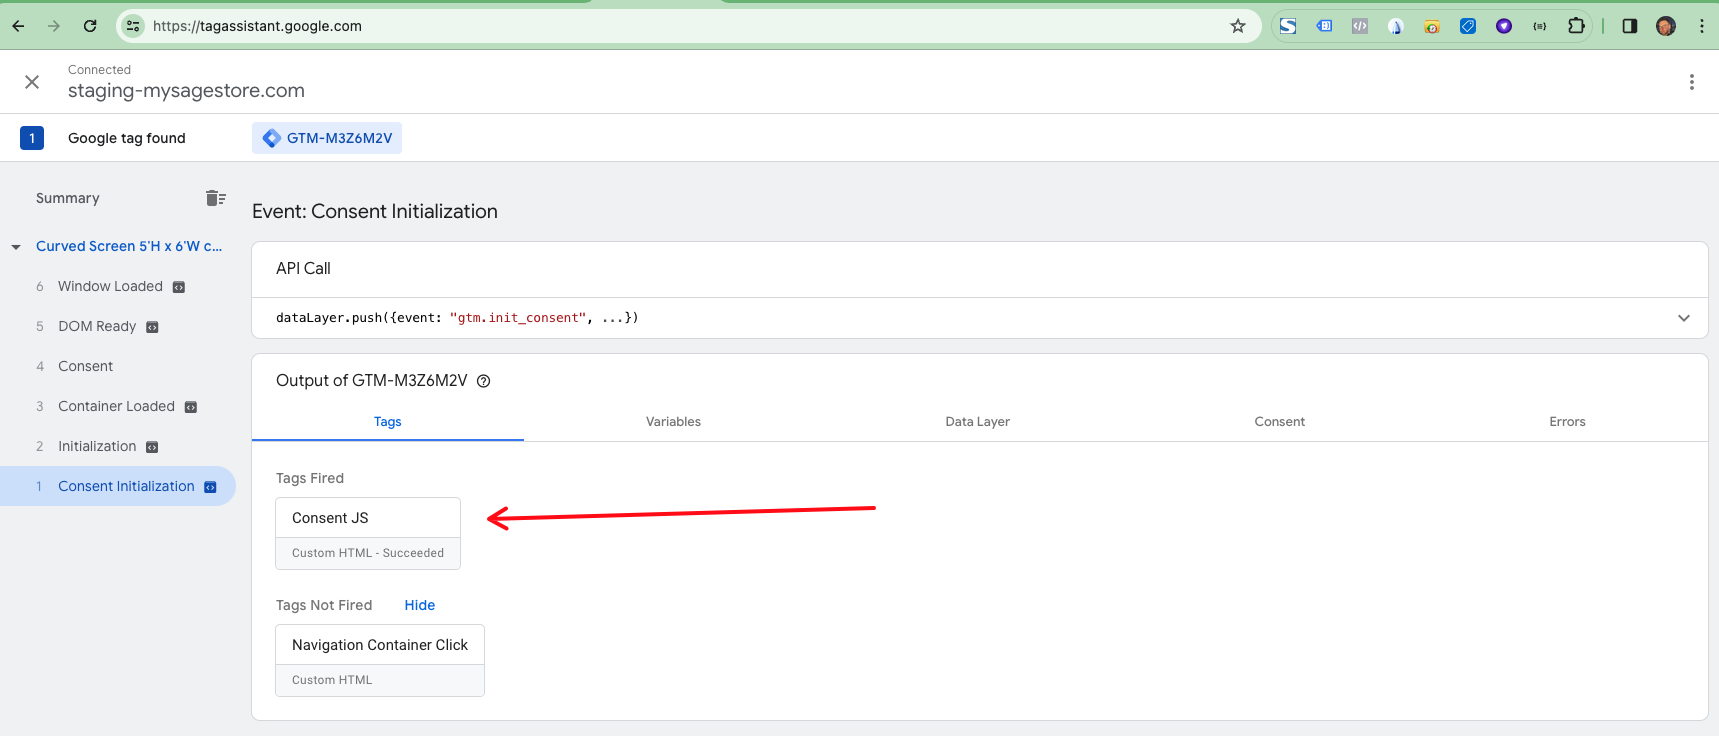
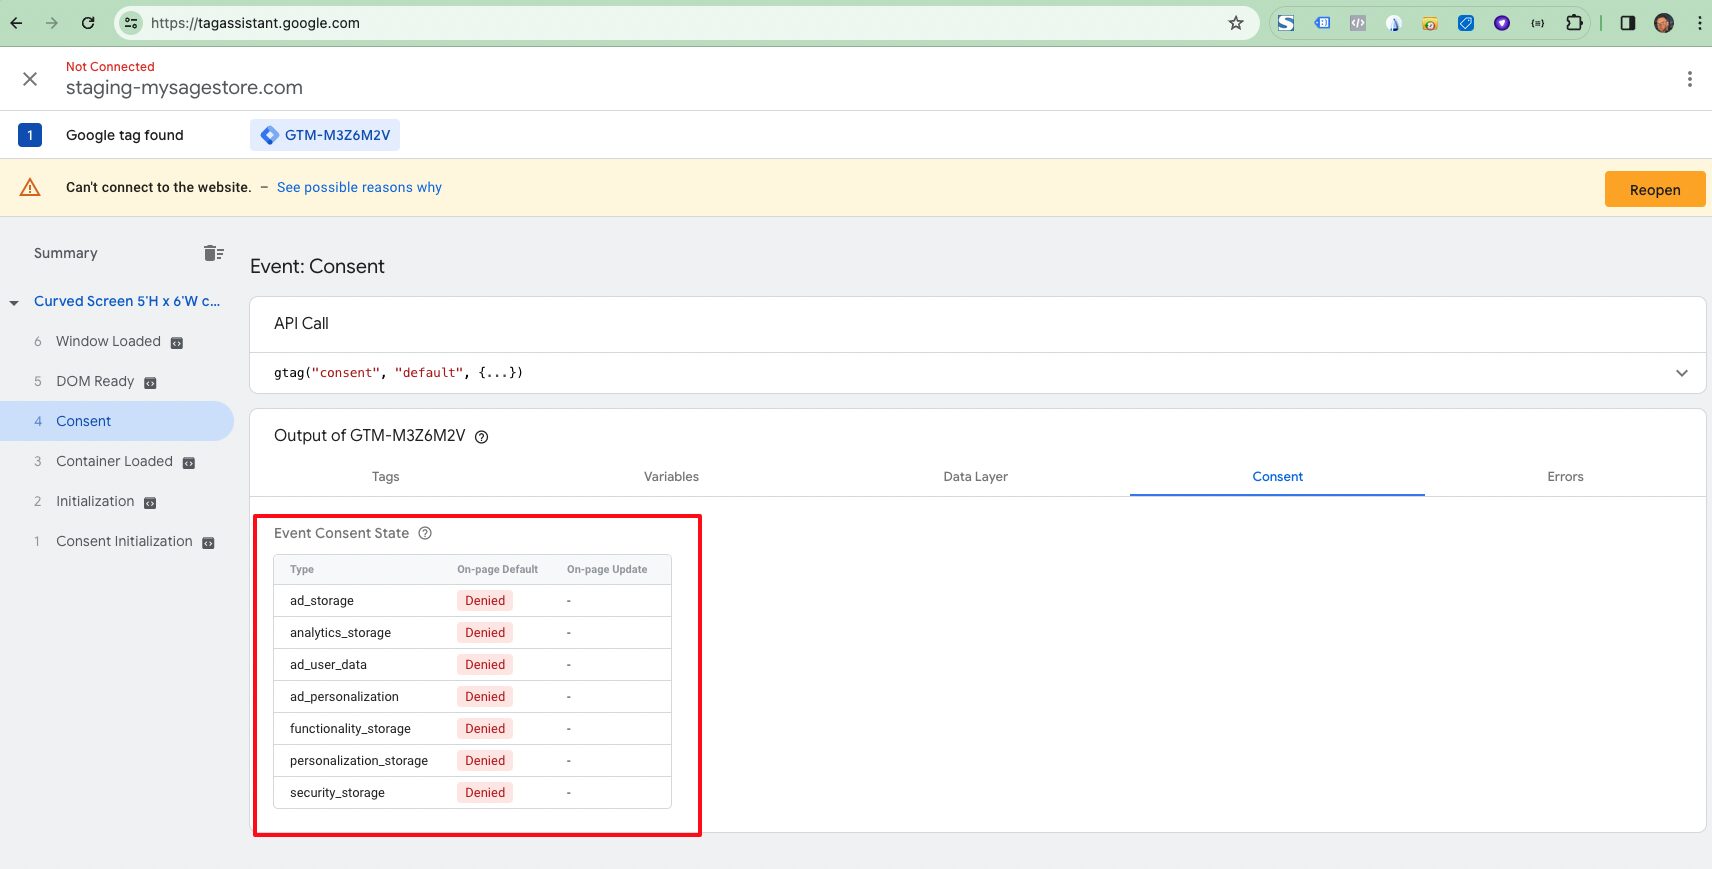
Test Consent State in Tag Assistant
To ensure that your consent state changes are firing correctly, use Tag Assistant to verify.
Implementing Consent
To implement consent, you will need to create a custom JavaScript tag, either from Google Tag Manager or your web store dashboard. If you choose to add this code to your web store, navigate to System > Modules > Custom Tags, and create a new tag that gets inserted into the footer with the following code:
<script>
// Function to check for consent cookie
function getConsentCookie(name) {
    const value = `; ${document.cookie}`;
    const parts = value.split(`; ${name}=`);
    if (parts.length === 2) return parts.pop().split(';').shift();
}

// Function to set consent cookie
function setConsentCookie(name, value, days) {
    const date = new Date();
    date.setTime(date.getTime() + (days*24*60*60*1000));
    const expires = "; expires=" + date.toUTCString();
    document.cookie = name + "=" + (value || "")  + expires + "; path=/";
}

// Function to handle consent
function requestGA4Consent() {
    // Check if the user has already given or denied consent
    let consentGiven = getConsentCookie('userGA4Consent');
    let userConsent = false
    // If consent is already recorded, do nothing
    if (!consentGiven) {
       // Prompt the user for consent
       userConsent = confirm("Do you accept cookies for analytics and personalized ads?");
     }

    if (userConsent || consentGiven == "granted") {
        // If accepted, update GA4 consent
        const consentOptions = {
            'ad_storage': 'granted',
            'ad_user_data': 'granted',
            'ad_personalization': 'granted',
            'analytics_storage': 'granted',
        };
        updateGA4Consent(consentOptions);
        // Set cookie
        setConsentCookie('userGA4Consent', 'granted', 365);
    } else {
        setConsentCookie('userGA4Consent', 'denied', 365);
    }
}

// Function to update GA4 consent, as provided
function updateGA4Consent(consentOptions) {
    gtag('consent', 'update', consentOptions);
}

// Execute the function to request consent with a delay of 5 seconds (5000 milliseconds)
setTimeout(requestGA4Consent, 5000);

</script>
Note that this example is very basic, and it will need customization. In a nutshell, this code stores the user consent in a cookie and looks up the consent on every page load. Depending on the settings in the code, the consent will be updated accordingly to override the default settings in Google Tag Manager.
commercebuild Remarketing Tag
Note that commercebuild's integration with Google automatically injects a remarketing event on product pages, like so:
<script>
  var dataLayer = window.dataLayer || [];
  dataLayer.push({
    'event': 'remarketing',
    'google_tag_params': {
      'ecomm_pagetype': 'product',
      'ecomm_prodid': 'S1300R',
      'ecomm_category': 'My Products',
      'ecomm_totalvalue': 114.17
    }
  });
</script>
This code will fire before the consent fires. If this is problematic, please use this script inserted after the opening body tag to prevent the event from running on page load:
<script>
  // Ensure dataLayer exists
  window.dataLayer = window.dataLayer || [];

  // Store a reference to the original push method
  const originalPush = dataLayer.push;

  // Override the push method with custom logic
  dataLayer.push = function() {
    // Convert arguments object to an array
    const args = Array.prototype.slice.call(arguments);

    // Check each object in arguments to see if it has the event type you want to block
    const blockPush = args.some(arg => arg.event === 'remarketing');

    // If the event type is not what you want to block, call the original push method
    if (!blockPush) {
      originalPush.apply(dataLayer, args);
    }
  };
</script>
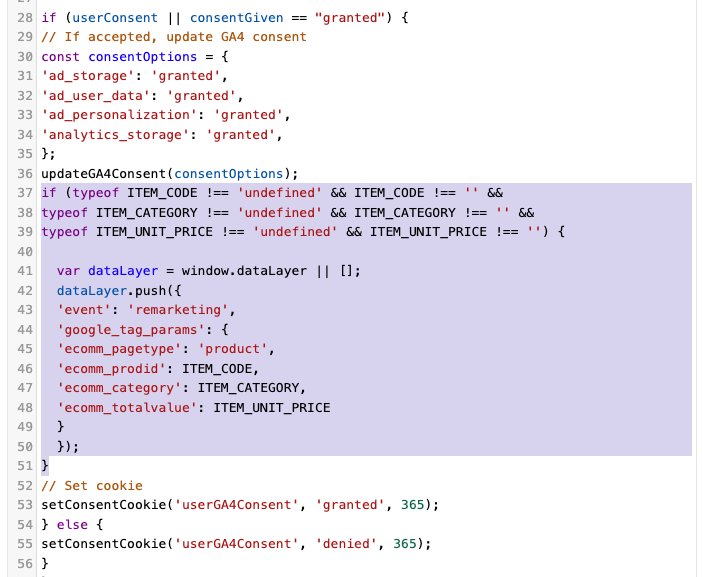
You will then need to modify your consent tag above to push the remarketing event back into the data layer. You can use this code snippet:
if (typeof ITEM_CODE !== 'undefined' && ITEM_CODE !== '' &&
    typeof ITEM_CATEGORY !== 'undefined' && ITEM_CATEGORY !== '' &&
    typeof ITEM_UNIT_PRICE !== 'undefined' && ITEM_UNIT_PRICE !== '') {

    var dataLayer = window.dataLayer || [];
    dataLayer.push({
        'event': 'remarketing',
        'google_tag_params': {
            'ecomm_pagetype': 'product',
            'ecomm_prodid': ITEM_CODE,
            'ecomm_category': ITEM_CATEGORY,
            'ecomm_totalvalue': ITEM_UNIT_PRICE
        }
    });
}
Using the code above, it should be placed after the call to updateGA4Consent, like so: